SUMMARY: This article explains how to connect to the PostgreSQL database using the terminal or command line and the pgAdmin connection tool. Differences in connections in the three major operating systems are covered.
- Connecting to PostgreSQL using psql
- Locating psql
- On Linux
- On Windows
- On Mac
- Connecting with psql
- Connecting to PostgreSQL using pgAdmin 4
- Launching pgAdmin 4
- Connecting with pgAdmin 4
This is a two-part article for beginners who have installed the most advanced open source database, PostgreSQL, and are now looking to connect to it. Since terminal/command line and pgAdmin are the most favored ways for connecting to PostgreSQL, I explain the basics of using both methodologies.
Here I offer separate steps for users of different operating systems, where required; in cases where the operating system is not specified, the steps can be treated as a universal approach, and are valid for any operating system that you are using.
So let’s take our first steps and get connected to PostgreSQL.
Connecting PostgreSQL using psql
Since this is probably the first time you are trying to connect to a PostgreSQL database that you have installed, we will cover some of the possible scenarios you may encounter so you can start working in just a short period of time.
a. Locating psql:
PostgreSQL is supported on three major platforms. To connect using psql you will first need to locate its location on the operating system that you might be using:
i. On Linux:
The easiest way to connect is to check whether you already have psql in your environment variables on not. You can try the following command on the terminal:
            [root@localhost data]# which psql

            /usr/bin/psql
This gives you the path, and also, since the OS knows the location, you will not need to browse for it. However, if it errors out, you can locate the psql utility by searching for the file with the following command on terminal:
            [root@localhost /]# find / -name psql

            /usr/edb/as11/bin/psql
ii. On Windows:
On Windows, you can find psql in the Program Files, and you should be able to launch it in a command prompt simply by clicking on it.
iii. On Mac:
On a Mac you should be able to locate psql under the Applications > PostgreSQL (version number) > SQL Shell (psql).
b. Connecting psql:
Now that we have located psql, we need to understand what it requires to connect to the database. The basic parameters on any of the platforms are as follows:
Server [localhost]:
This is the address for the server. You can use an IP address or the hostname of the machine on which database server is running. If you do not give any value, by default it is localhost.
Database [postgres]:
The name of the database with which you want to connect. The default name of the database is the same as that of the user. (If you are using Advanced Server, the default name would be edb.)
Port [5432]:
This is the port on which you have configured your instance while installing or initializing. The default port is 5432. (If you are using Advanced Server this would be 5444.)
Username [postgres]:
This is the username that is created while the installation takes place. The default username for postgres is postgres. (If you are using Advanced Server it is enterprisedb.)
On a Mac or Windows, you are able to connect to the default instance by simply hitting enter at the shell or command prompt when trying to run psql and keying in the password.
On Linux, you will explicitly need to pass these parameters at the shell:
For PostgreSQL: -bash-4.2$ psql -d postgres -U postgres
For Advanced Server: -bash-4.2$ psql -d edb -U enterprisedb
If connecting to a remote server from any of the operating systems, you can pass on the specific parameters in the following format:
bash-4.2$ psql -h <hostname or ip address> -p <port number of remote machine> -d <database name which you want to connect> -U <username of the database server>
Connecting PostgreSQL using pgAdmin 4
pgAdmin is the community client for using PostgreSQL. It can be downloaded from the pgAdmin website (https://www.pgadmin.org/download/).
Launching pgAdmin
Launching pgAdmin is easy. It is available in the respective application or programs folder for the operating system that you may be using.
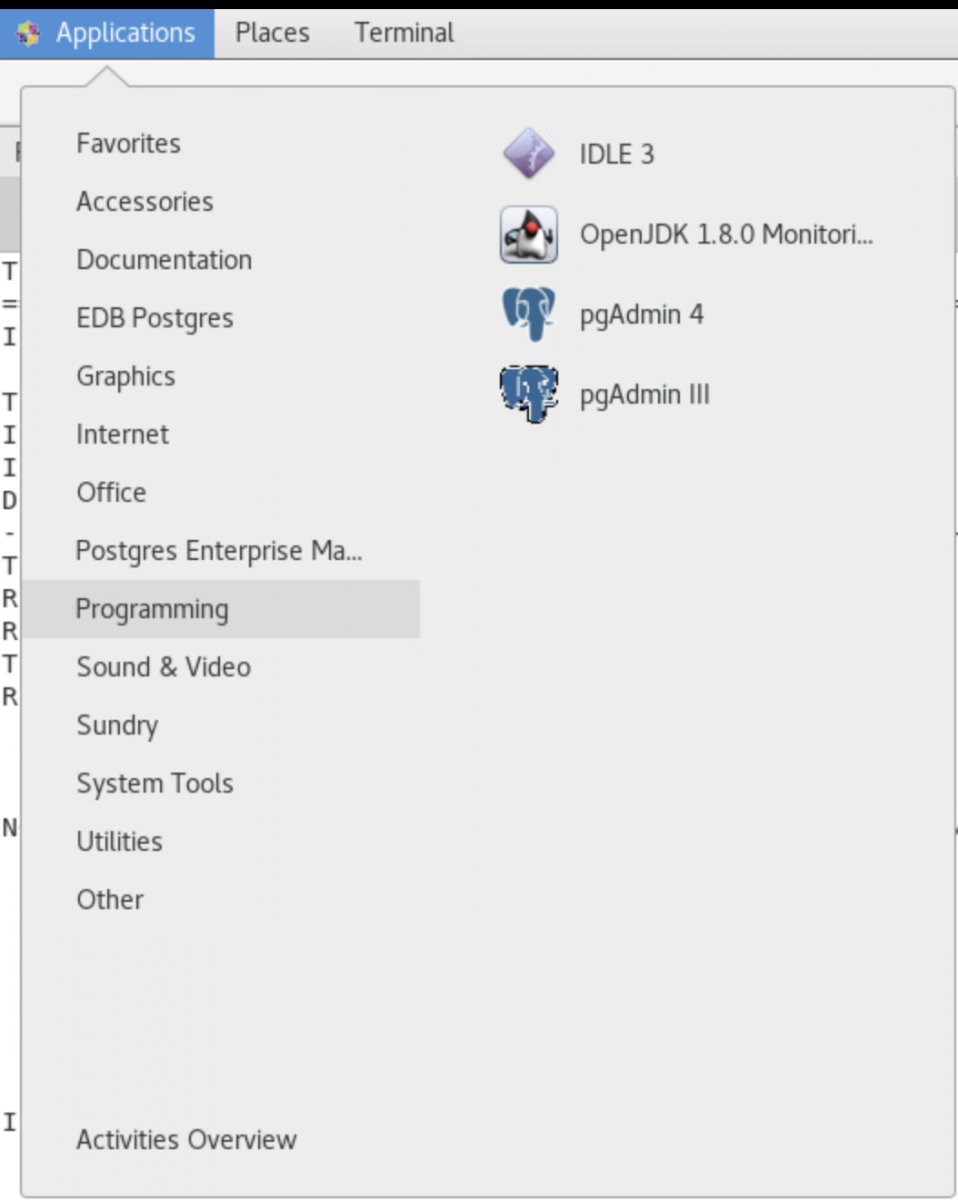
1. On Linux pgAdmin is available under Programming in the Applications menu:
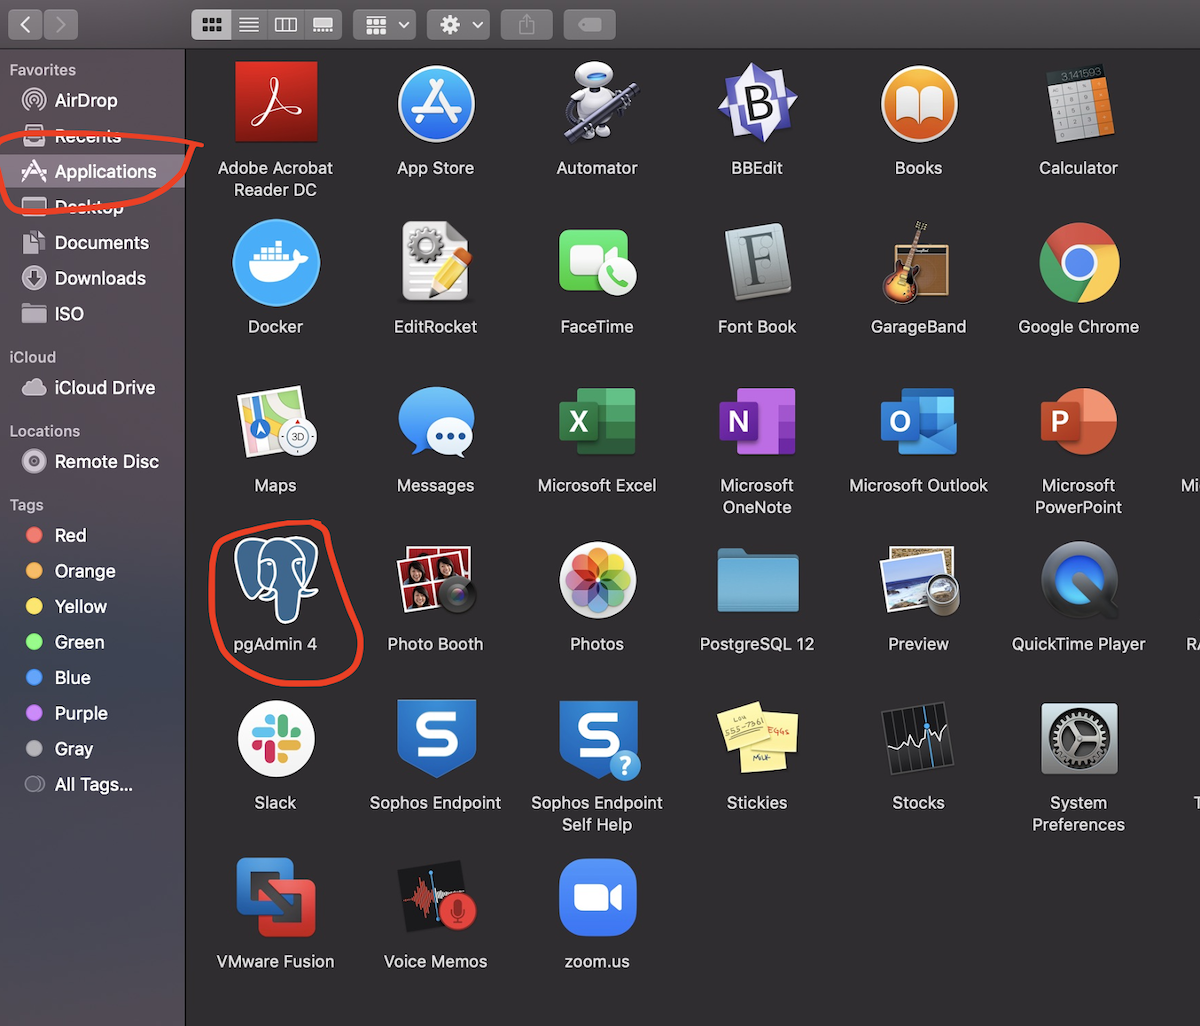
2. On a Mac it is available in the Applications folder as an application:
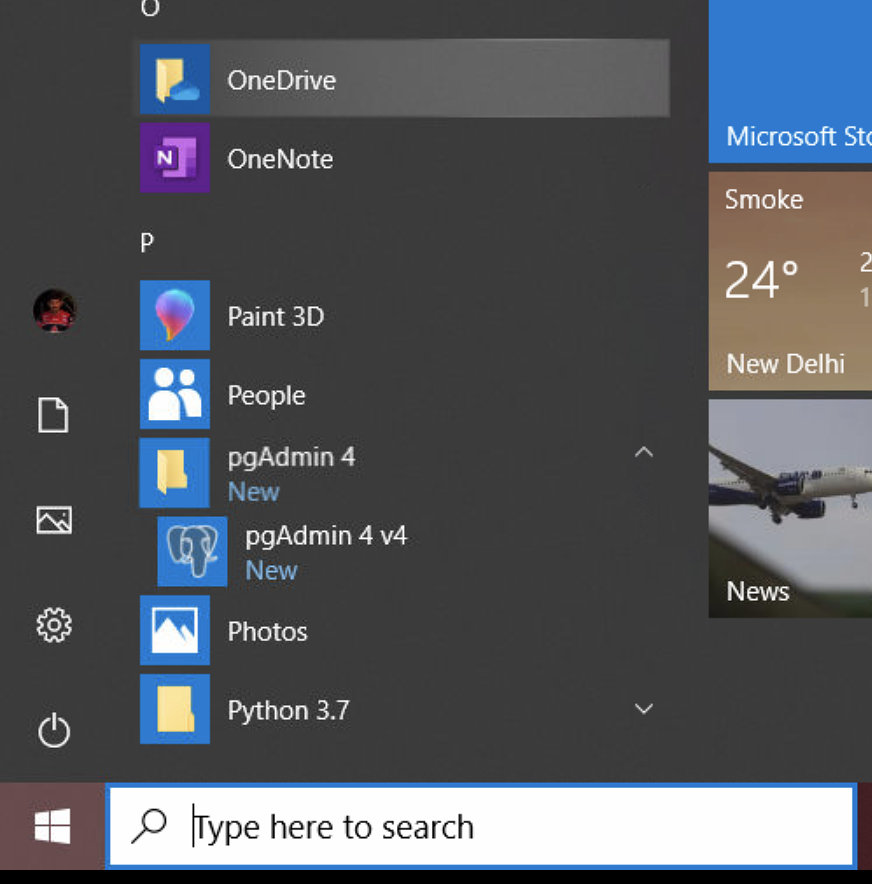
3. On Windows it is available under Program Files:
Connecting PostgreSQL using pgAdmin 4
pgAdmin 4 is a web application and works as a browser-based client for PostgreSQL. The interface is very user friendly, and most of the options are visible in the first go. Logging in to the pgAdmin client requires you to set a master password when you launch it for the first time.
Once you have logged into the pgAdmin client, you can connect to your database servers using the Create Server option:
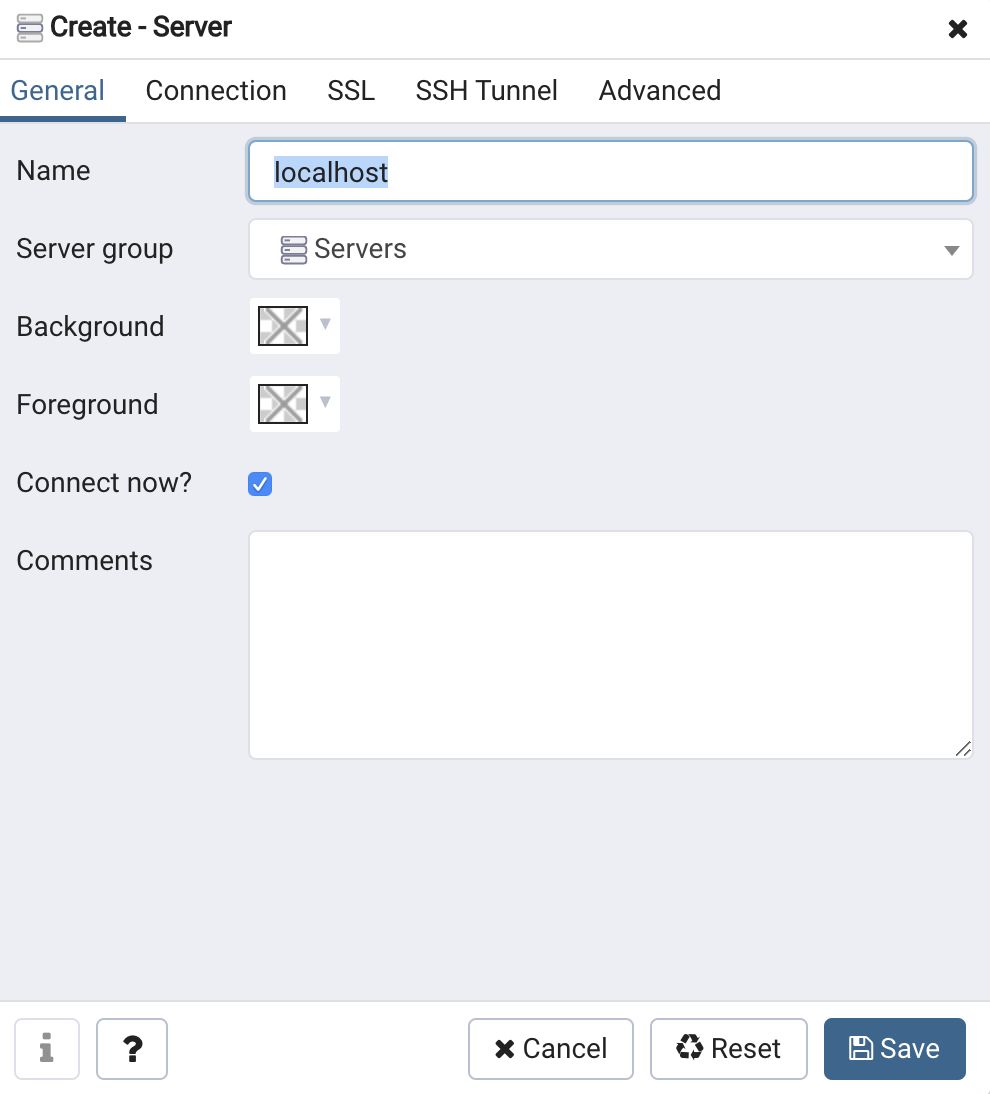
In the first window you only need to provide an identifiable name for the server. The connection details for that server are in the connection tab below::
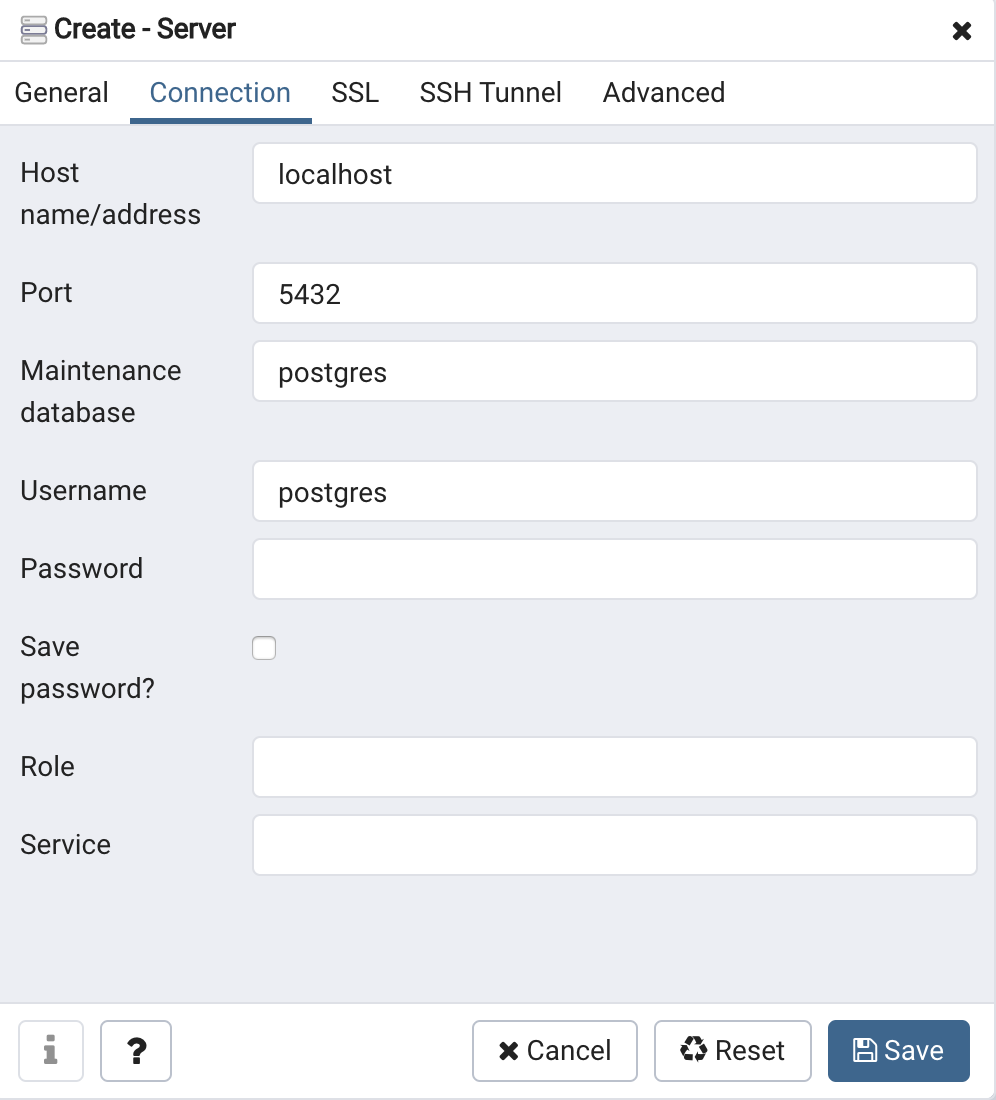
Once you have filled in the required details, you can click Save, and it will add the name to the list of the servers on the left-hand side tab:
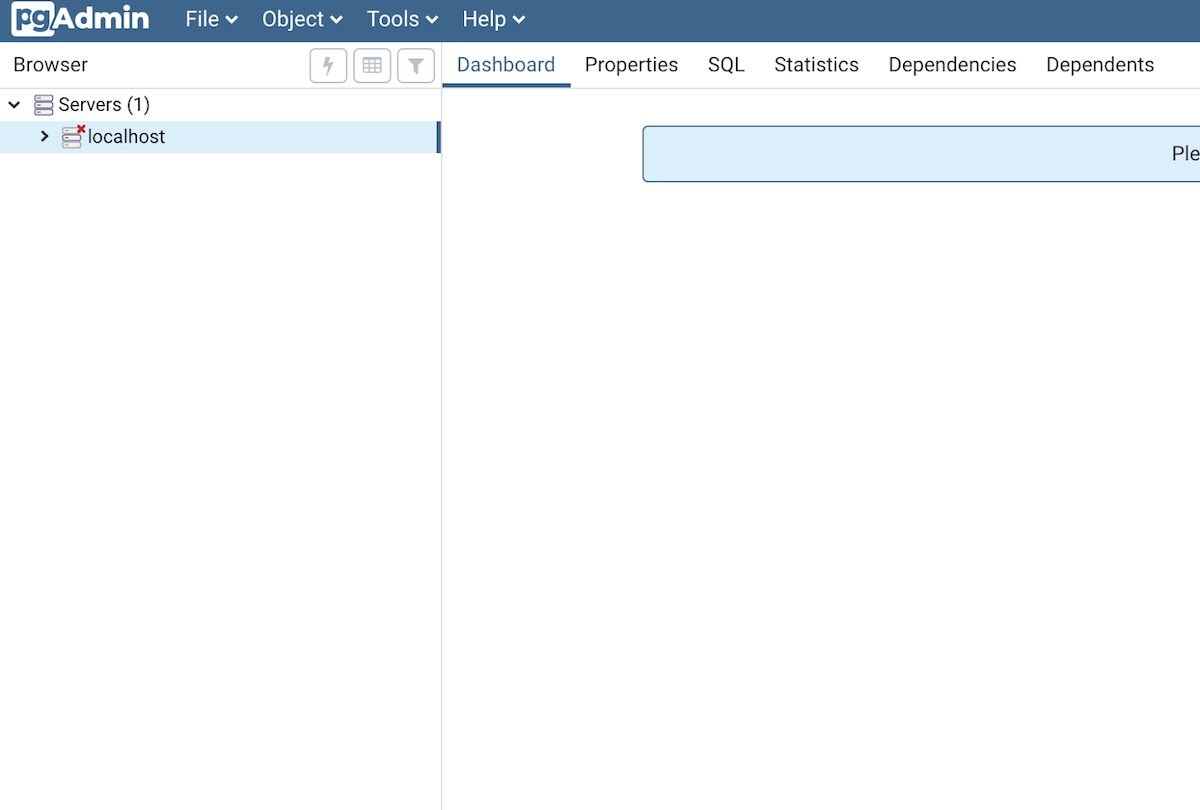
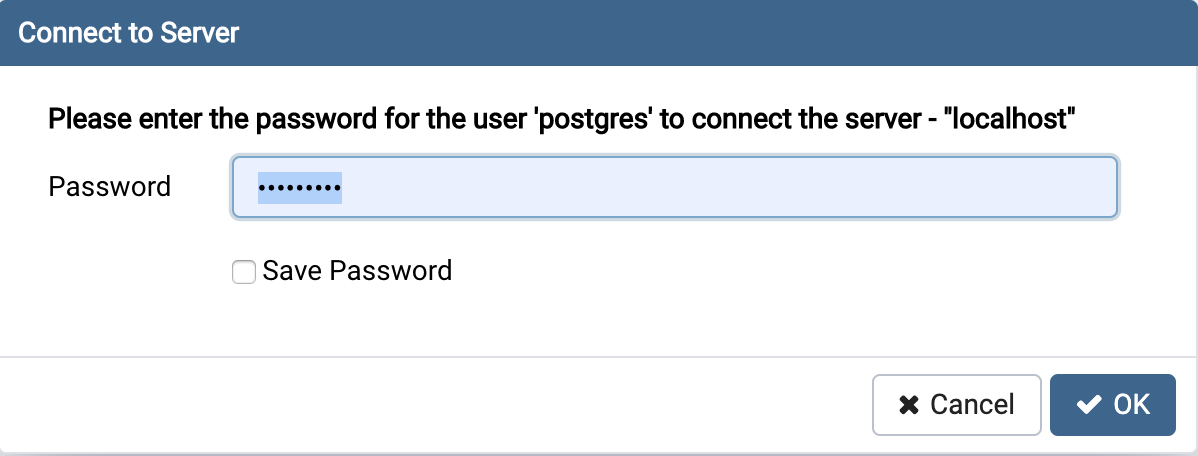
Now you are ready to connect to the server by double clicking the server name under Servers (1) and entering your password:
After you provide the server credentials, you will be presented with the server tree and dashboard:
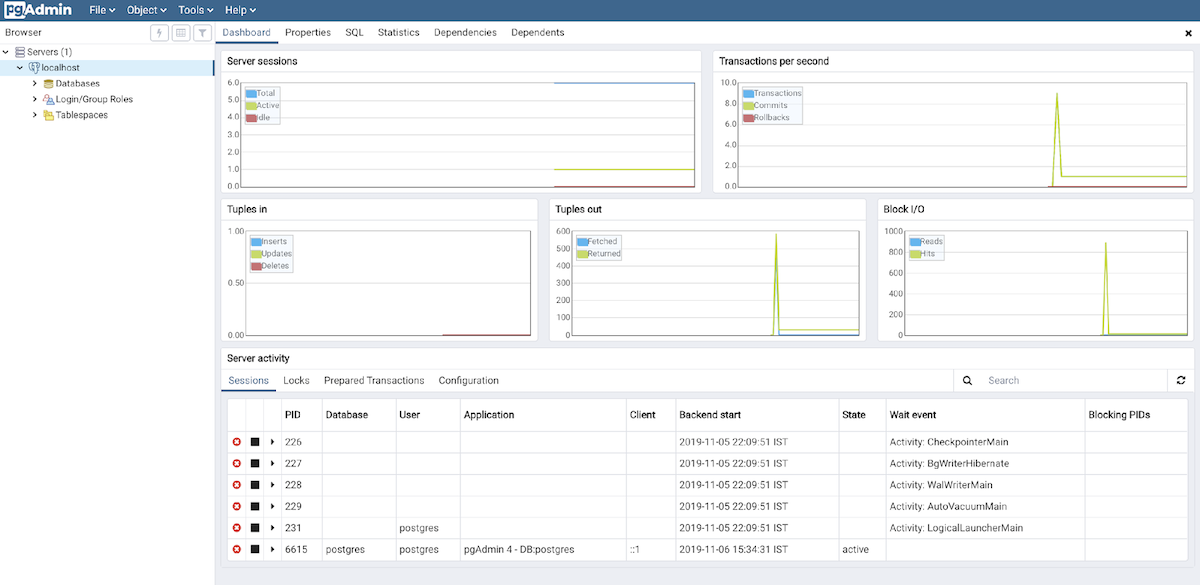
You should be able to select any of the options from the tabs above the dashboard in order to proceed.
Related Content
BLOG POST
How to secure PostgreSQL
BLOG POST
Oracle to PostgreSQL Migration Guide
TUTORIAL
How to use Coalesce in PostgreSQL
BLOG POST
How to Monitor PostgreSQL Like a Pro!
BLOG POST
PostgreSQL Vs. MySQL
Popular Links
Featured Links
Relevant Blogs
EDB Tutorial: How to run a TPC-E-like benchmark easily
The TPC Benchmark(TM) E (TPC-E) was released back in 2007 as the successor to the TPC Benchmark(TM) C (TPC-C) for an OLTP type workload. To briefly recap, the TPC-E models...EDB Tutorial: How to Use Privilege Analysis to Identify [Un]Used Privileges
Have you ever searched for unnecessary granted privileges in your database? To find these, you need to know 1. The granted privileges 2. How many of the granted privileges have...EDB Tutorial: How To Get the Most Out of EDB Query Advisor
Enterprise-class databases require DBAs who are responsible for maximizing query performance. Therefore, when it comes to large scale deployment of databases, minimizing the work of DBA is important. One of...More Blogs

EDB Tutorial: How to Configure Databases for EDB JDBC SSL Factory Classes
The fact is, SSL configuration required by EDB JDBC SSL factory classes is considered confusing and challenging by many EDB customers. This stems from the concepts behind the SSL handshake...