Using
Suggest editsYou can back up and restore a Postgres distribution database using Commvault Backup & Recovery.
Using Commvault Backup & Recovery
Commvault provides two methods of taking the backup from a Postgres distribution database and restoring it:
- DumpBasedBackupSet backup and restore
- FSBasedBackupSet backup and restore
Note
At this time, there's a known issue with FSBased Incremental/PITR Restore that doesn't allow for proper restoration of the database using the defined process. See Known issues for more information and workarounds.
DumpBasedBackupSet backup and restore
Dump-based backup uses the pg_dump utility to take the backup.
Taking a DumpBasedBackupSet backup
Open the Commvault Backup & Recovery Command Center. From the navigation pane, select Protect > Databases.

Select the required instance.
In the Backup sets section, select DumpBasedBackupSet.
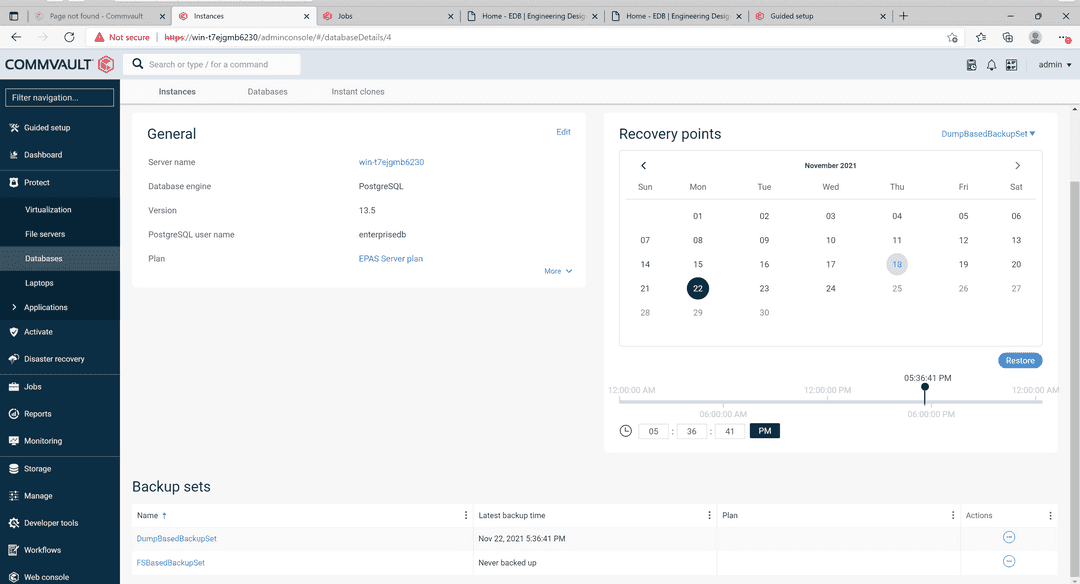
In the Database groups section, select the database group that you want to back up. In this case it's default.

In the Backup section, select Back up now.
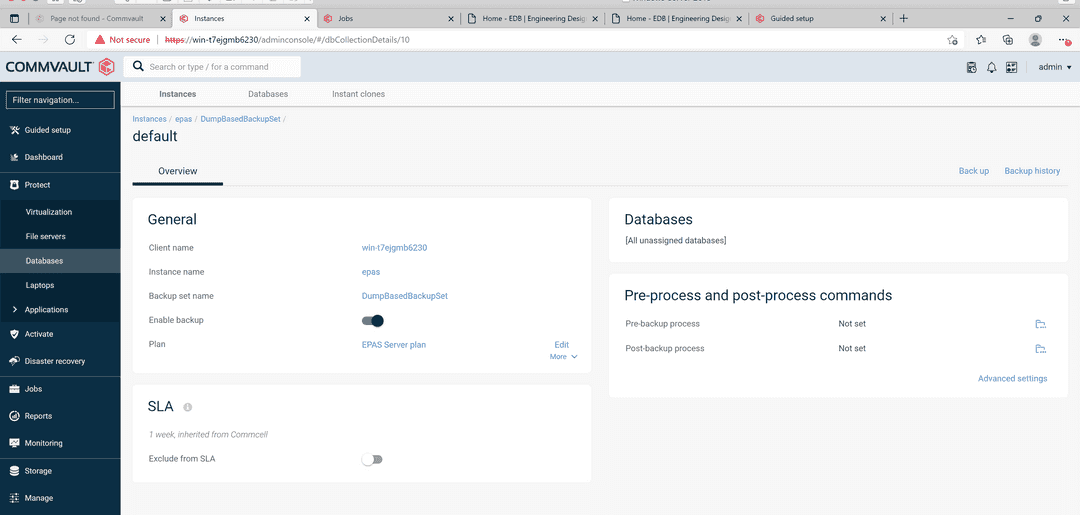
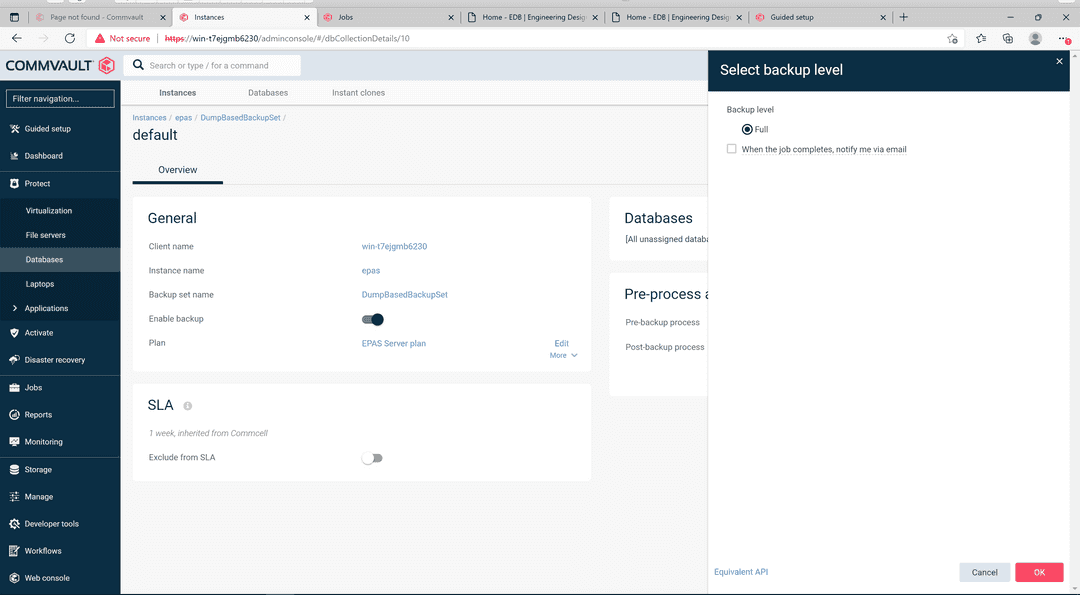
In the Select Backup Level screen, select Full.
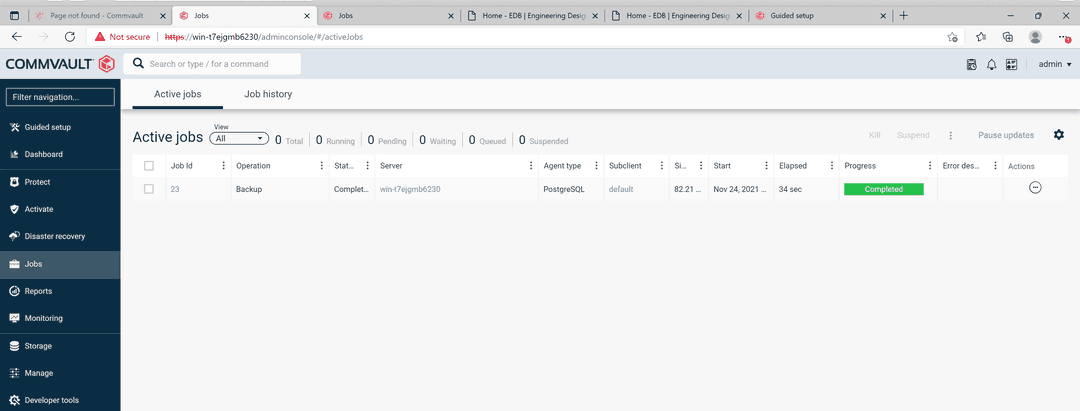
A job is created to take the backup.
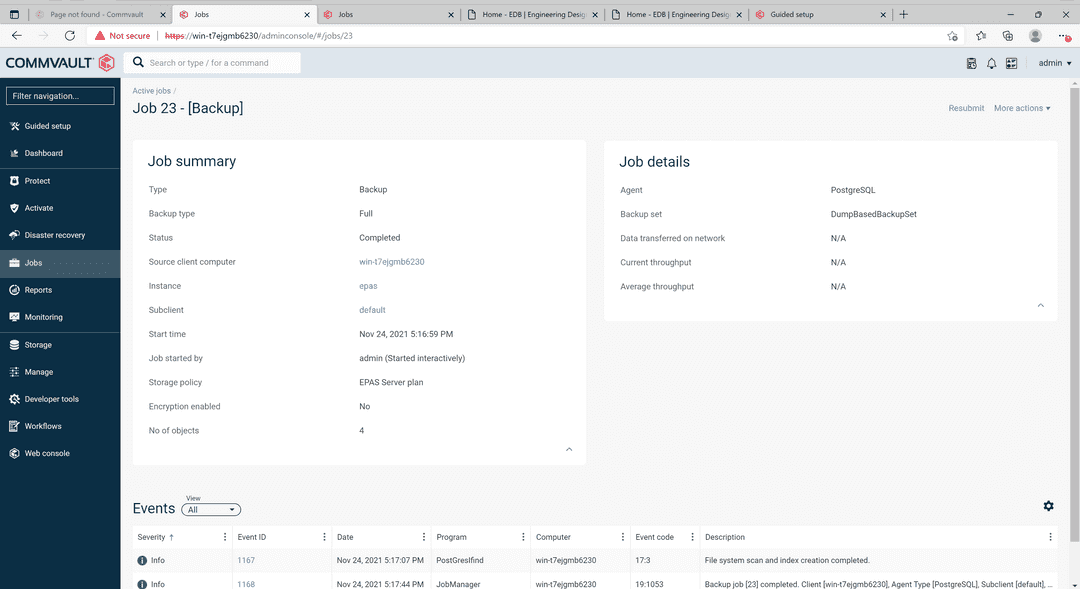
When the backup job is complete, its status changes to Completed.
Restoring a DumpBasedBackupSet backup
You can use DumpBasedBackupSet to restore the individual databases.
From the navigation pane, select Protect > Databases.
Select the instance that you want to restore.
In the Recovery points calendar, select DumpBasedBackupSet.
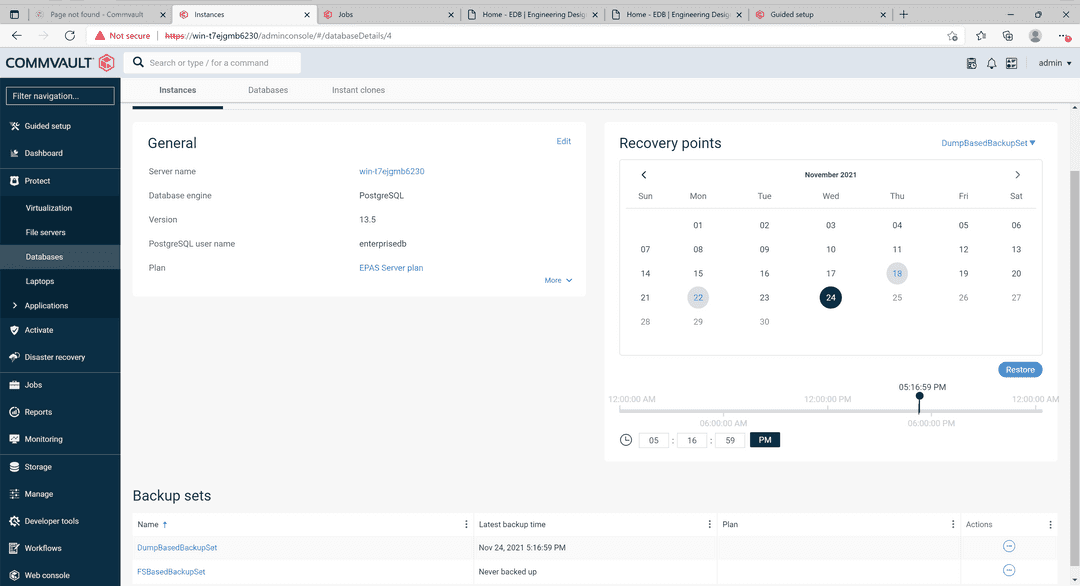
Select a date from the calendar, and then select Restore.
The Backup Content screen displays the databases to restore. Select the required database to restore, or select all of them to restore all.
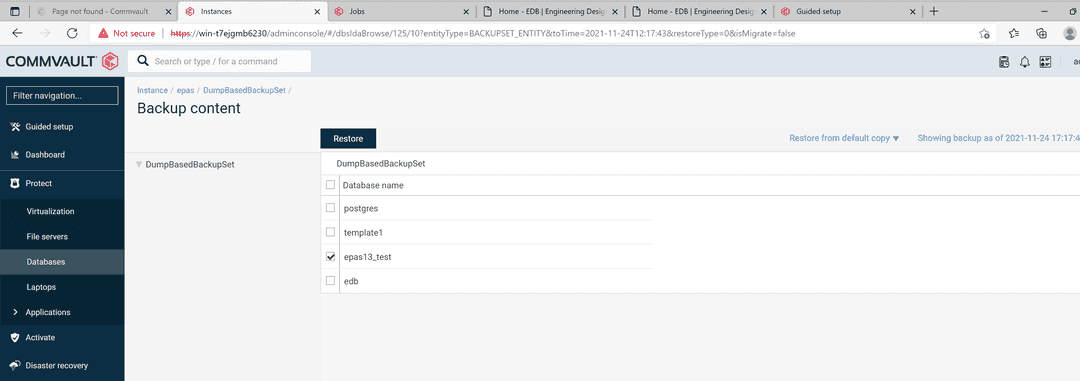
Select Restore.
From the Restore Options screen, select the destination server and destination instance. Then select Submit.
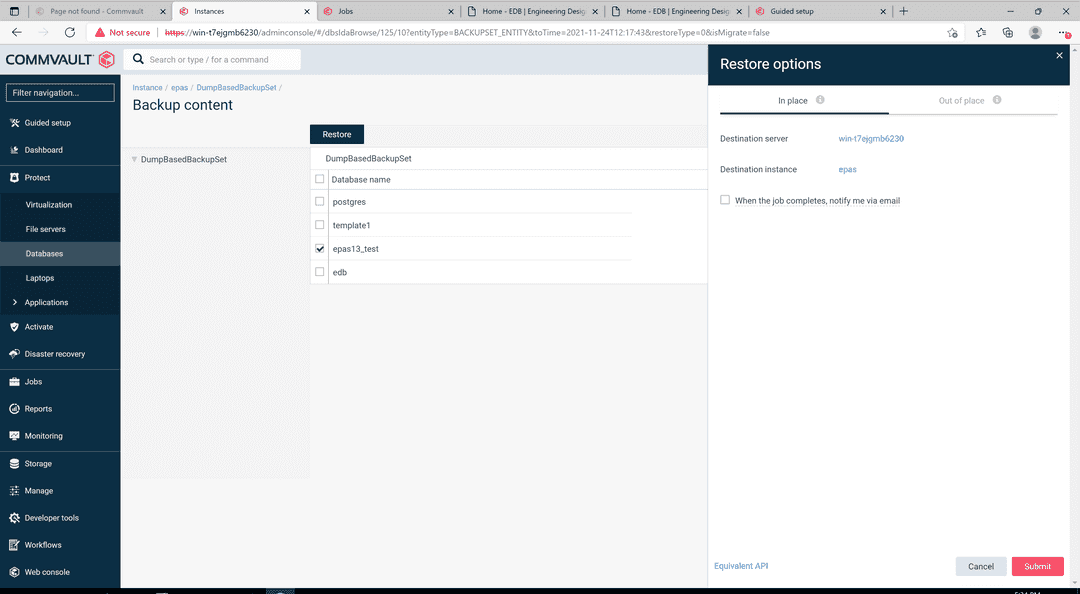
A job is created to restore the backup.

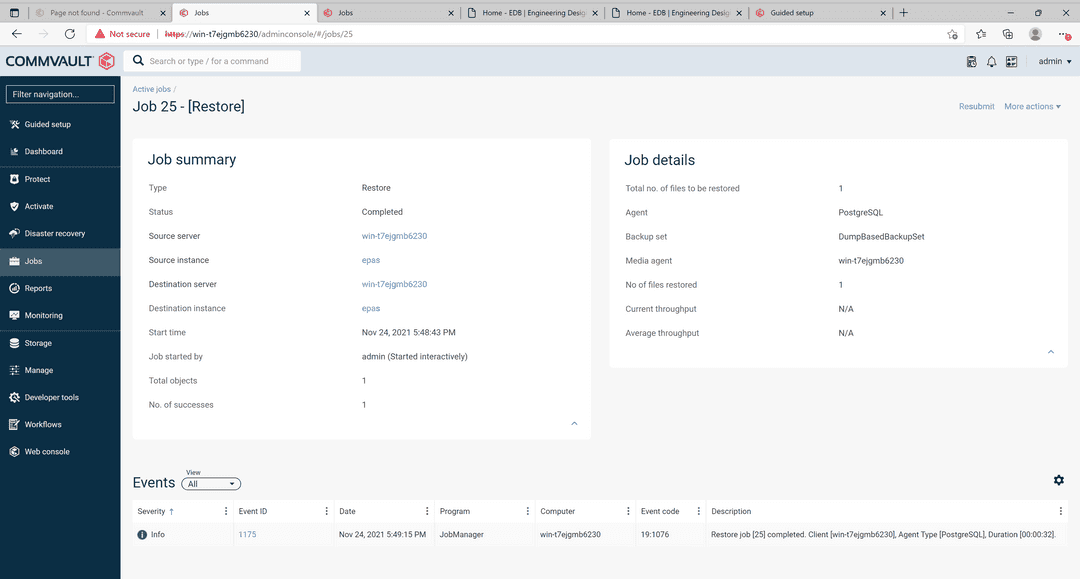
When the restore has completed successfully, log in to the Postgres distribution database and check that the restore operation recovered the data. This example connected to an EDB Postgres Advanced Server instance:
edb=#
edb=# \l
                                                           List of databases
    Name     |    Owner     | Encoding |          Collate           |           Ctype            | ICU |       Access privileges
-------------+--------------+----------+----------------------------+----------------------------+-----+-------------------------------
 edb         | enterprisedb | UTF8     | English_United States.1252 | English_United States.1252 |     |
 epas13_test | enterprisedb | UTF8     | English_United States.1252 | English_United States.1252 |     |
 postgres    | enterprisedb | UTF8     | English_United States.1252 | English_United States.1252 |     |
 template0   | enterprisedb | UTF8     | English_United States.1252 | English_United States.1252 |     | =c/enterprisedb              +
             |              |          |                            |                            |     | enterprisedb=CTc/enterprisedb
 template1   | enterprisedb | UTF8     | English_United States.1252 | English_United States.1252 |     | =c/enterprisedb              +
             |              |          |                            |                            |     | enterprisedb=CTc/enterprisedb
(5 rows)


edb=#
edb=# \c epas13_test
You are now connected to database "epas13_test" as user "enterprisedb".
epas13_test=# \dt
                List of relations
 Schema |       Name       | Type  |    Owner
--------+------------------+-------+--------------
 public | tp_department_db | table | enterprisedb
 public | tp_sales_db      | table | enterprisedb
(2 rows)


epas13_test=# select * from  tp_department_db;
 deptno |    dname    | location
--------+-------------+----------
     10 | Development | Pakistan
     20 | Testing     | Pakistan
     30 | CM          | Pakistan
     40 | Marketing   | India
(4 rows)


epas13_test=# select * from  tp_sales_db;
 salesman_id | salesman_name | sales_region | sales_amount | deptno
-------------+---------------+--------------+--------------+--------
         100 | Person 1      | CITY 1       |            1 |     10
         110 | Person 2      | CITY 2       |            2 |     20
         120 | Person 3      | CITY 3       |            3 |     30
         130 | Person 4      | CITY 4       |        10000 |     40
(4 rows)


epas13_test=# select * from v1;
 dept_no |  dept_name  | sales_no | sales_name | sales_salary | sales_dept_no
---------+-------------+----------+------------+--------------+---------------
      10 | Development |      100 | Person 1   |            1 |            10
      20 | Testing     |      110 | Person 2   |            2 |            20
      30 | CM          |      120 | Person 3   |            3 |            30
      40 | Marketing   |      130 | Person 4   |        10000 |            40
(4 rows)


epas13_test=# desc  tp_sales_db;
                                 Table "public.tp_sales_db"
    Column     |         Type          | Collation | Nullable |           Default
---------------+-----------------------+-----------+----------+------------------------------
 salesman_id   | integer               |           |          |
 salesman_name | character varying(30) |           |          |
 sales_region  | character varying(30) |           |          |
 sales_amount  | integer               |           |          | nextval('sal_seq'::regclass)
 deptno        | integer               |           |          |
Indexes:
    "lower_reg_idx" btree (lower(sales_region::text))
    "reg1_idx" btree (salesman_id)
Foreign-key constraints:
    "department_employee_fk" FOREIGN KEY (deptno) REFERENCES tp_department_db(deptno)


epas13_test=#
epas13_test=#
FSBasedBackupSet backup and restore
A file system backup backs up data that resides on a Windows or UNIX computer.
Taking a FSBasedBackupSet backup
Open the Commvault Backup & Recovery Command Center. From the navigation pane, go to Protect > Databases.
Select the required instance.
In the Backup sets section, select the FSBasedBackupSet backup set.
In the Database groups section, select the database group that you want to back up. In this case, it's default.
In the Backup section, select Back up.
In the Select Backup Level screen, choose between a full or incremental backup. This example uses an incremental backup.

A job is created to take the backup. View the job by selecting the Job ID for that backup.
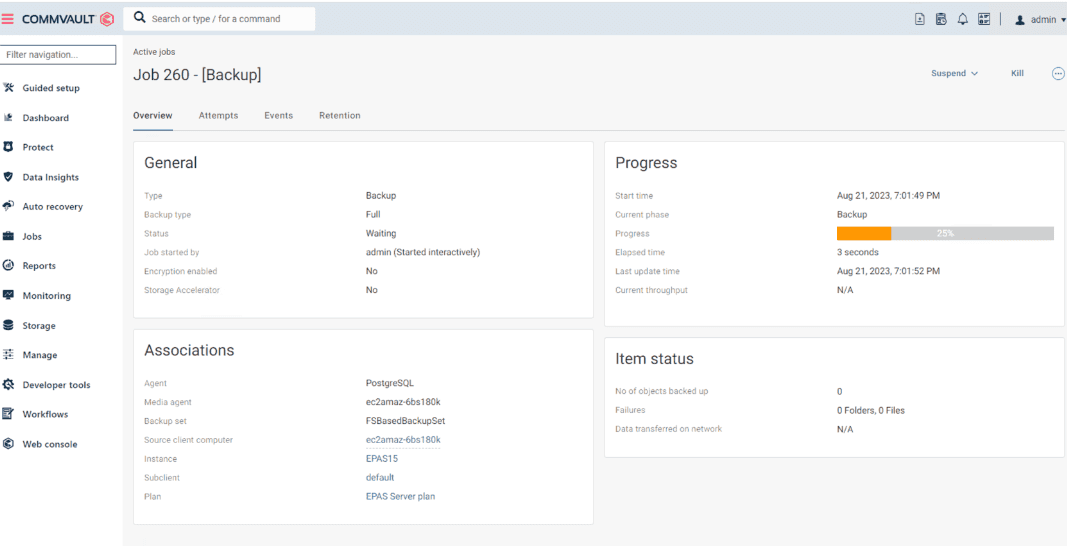
When the job is complete, you can find the information about the job on the job's page.

Restoring a FSBasedBackupSet full backup
You can restore backed-up data for a subclient or an entire backup set using either an in-place restore, out-of-place restore, or, for a Linux file server, to a standalone file server.
Ensure that your Postgres distribution instance is stopped.
Delete or rename the WAL directory and data directory.
From the Commvault navigation pane, go to Protect > Databases.
Select the instance you want to restore.
In the Recovery Points calender, select FSBasedBackupSet.
Select a date when a full FSBasedBackupSet was taken and select Restore.
The Backup Content screen displays the databases to restore. Select the required database to restore, or select all of them to restore all.
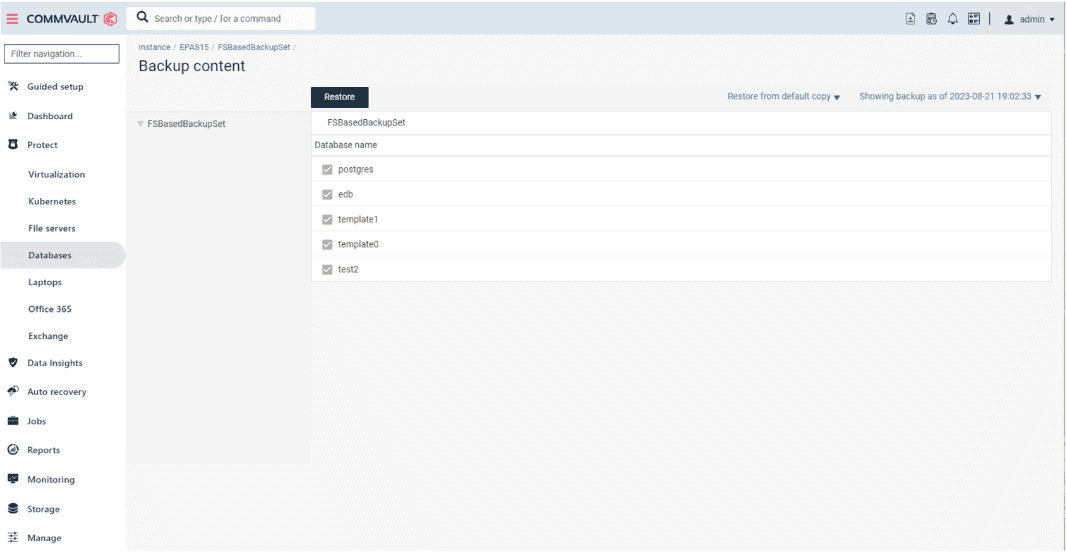
Select Restore.
From the Restore Options screen, select where you want the restore to complete: in-place, out-of-place, or restore to disk for a Linux server.
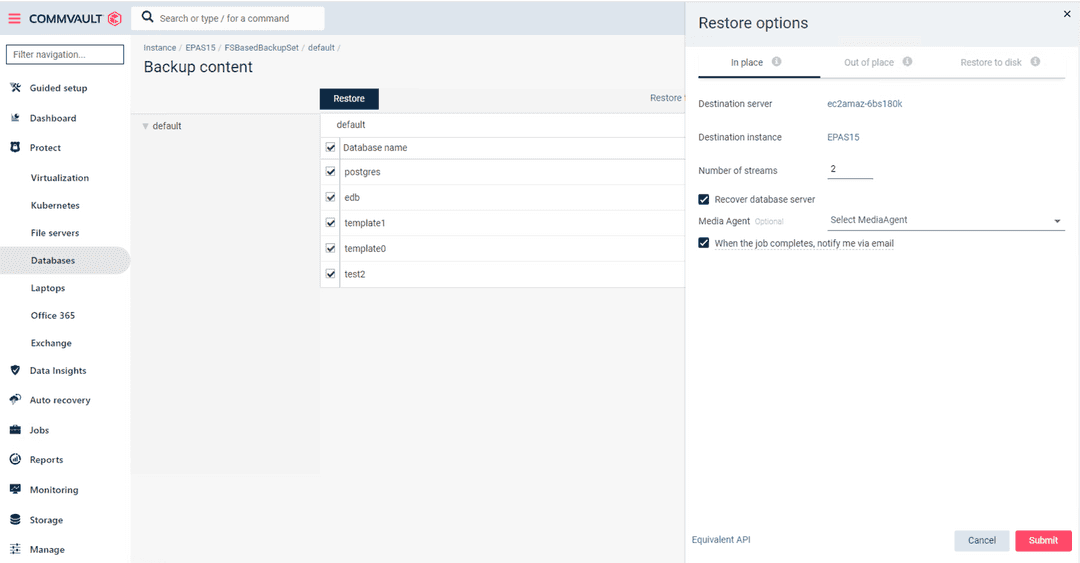
Select the Destination Server and Destination Instance, and select Submit.
A job is created to restore the backup.
When the restore has completed successfully, Commvault starts the server using the pg_ctl utility.
You can check that the server was started successfully with a command like,
"C:\Program Files\edb\as15\bin\pg_ctl" -U enterprisedb status -D "C:\Program Files\edb\as15\data". It returns a message that the server is running.
C:\Program Files\edb\as15>"C:\Program Files\edb\as15\bin\pg_ctl" -U enterprisedb status -D "C:\Program Files\edb\as15\data"
pg_ctl: server is running (PID: 20896)
C:/Program Files/edb/as15/bin/edb-postgres.exe "-D" "C:\Program Files\edb\as15\data"
If you want the server to be controlled by a Services utility, you need to stop it with the pg_ctl utility and start it again in your Services utility, for example, Services(Local) in Windows or systemctl in UNIX.
After you start the service using your utility of choice, log in to your EDB database and check that the restore operation recovered the data.
Known issues
FSBaseBackupSet Incremental or Point-In-Time(PITR) Restore has issues with PostgreSQL server, EDB Postgres Advanced Server, and EDB Postgres Extended versions 13 and later. The behavior is due to a change that was made in Postgres version 13. From the release notes, Generate an error if recovery does not reach the specified recovery target. While Commvault does provide a time target for the recovery, the recovery is performed entirely by Postgres, and Postgres doesn't know how to reach that time target. Therefore, it fails. This can happen when there are no transactions between backup jobs.
A workaround for this issue is to always introduce a transaction scenario, such as a create and drop database, before doing a log backup. Another workaround is to use recovery_target_lsn in the postgresql.conf file instead of using recovery_target_time.
Commvault is aware of this error and is working on a fix.
Could this page be better? Report a problem or suggest an addition!