Configuring
Suggest editsImplementing DBeaver PRO with EDB Postgres Advanced Server and EDB Postgres Extended Server requires the following components:
- A running EDB Postgres Advanced Server or EDB Postgres Extended Server instance
- DBeaver PRO application installed on a system where you manage the running database
EDB Postgres Advanced Server configuration
- Launch DBeaver PRO on your system.
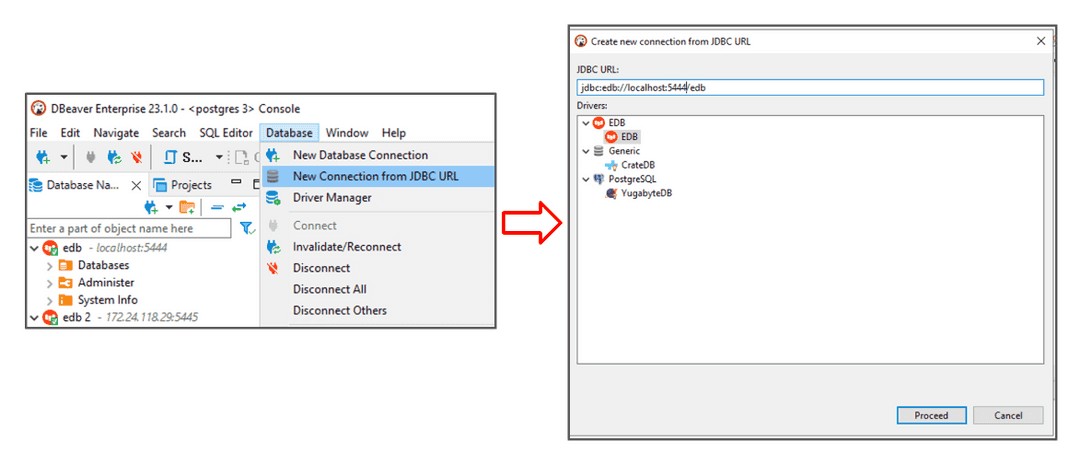
- From the Database menu at the top left, select New Database Connection. In the All tab, select EDB, and then select Next.

Note
You can also connect to your EDB database instance by selecting Database > New Connection from JDBC URL. DBeaver PRO selects EnterpriseDB in the Drivers field when you provide the EDB JDBC URL in the JDBC URL field. If you use this method, select Proceed and continue to step 3.
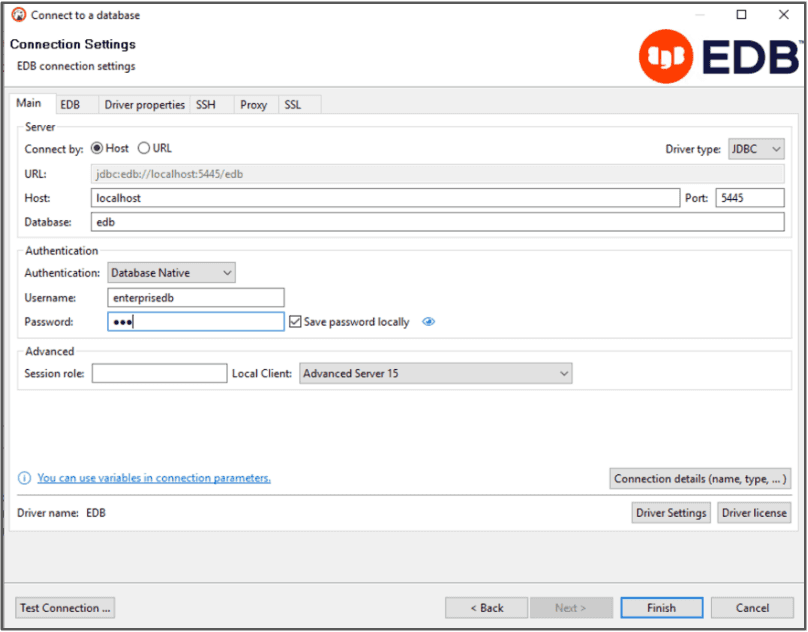
- Provide connection information for the user, password, host, port, and database for your EDB Postgres Advanced Server instance.
- Select Test Connection. The success message appears.
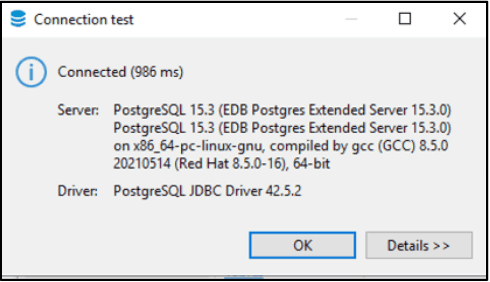
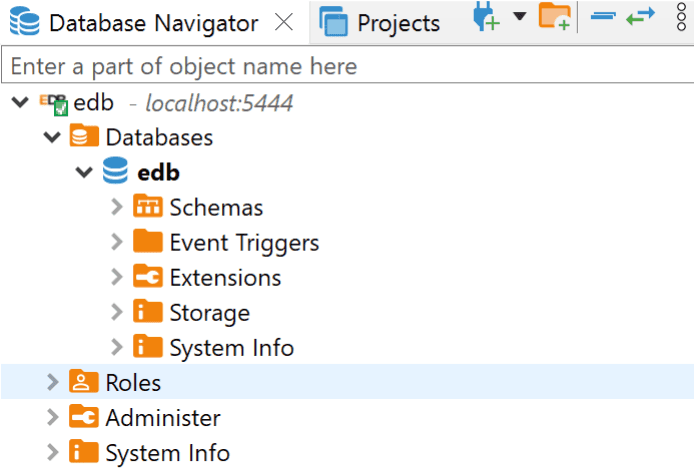
- Respond OK to the message. Then select Finish on the Connection Settings window. The connection is then created and appears in the left-side tree.
EDB Postgres Extended Server configuration
- Launch DBeaver PRO on your system.
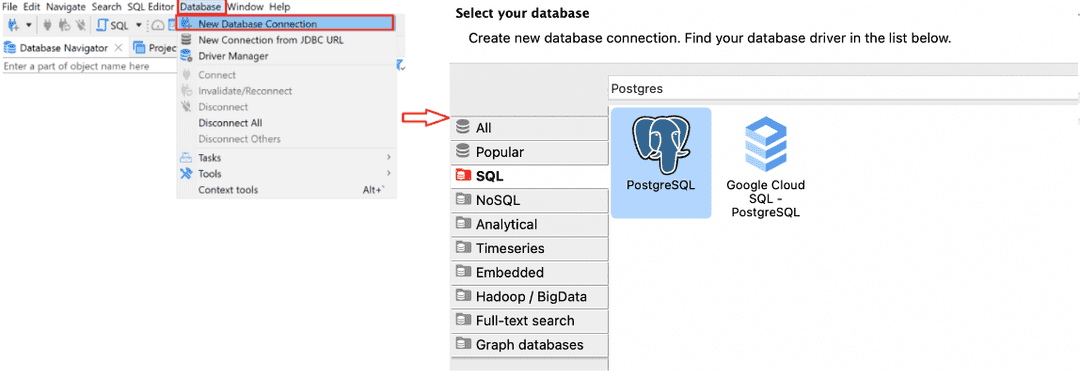
- From the Database menu in the top left, select New Database Connection. In the All tab, select PostgreSQL. Then select Next.
Note
You can also connect to your PostgreSQL database instance by selecting Database > New Connection from JDBC URL. When you provide the PostgreSQL JDBC URL in the JDBC URL fieldD, Beaver PRO selects PostgreSQL in the Drivers field. If you use this method, select Proceed and continue to step 3.

- Provide connection information for the user, password, host, port, and database for your PostgreSQL instance.
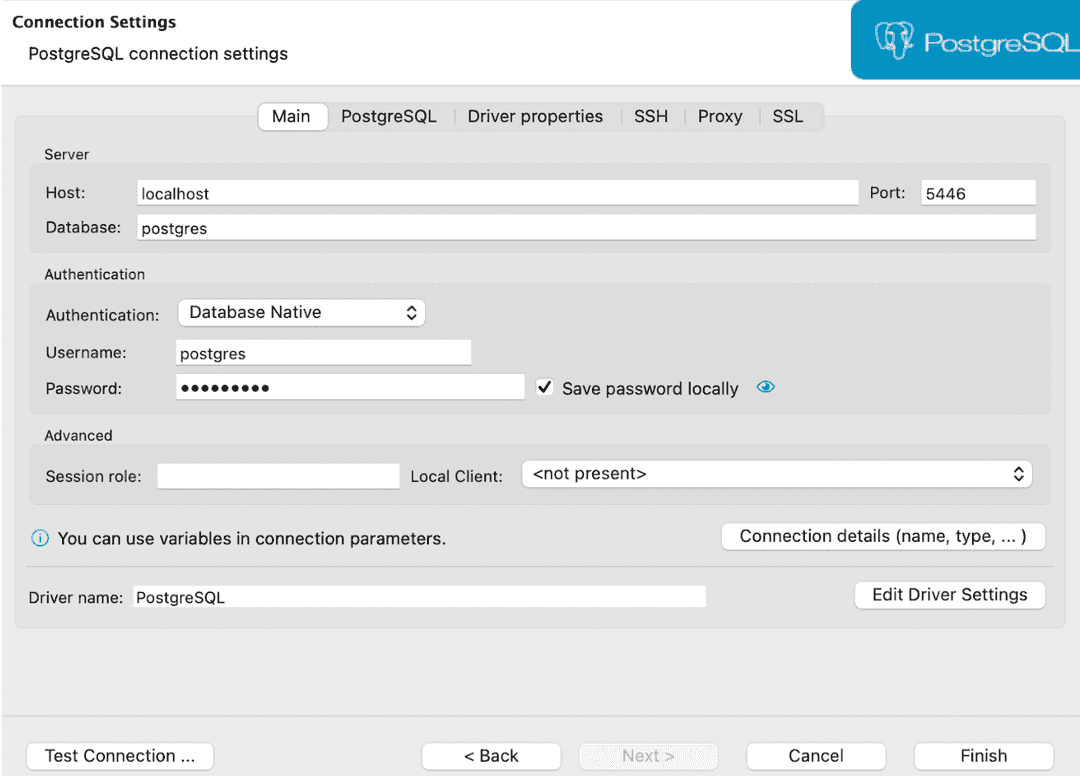
- Select Test Connection. The success message appears.
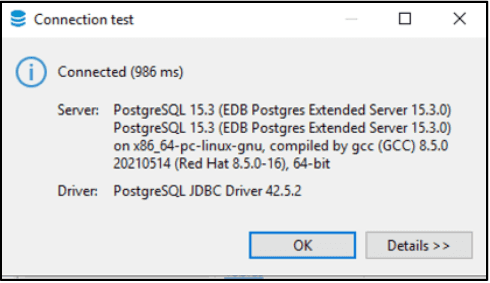
- Respond OK to the message. Then, on the Connection Settings window, select Finish. The connection is created and shown in the left-side tree.

Could this page be better? Report a problem or suggest an addition!