Using
Suggest editsThese examples walk you though some of the common usage scenarios that can be used with EDB Postgres Advanced Server or EDB Postgres Extended Server. These are examples to help get you started and show how the products can work together.
- FMB-based migration of an Oracle Forms application to an EDB Postgres Advanced Server/SIB Visions VisionX Low Code application
- Part 1: FMB-based application migration
- Part 2: Oracle database to EDB Postgres Advanced Server migration
- Part 3: Switch database connection to EDB Postgres Advanced Server
- Data model-based migration of an Oracle Forms/APEX application to an EDB Postgres/SIB Visions VisionX Low Code application
- Part 1: Data-model-based application migration
- Part 2: Oracle database to EDB Postgres Advanced Server migration
- Part 3: Switch database connection to EDB Postgres Advanced Server
- Create a SIB Visions VisionX application that uses an EDB Postgres Advanced Server or EDB Postgres Extended Server instance as a data source
- Create a screen that connects to an existing table from an EDB Postgres Advanced Server or EDB Postgres Extended Server instance
- Create a screen that creates a table in the connected EDB Postgres Advanced Server or EDB Postgres Extended Server instance
FMB-based migration of an Oracle Forms application to an EDB Postgres Advanced Server/SIB Visions VisionX low-code application
This example shows how an Oracle Forms application is migrated to a SIB Visions VisionX low-code application using an FMB file (Oracle Forms source file). The first step is to migrate the application. In the second step, the Oracle database is migrated to EDB Postgres Advanced Server or EDB Postgres Extended Server using the usual tools, such as EDB's Migration Toolkit. Then the migrated application is connected to EDB Postgres Advanced Server or EDB Postgres Extended Server.
FMB-based application migration
Open SIB Visions VisionX and create an application. The Create a New Application screen opens.
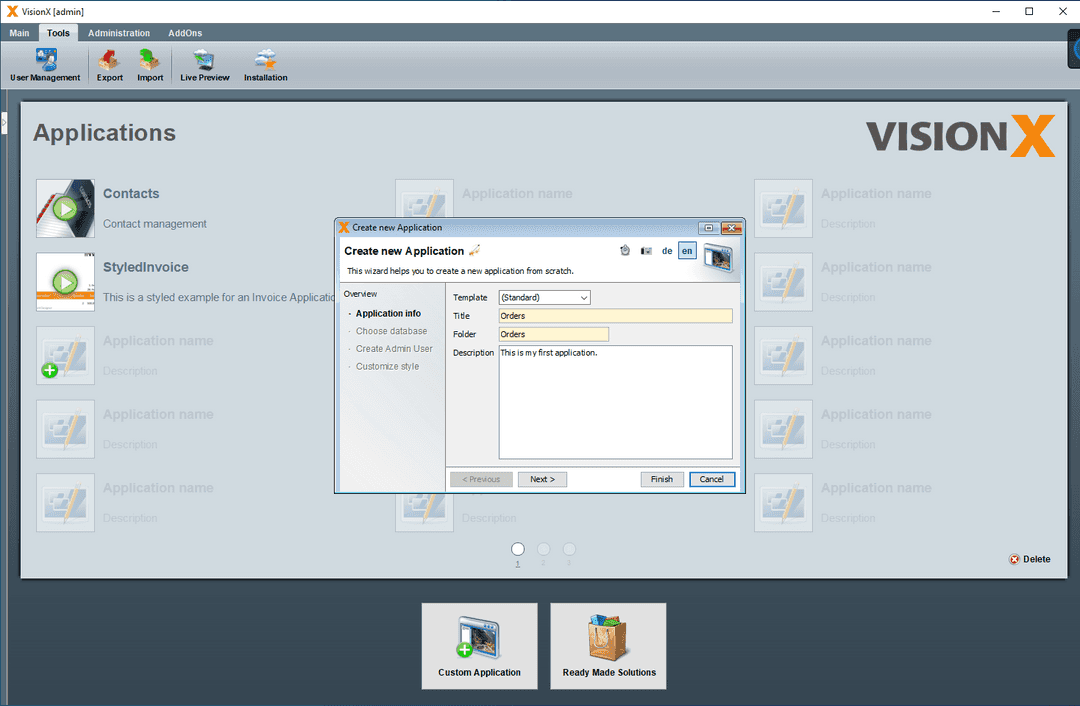
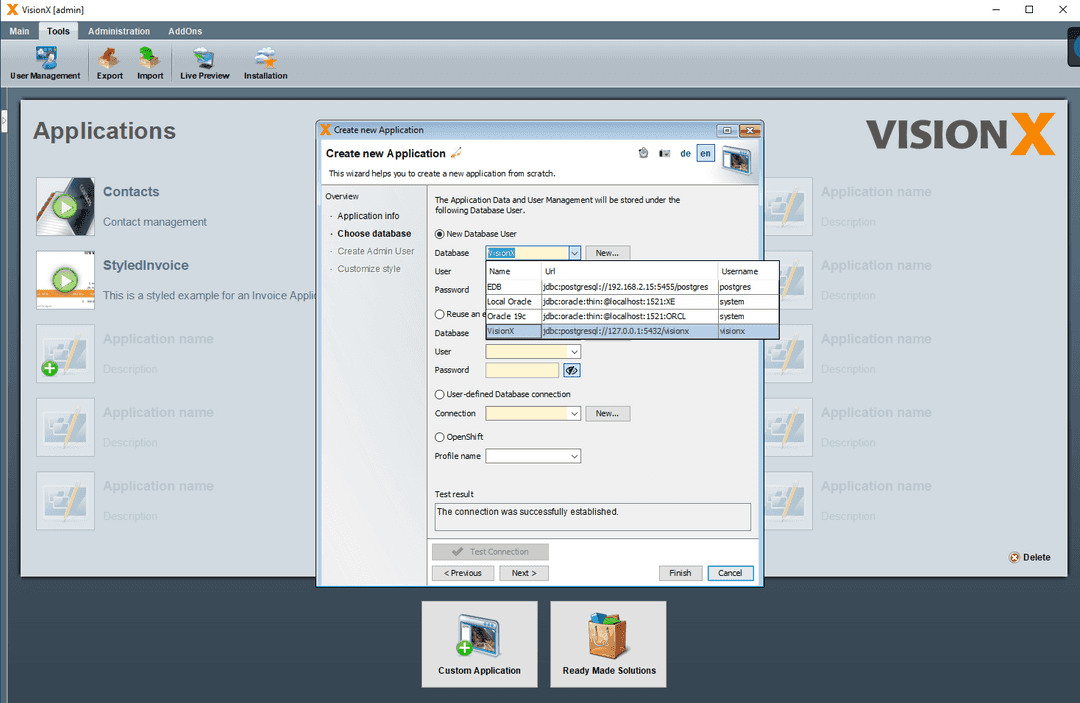
At the Choose Database step, select New Database User. The default settings create a database user in the Postgres database bundled with SIB Visions VisionX. Alternatively, you can use Postgres, EDB Postgres Advanced Server, or EDB Postgres Extended Server here. The database user is used to create the tables for the migrated application’s standard SIB Visions VisionX user management instead of the Oracle Forms user management. Optionally, other authentication systems, such as Windows AD or Open ID system, can easily be integrated.
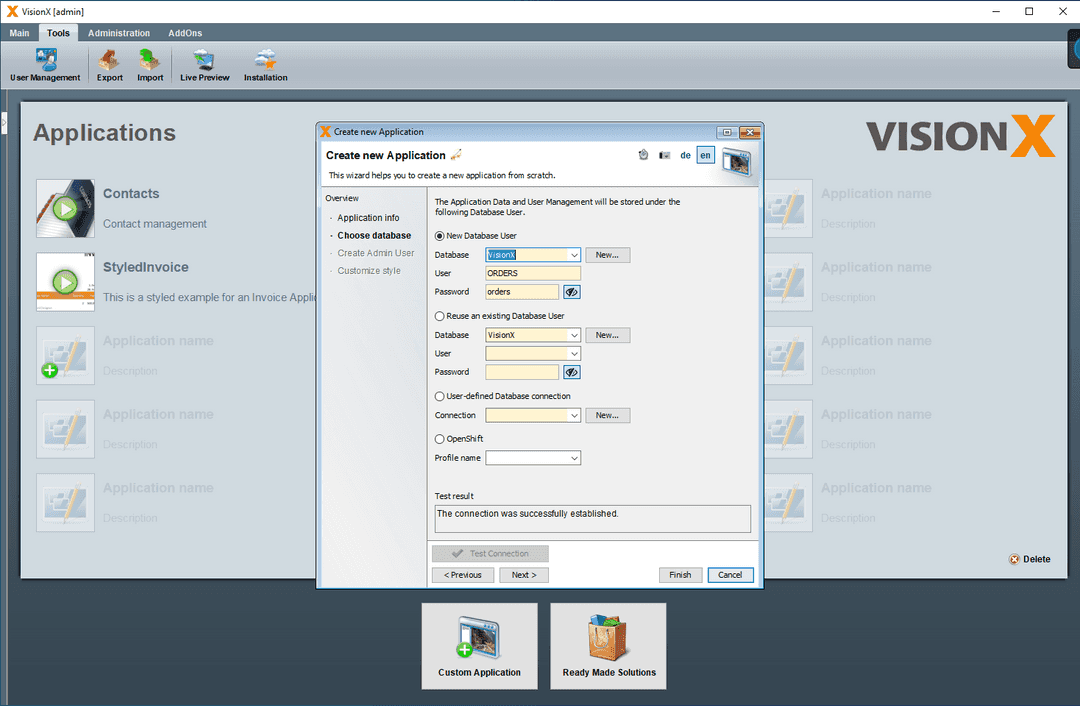
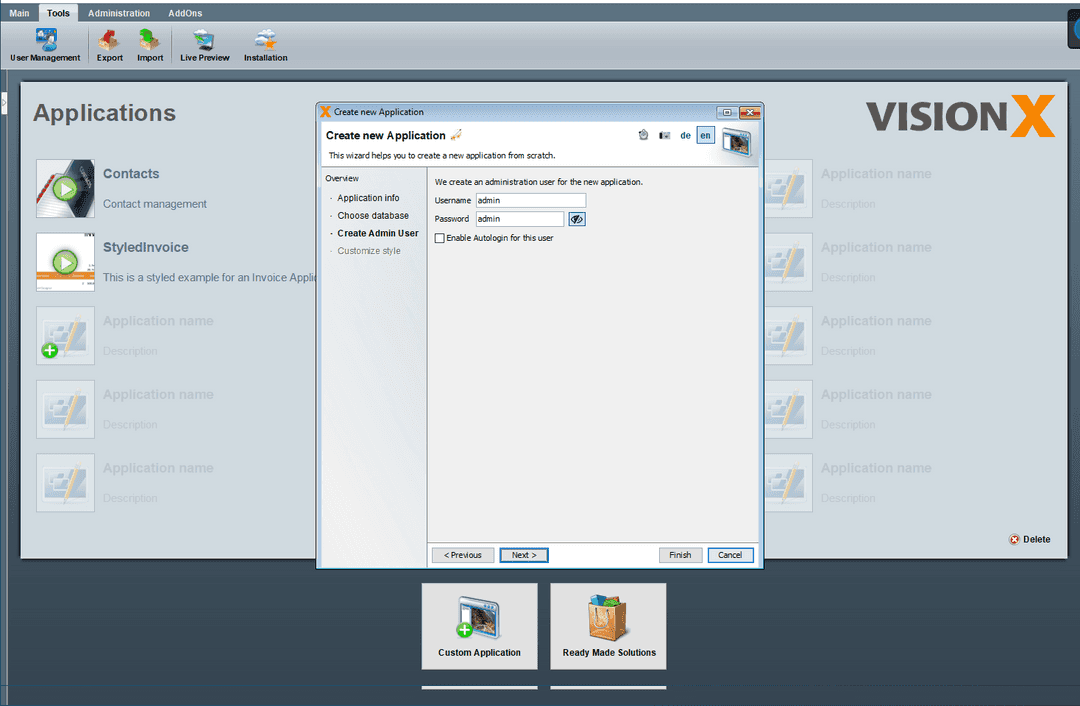
At the Create Admin User step, provide the user name and password and select Finish.
A Task List screen shows the application creation progress.

Once the application is created, the New Application Screen screen is opened, which allows you to create a screen.
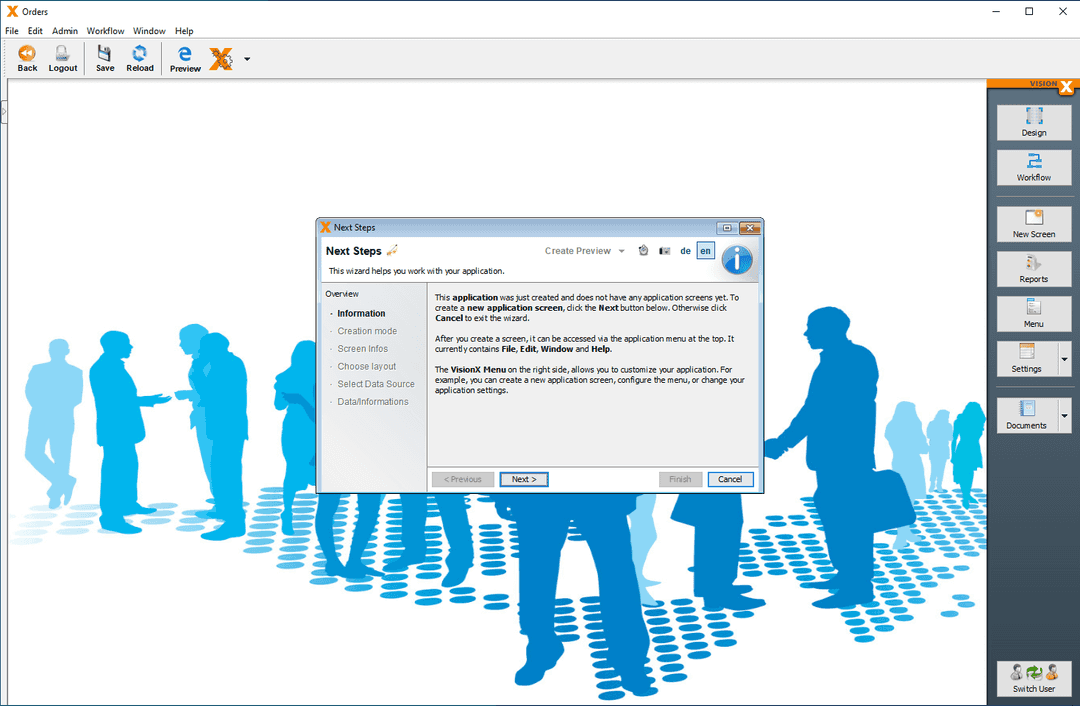
At the Creation Mode step, select Import an Oracle Forms (.fmb) module.
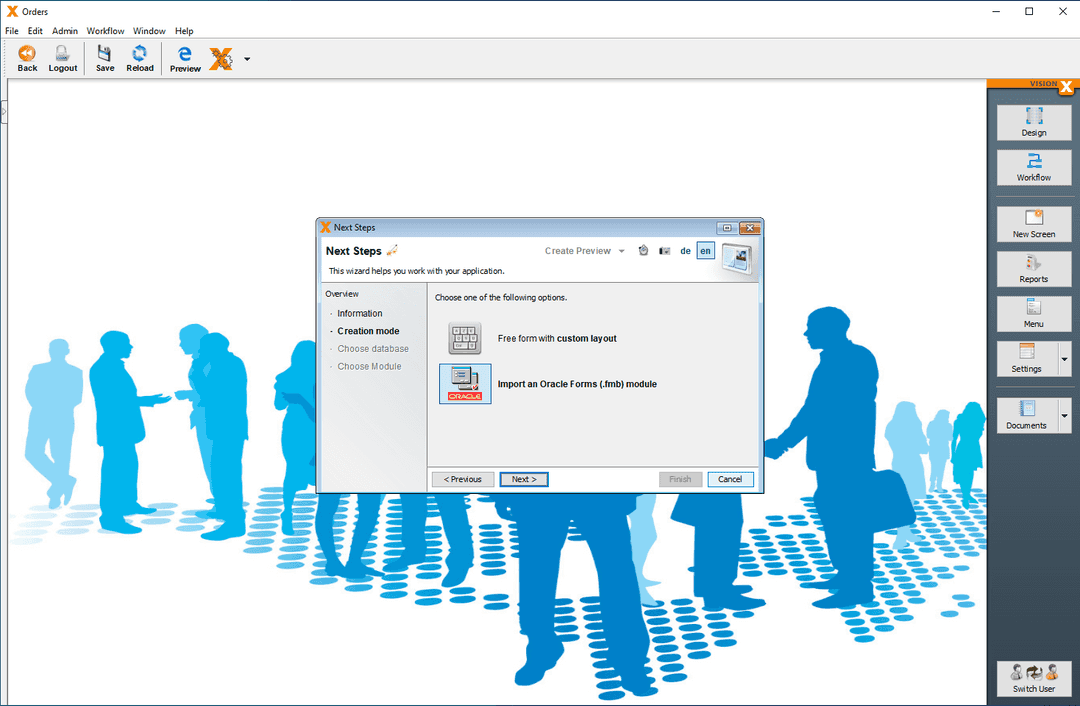
At the next step (Choose Database), select Existing Database User and provide the credentials to the Oracle Database used by Oracle Forms.
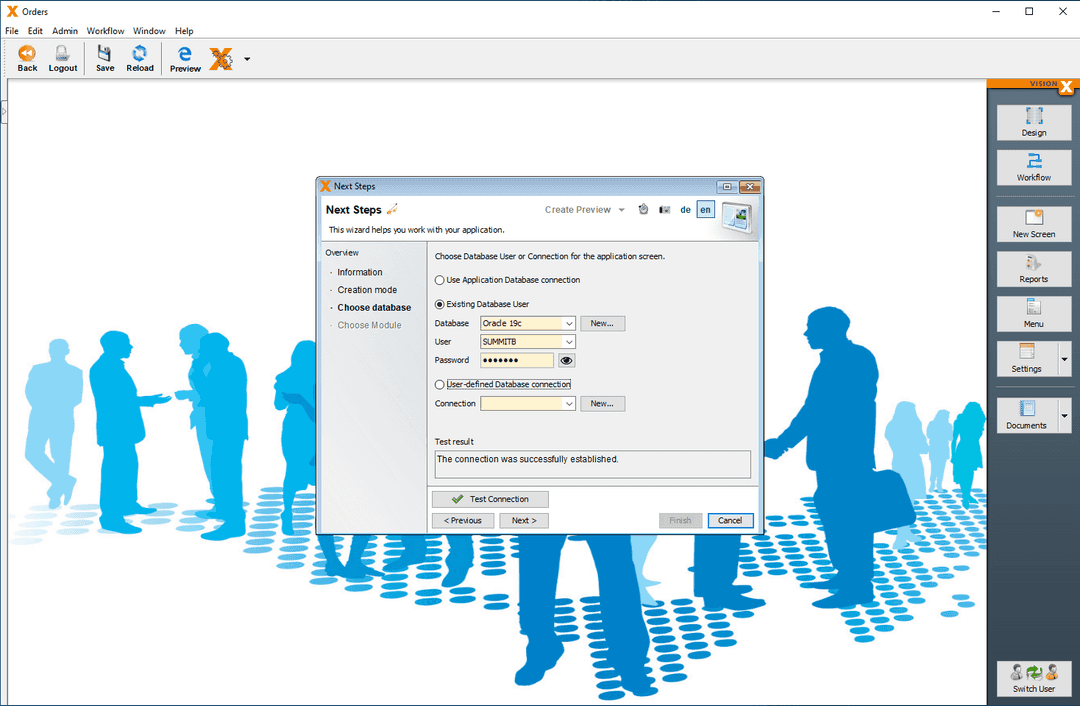
At the Choose Module step, select the FMB file.
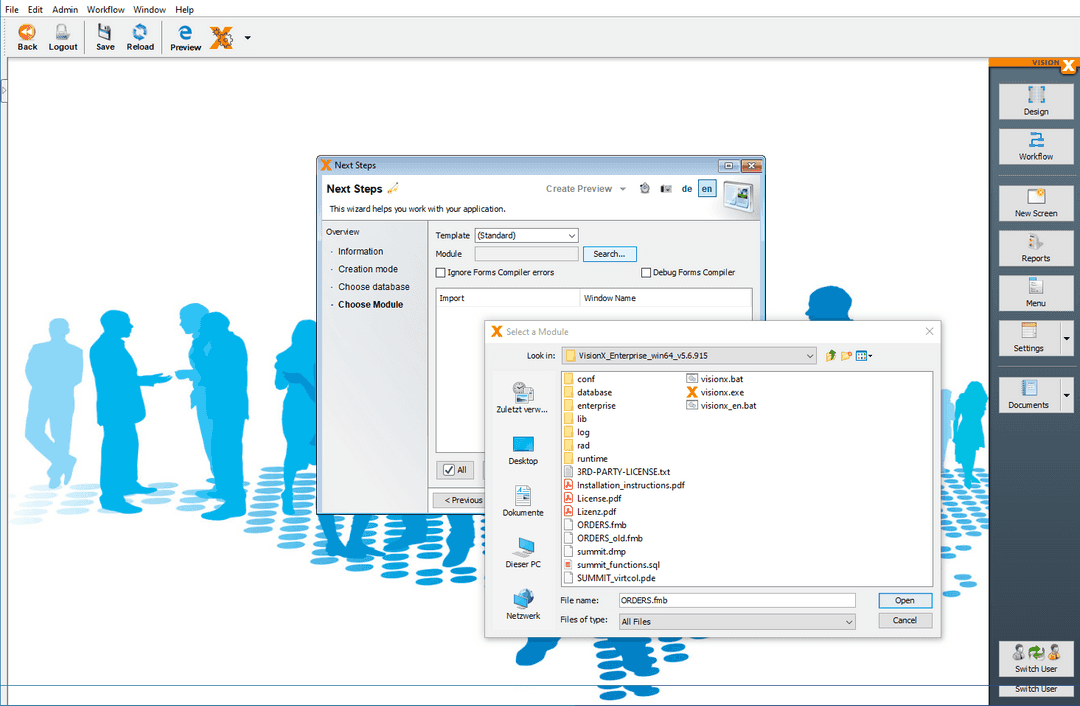
In this example, SIB Visions VisionX analyzes the
orders.fmbfile and shows all included windows/canvases for the selection.The following screenshot shows the
orders.fmbfile in Oracle Forms Builder.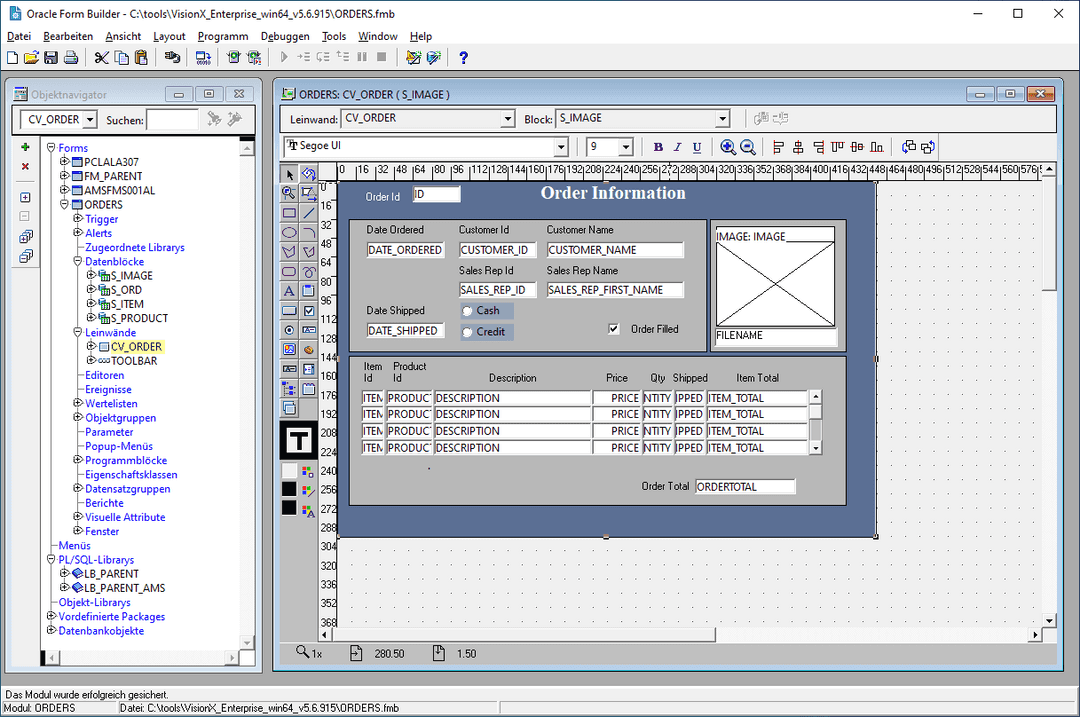
After the
.fmbfile is selected, a Task List screen displays the Oracle Forms migration progress.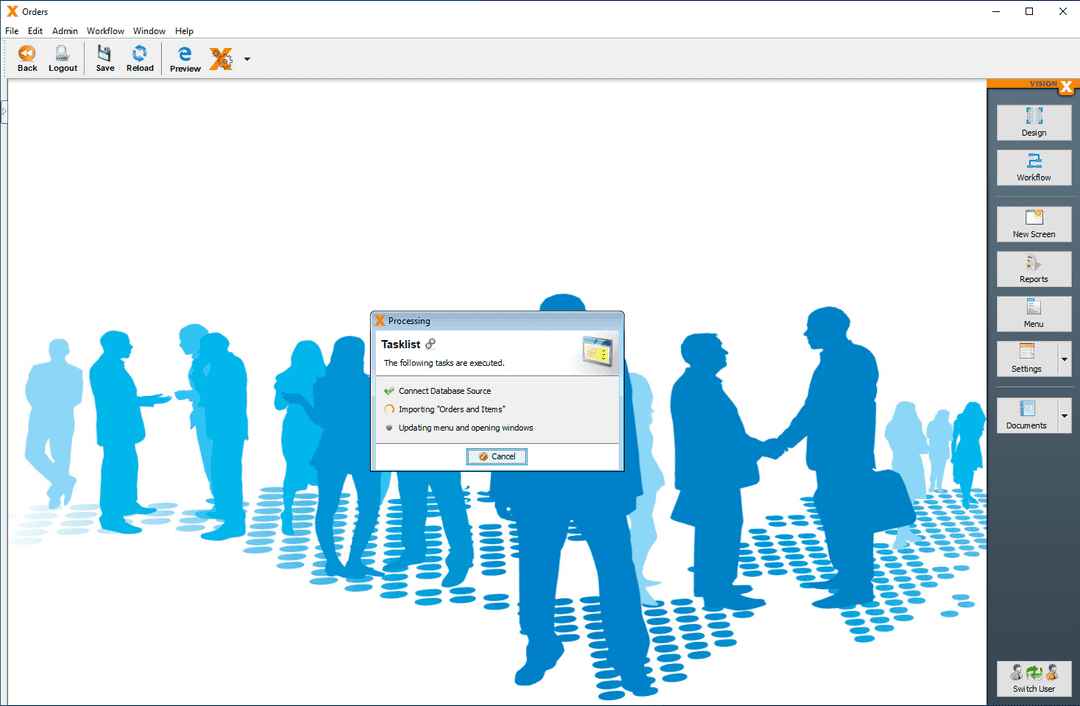
After the migrated screen is created, it's displayed in design mode in SIB Visions VisionX, where you can adjust it according to the requirements.
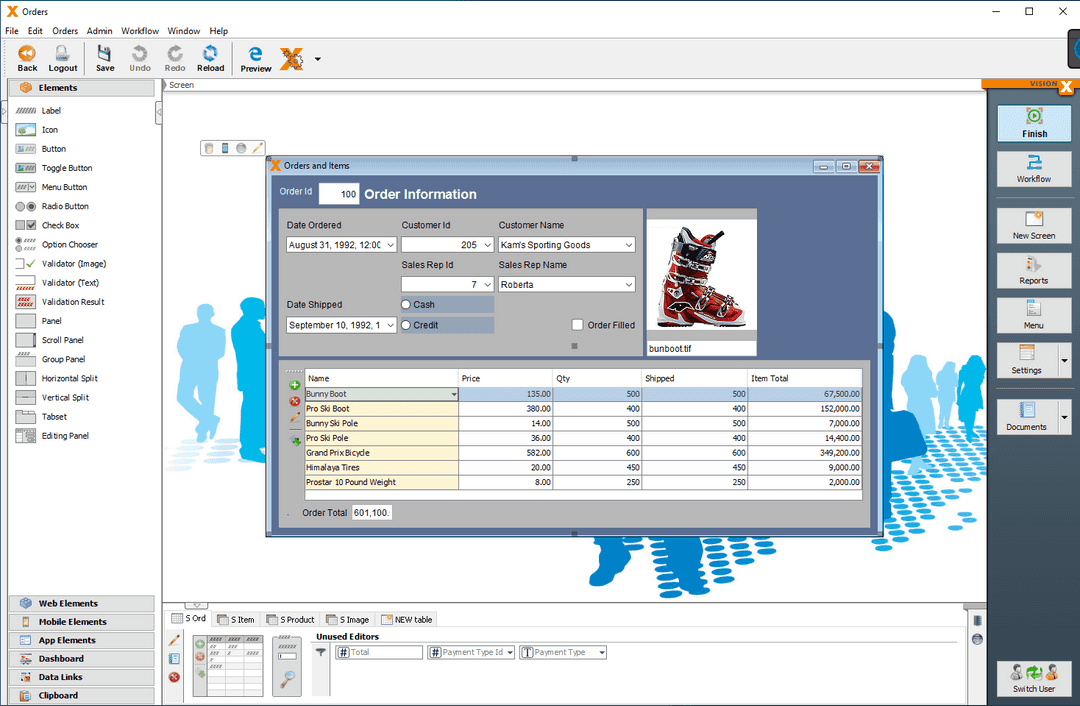
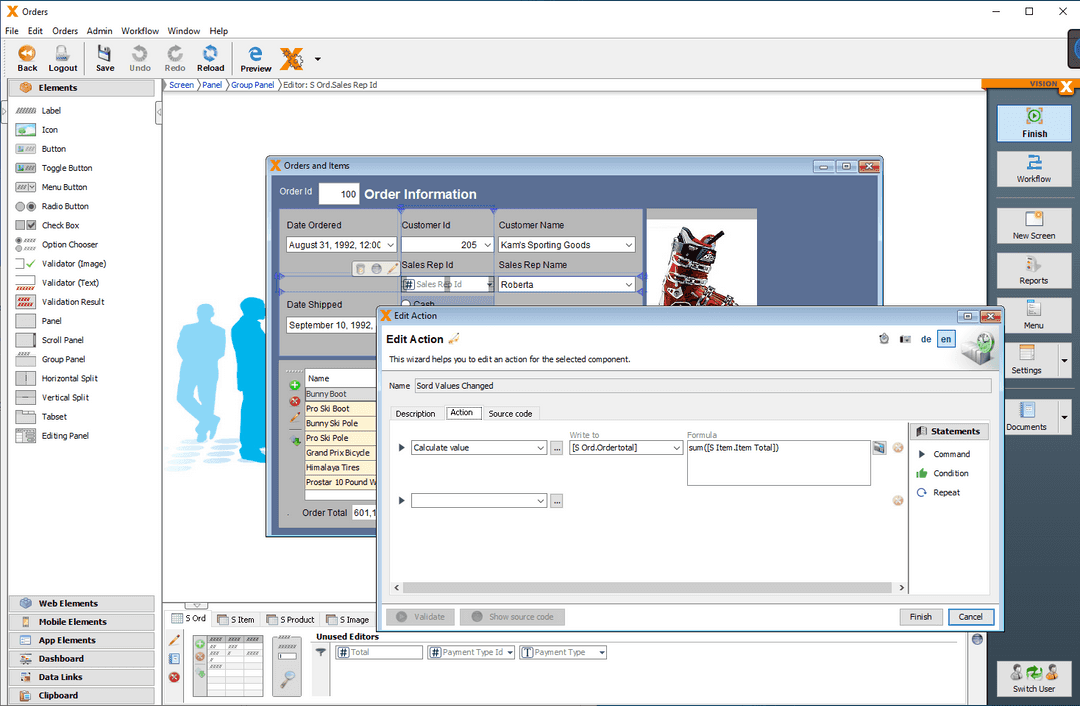
The SIB Visions VisionX Oracle Forms Migration Extension can migrate FMBs semi-automatically. All user interface elements (Windows/Canvas/Items) and the Oracle Forms Persistence (Blocks) can be migrated automatically. In a manual step, the Oracle Forms application logic (PL/SQL) is compiled into the database. The remaining UI logic is then created in SIB Visions VisionX visually or manually with Java Code.
Add logic visually with actions in SIB Visions VisionX
Modify or add any Java code using Eclipse
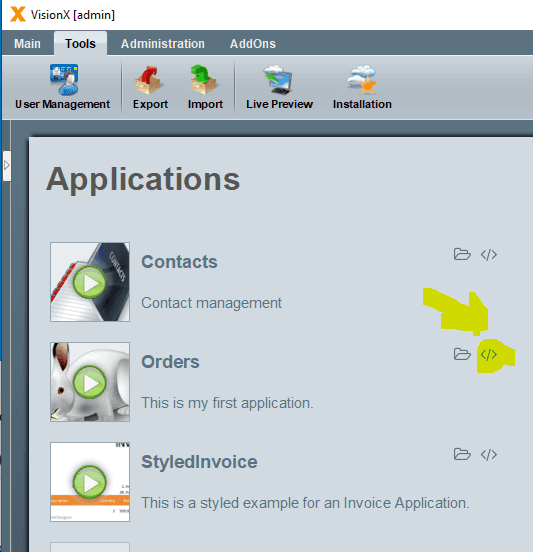
Import the application in Eclipse by pressing shift+alt in the SIB Visions VisionX main view and selecting the icon next to the application.
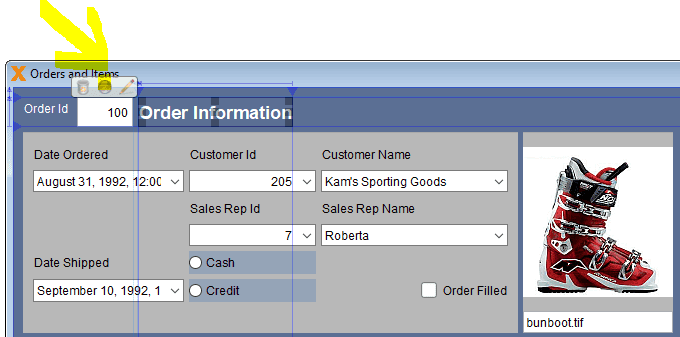
Select a UI element in SIB Visions VisionX and select the purple Eclipse button.
Eclipse navigates to the relevant Java code.
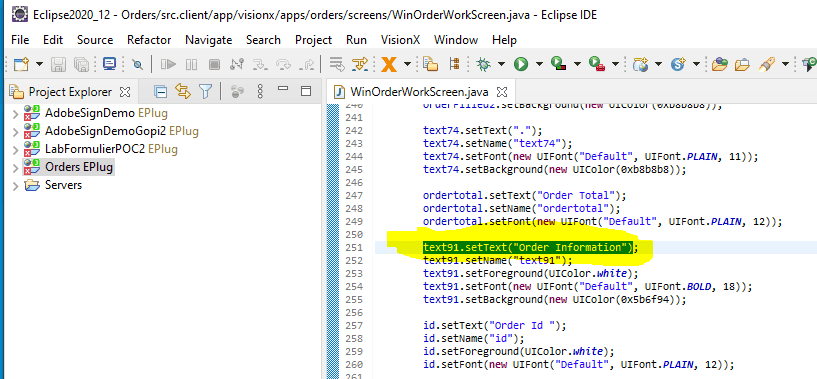
Change the Order Information label in Eclipse.
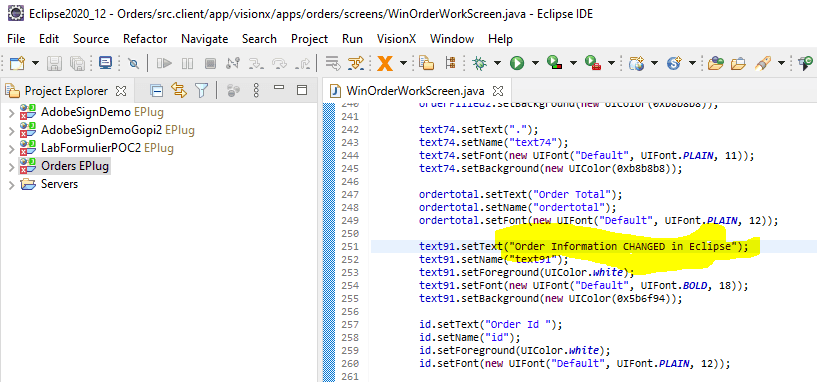
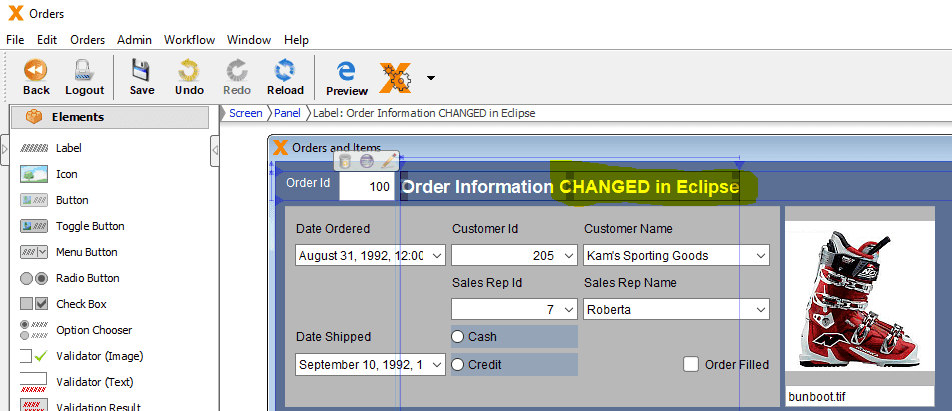
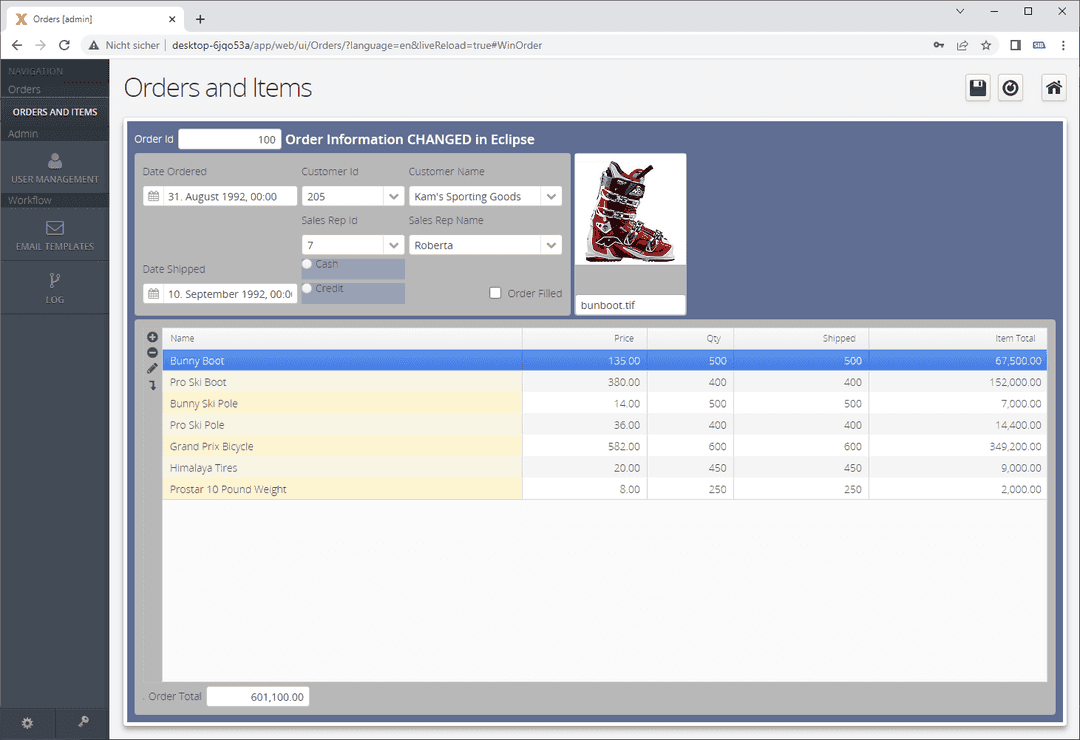
If you change the code outside of SIB Visions VisionX in Eclipse, the changes are pushed back into the VisionX visual development environment in real time. This capabioity enables unlimited app development for Citizen Developers/Business Users and Pro Developers.
Open the screen in the SIB Visions VisionX Live Preview and change some of the data. The data is updated in the Oracle database.
Oracle database to EDB Postgres Advanced Server migration
In the second step, the Oracle database is migrated to EDB Postgres Advanced Server/EDB Postgres Extended Server using EDB's Migration Toolkit.
The migration steps in connection with an Oracle Forms migration aren't different from a pure Oracle-to-EDB database migration. Therefore, this topic isn't discussed in detail here. Refer to the Migration Toolkit documentation.
Switch database connection to EDB Postgres Advanced Server
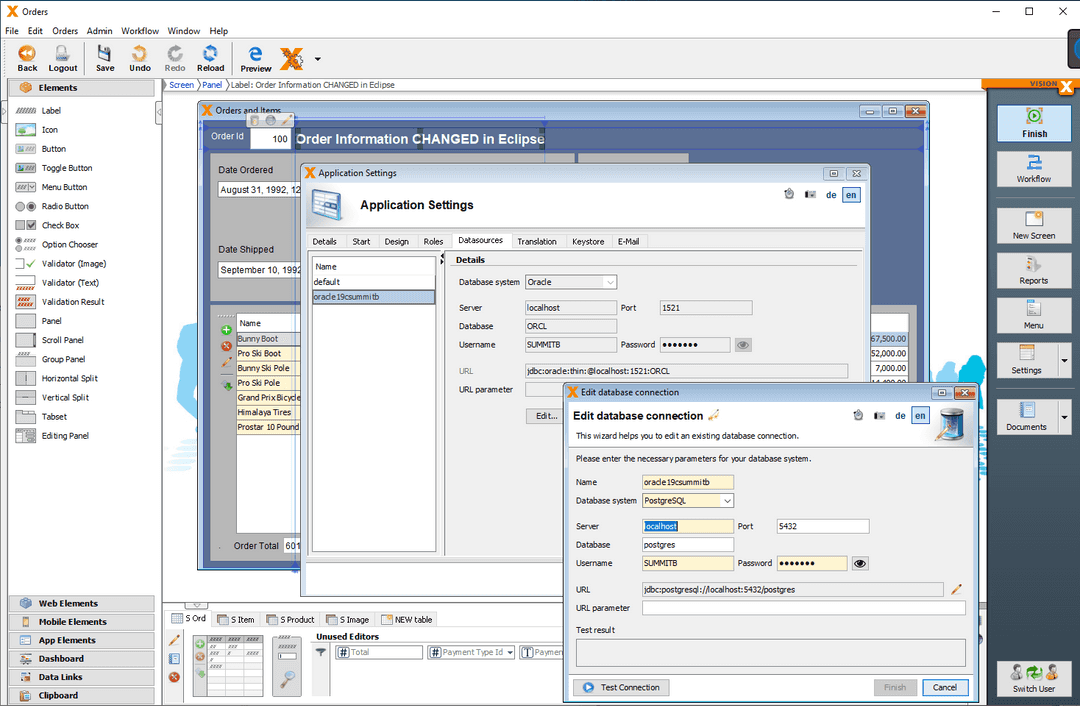
Switching from the Oracle database is a simple step in SIB Visions VisionX. In the migrated SIB Visions VisionX application, select the SIB Visions VisionX Settings screen and select the Datasources tab. Select Edit to change the database connection from Oracle to PostgresSQL.
Data-model-based migration of an Oracle Forms/APEX application to an EDB Postgres Advanced Server/SIB Visions VisionX low-code application
This example shows how an Oracle Forms/APEX application is migrated to a SIB Visions VisionX low-code application using the existing data model. The first step is to migrate the application. In the second step, the Oracle database is migrated to EDB Postgres Advanced Server/EDB Postgres Extended using the usual tools, such as EDBs Migration Toolkit.
Then the migrated application is connected to EDB Postgres Advanced Server/EDB Postgres Extended Server.
Data model based application migration
First follow Steps 1 to 5 under FMB-based application migration before proceeding to step 1.
At the Screen Infos step, provide the required information for the screen.
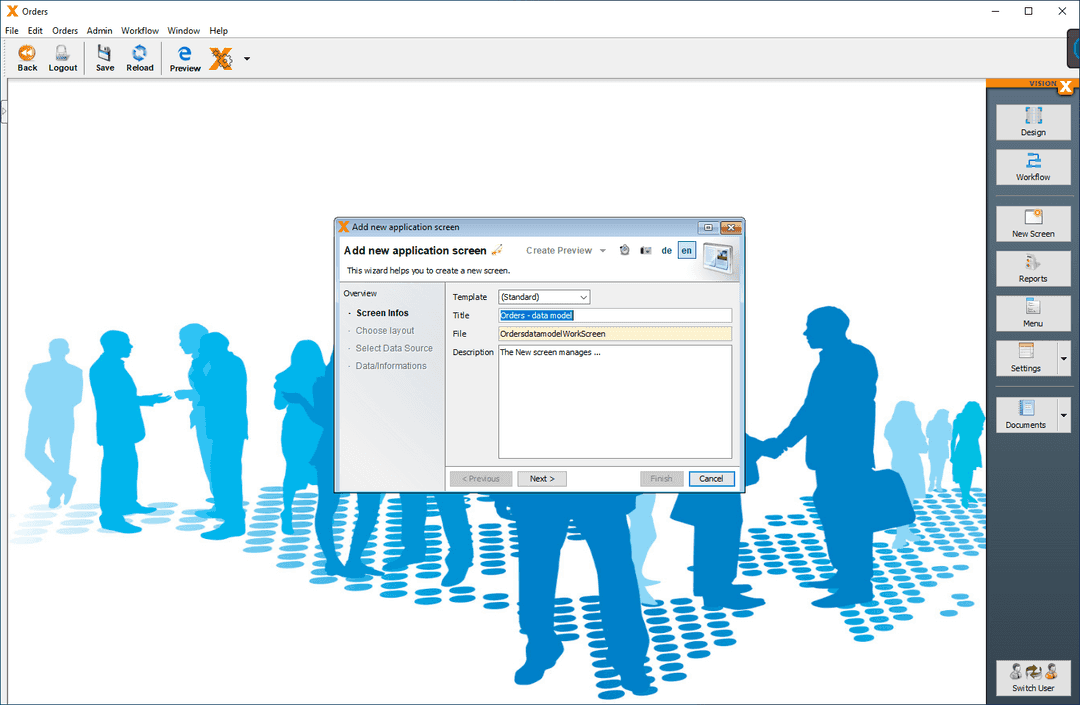
At the Choose Layout step, select the required layout for the screen.
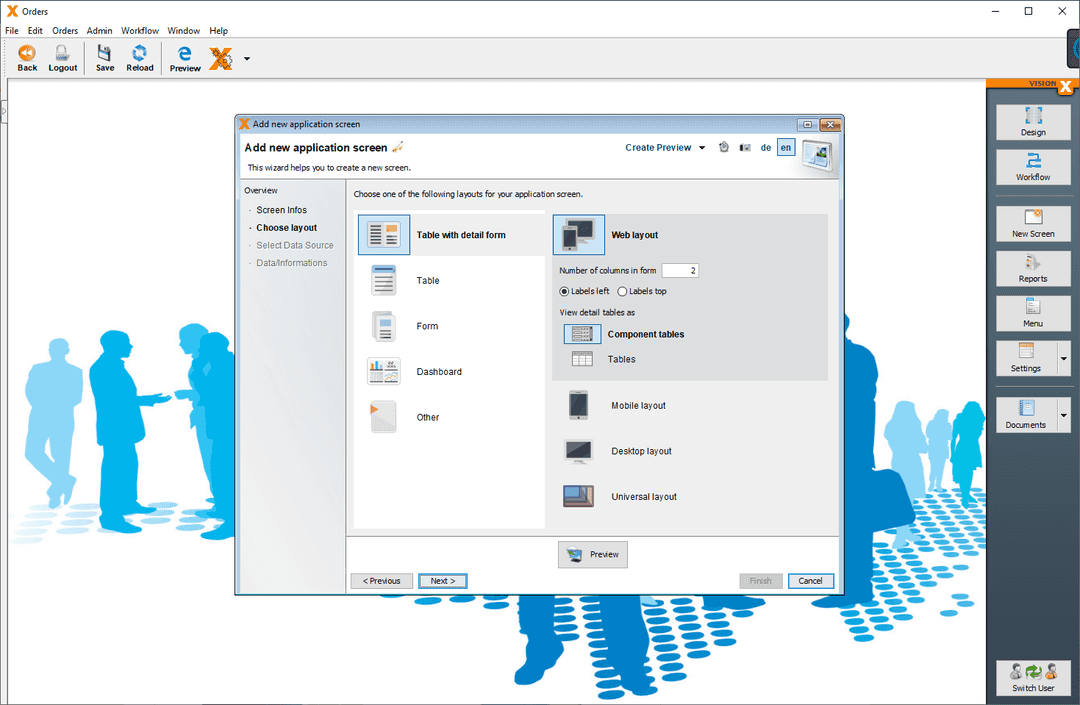
At the next step (Select Data Source), select the Use existing data from database tables option, which allows you to select the tables used in the original Oracle Forms/APEX screen. The screen is migrated based on these tables.
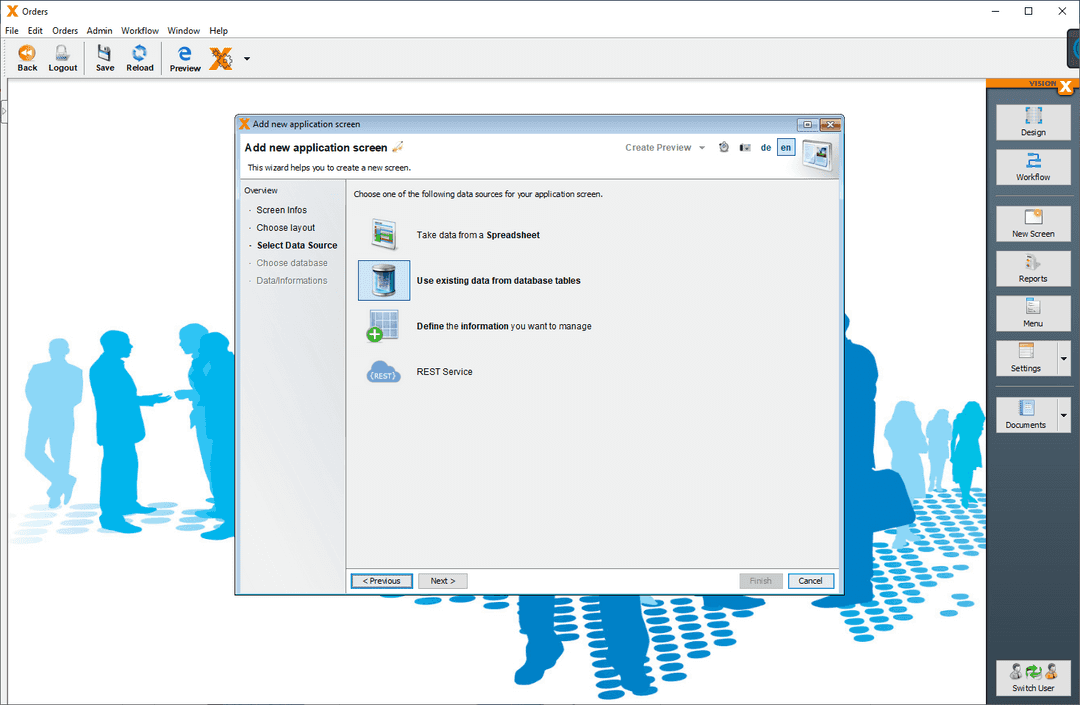
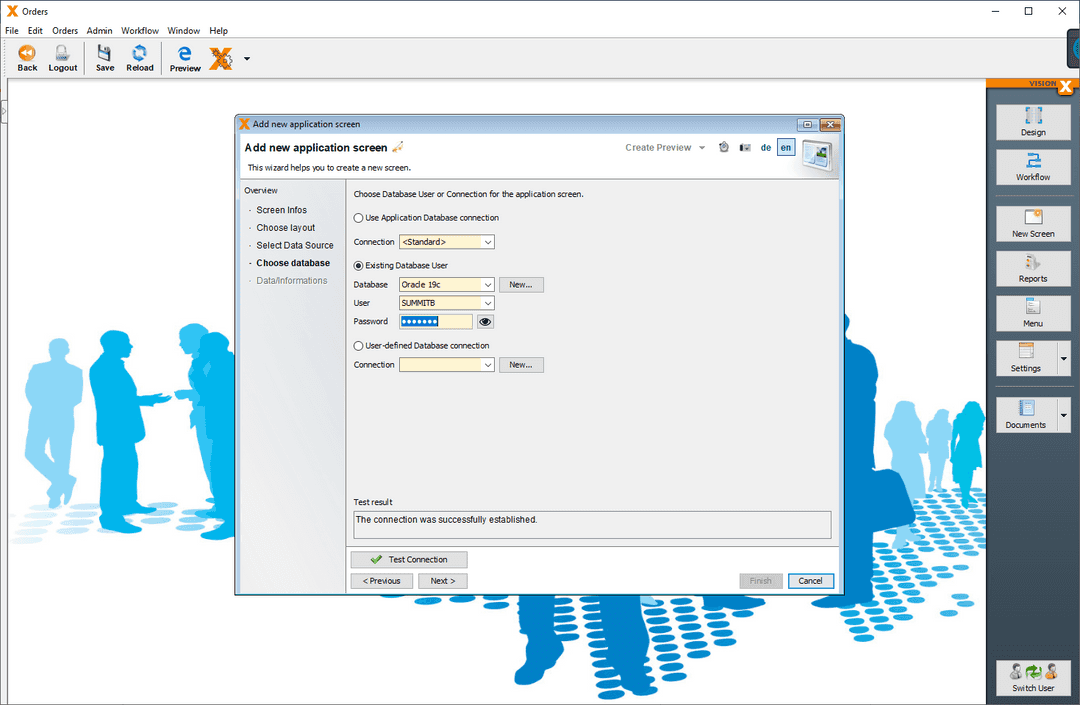
At the Choose Database step, provide the connection information for the Oracle database that's used in the Oracle Forms/APEX application.
On the next screen, select the tables used in the original Oracle Forms/APEX screen. The screen is migrated based on these tables.
Much of the typically manually created logic in Oracle Forms and APEX is automatically recognized in SIB Visions VisionX. All drop-down lists are recognized based on the foreign keys to the master data. If these are missing, they can be defined manually in SIB Visions VisionX. Furthermore, all relevant detail tables are offered for each master table. This makes it very easy to define the master detail relations in the screen. The appropriate layout of the screen was selected in the previous step. You can change this layout in the UI Designer later.
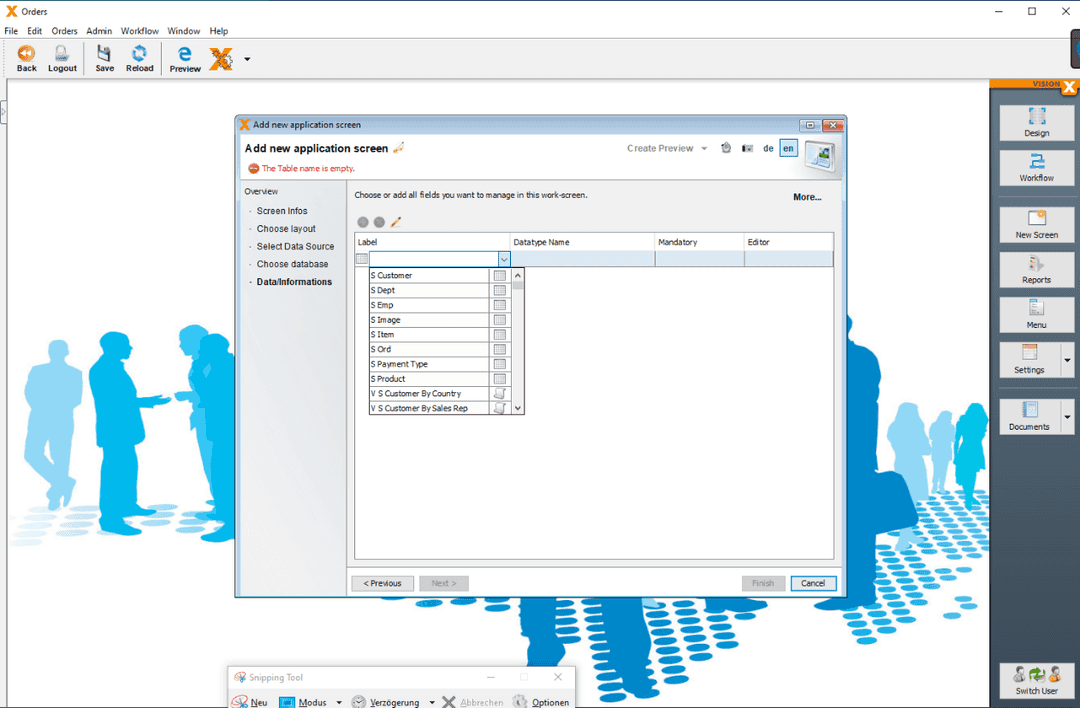
s_Ordwas chosen in this example because it's the master table of the Oracle Forms screen.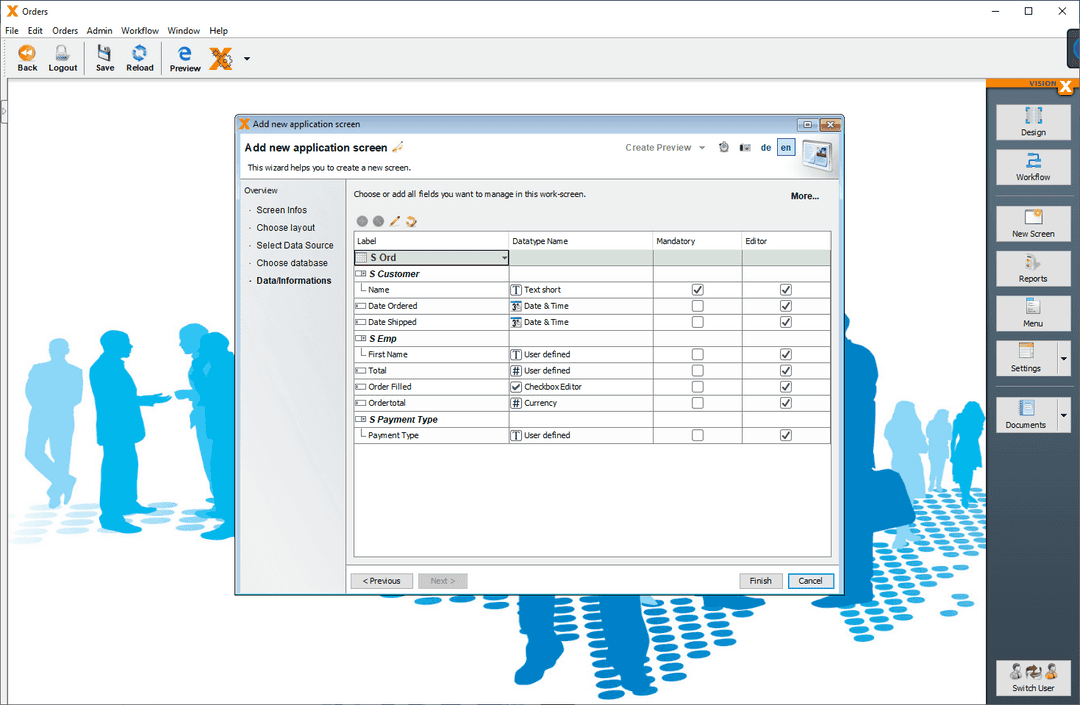
The dropdown lists for
S_Customer,A_Payment Type, andS_Empfor the sales rep of the order are detected automatically.In the next step, select More and add the Master/Detail relationship to the
S_Itemtable.
Once the screen is created, it's displayed in design mode where you can adjust it according to the requirements.
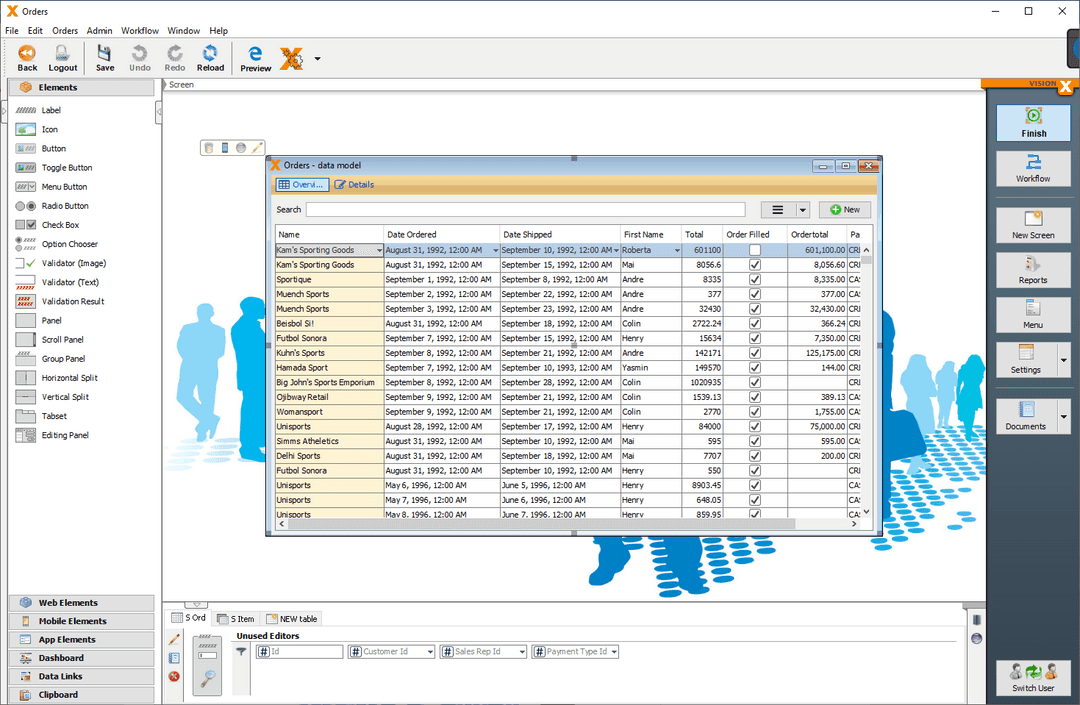
To get the image for each product as in the original Oracle Form, add the product table in the lower area using the New Table tab.
Here, use the same steps as for the selection of the
S_Ordtable, except that you select theS_Producttable instead.S_Productwas chosen because it's a detail to theS_Itemtable.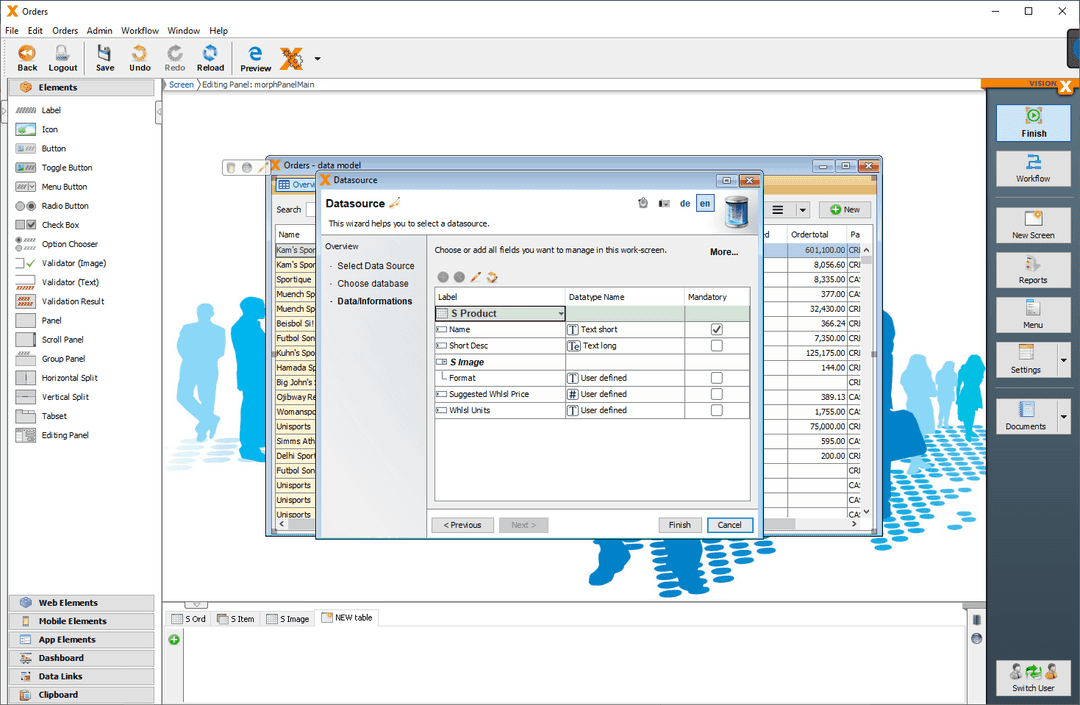
Repeat the same for the
S_Imagetable becauseS_Imageis a detail to theS_Producttable.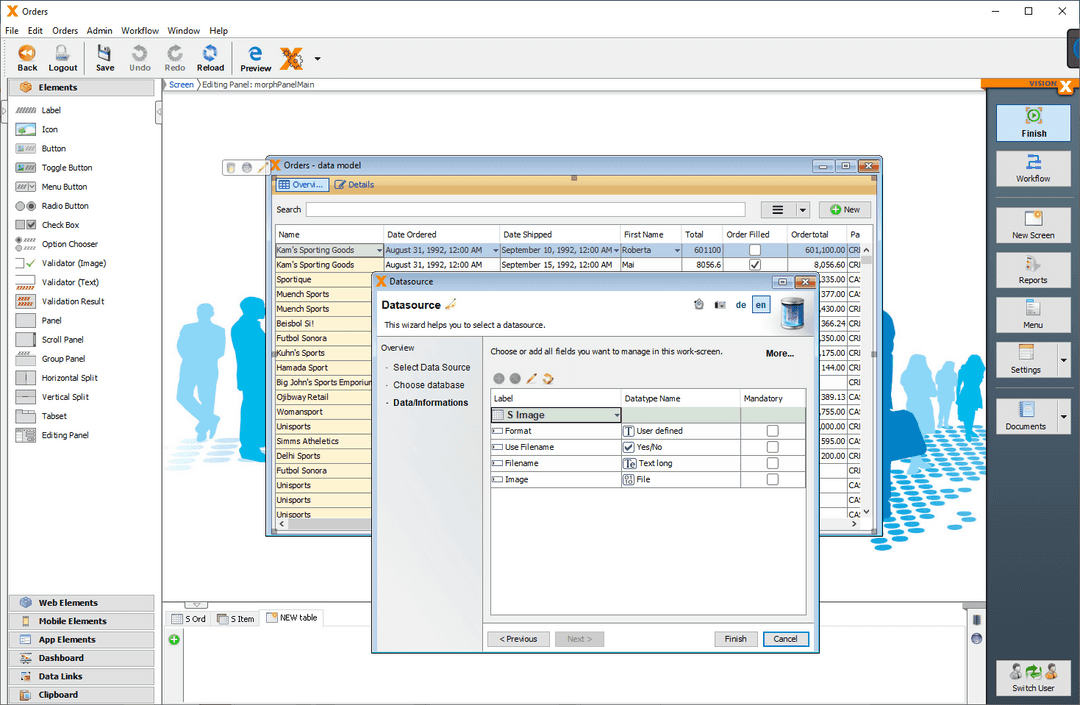
Then define the
Imagecolumn asImagedatatype by selecting the datatype dropdown. You can later position it on the screen as an image.
Next, connect the
S_Producttable as a detail to theS_Itemtable. To do this, select theS_Producttable at the bottom of the editor and select the Edit icon. Then select More and select theS_Itemas Master Table.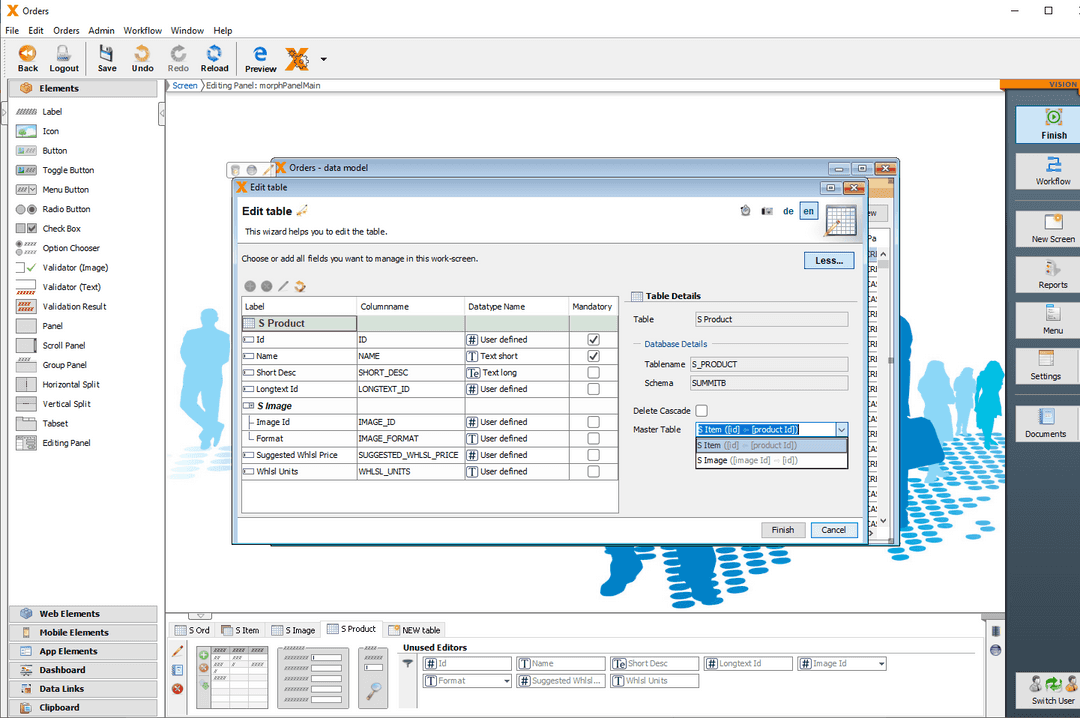
Repeat the same for the
S_Imagetable becauseS_Imageis a detail to theS_Product.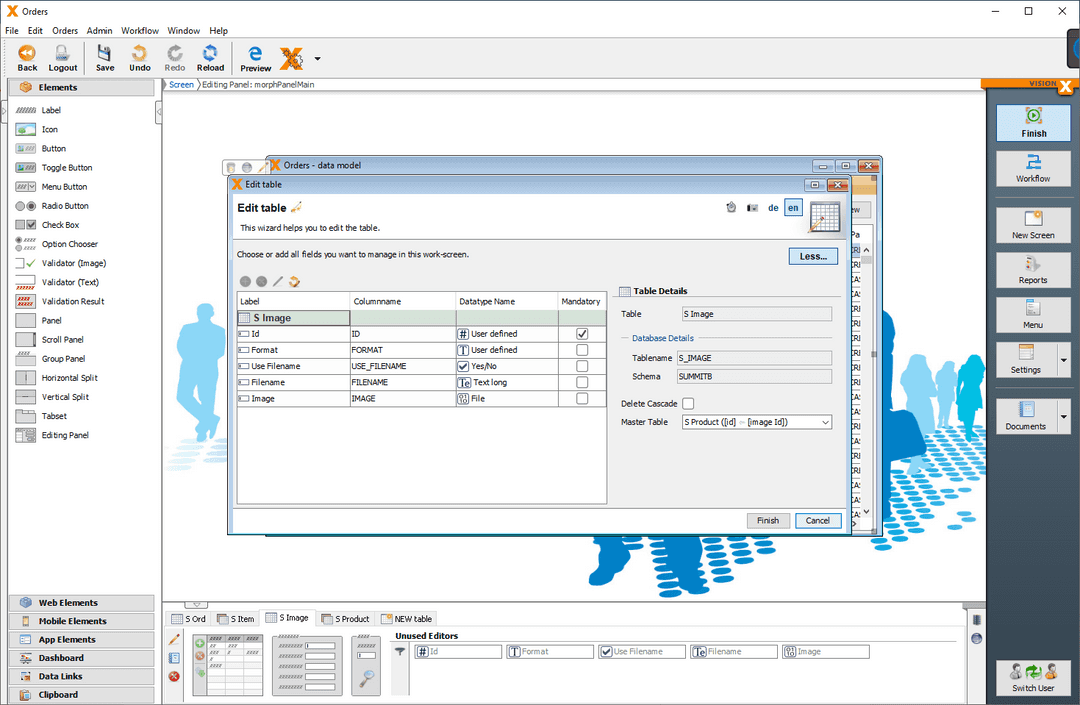
Select the screen’s detail area by selecting Details on the orange bar at the top of the Orders screen. Then select the
S_Imagetable in the lower area and position the image editor on the top-right corner of the screen by dragging it.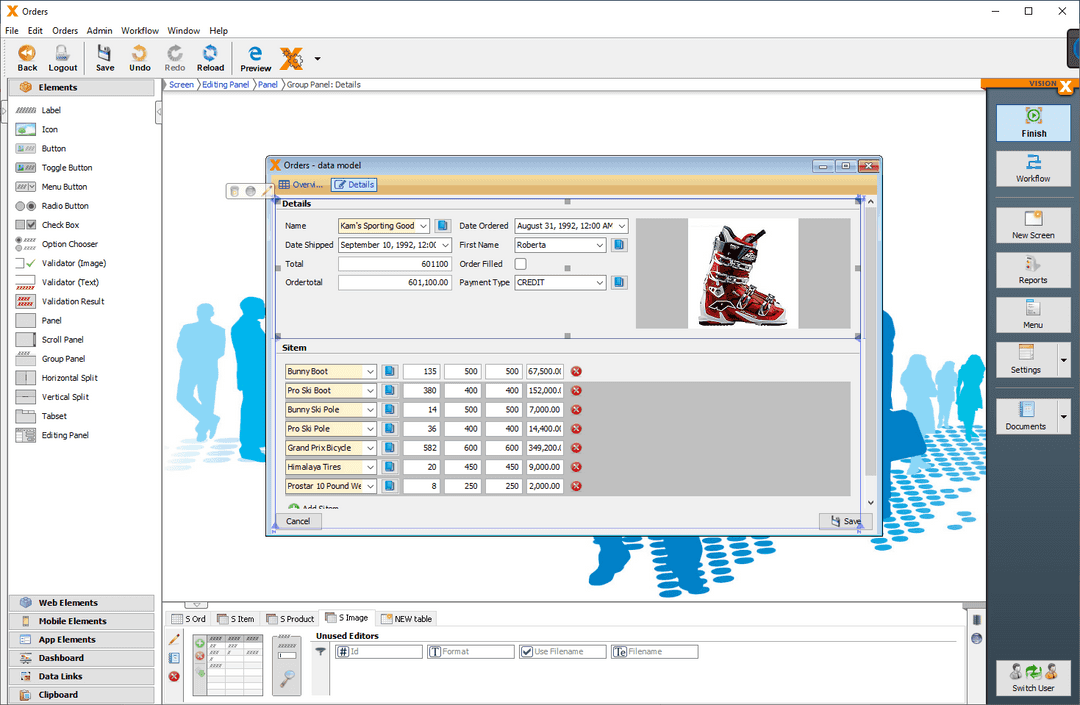
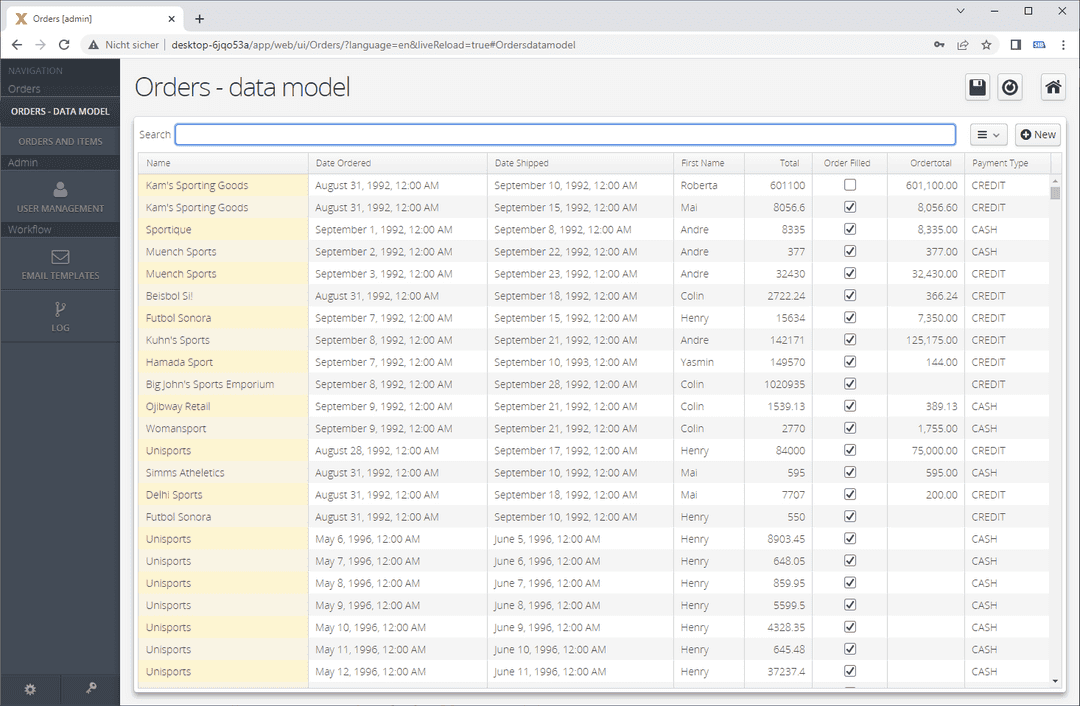
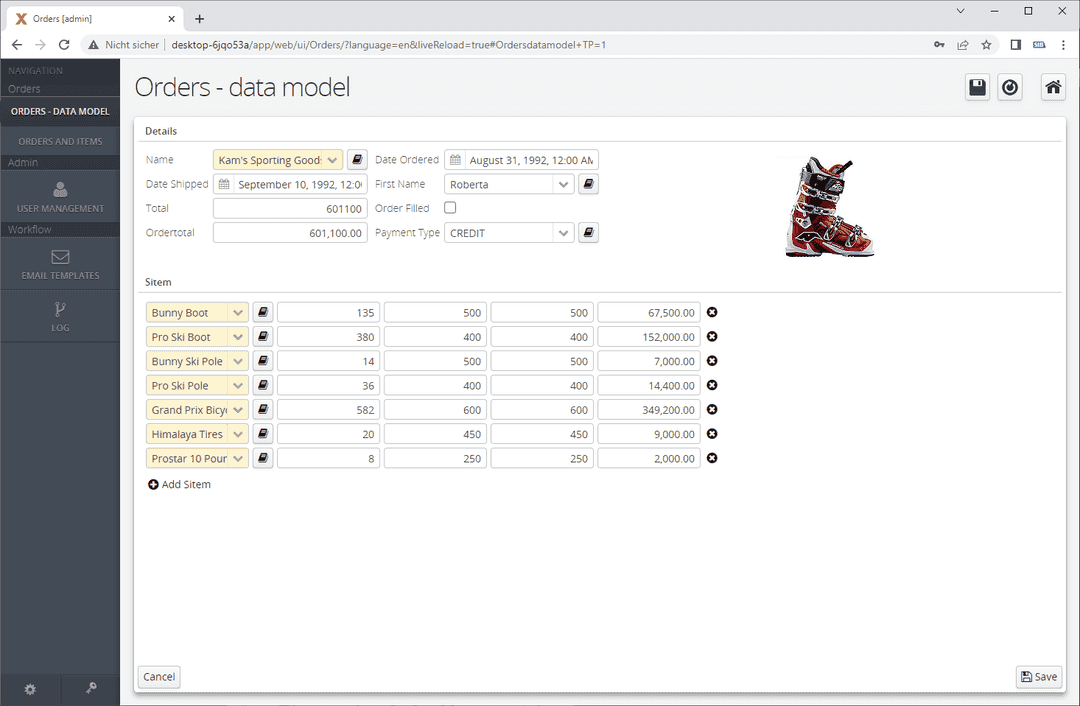
Open the screen in the Live Preview. Just a few steps were needed to create the Oracle Forms screen in SIB Visions VisionX based on the current data model. An additional list view with a search function was also created.
Oracle database to EDB Postgres Advanced Server migration
In the second step, the Oracle database is migrated to EDB Postgres Advanced Server/EDB Postgres Extended Server using EDB's Migration Toolkit.
The migration steps in connection with an Oracle Forms migration aren't different from a pure Oracle-to-EDB Postgres Advanced Server database migration. Therefore, this topic isn't discussed in detail here. Refer to the Migration Toolkit documentation.
Switch database connection to EDB Postgres
Switching from Oracle is a simple step in SIB Visions VisionX. In the migrated SIB Visions VisionX application, select the SIB Visions VisionX Settings screen and choose the Datasources tab. Select Edit to change the database connection from Oracle to EDB Postgres Advanced Server.

Create a SIB Visions VisionX application that uses an EDB Postgres Advanced Server/EDB Postgres Extended instance as a data source
Create a screen that connects to an existing table from an EDB Postgres Advanced Server/EDB Postgres Extended instance
For this example, the data was set up in an EDB Postgres Advanced Server 13 instance.
[edb@linux bin]$ ./psql -p 5444
psql (13.4.8, server 13.4.8)
Type "help" for help.

edb=# select version();
                                                                  version
-----------------------------------------------------------------------------------------------------------------------------------------------
PostgreSQL 13.4 (EnterpriseDB Advanced Server 13.4.8) on x86_64-pc-linux-gnu, compiled by gcc (GCC) 4.8.5 20150623 (Red Hat 4.8.5-36), 64-bit
(1 row)

edb=# show db_dialect;
db_dialect
------------
redwood
(1 row)

edb=#
edb=# CREATE TABLE public.tp_sales
edb-# (
edb(# salesman_id        INT4 Primary Key,
edb(# salesman_name      CLOB,
edb(# sales_region       VARCHAR2(30),
edb(# sales_amount       INT4
edb(# );
CREATE TABLE
edb=# INSERT INTO public.tp_sales VALUES (100,'TOM','USA',15000);
INSERT 0 1
edb=# INSERT INTO public.tp_sales VALUES (110,'JACK','UK',24000);
INSERT 0 1
edb=# INSERT INTO public.tp_sales VALUES (120,'TONNY','FRANCE',11000);
INSERT 0 1
edb=#
edb=# select * from public.tp_sales;
salesman_id | salesman_name | sales_region | sales_amount
-------------+---------------+--------------+--------------
         100 | TOM           | USA          |        15000
         110 | JACK          | UK           |        24000
         120 | TONNY         | FRANCE       |        11000
(3 rows)

edb=#
Open SIB Visions VisionX and create an application. The Create a New Application screen opens.
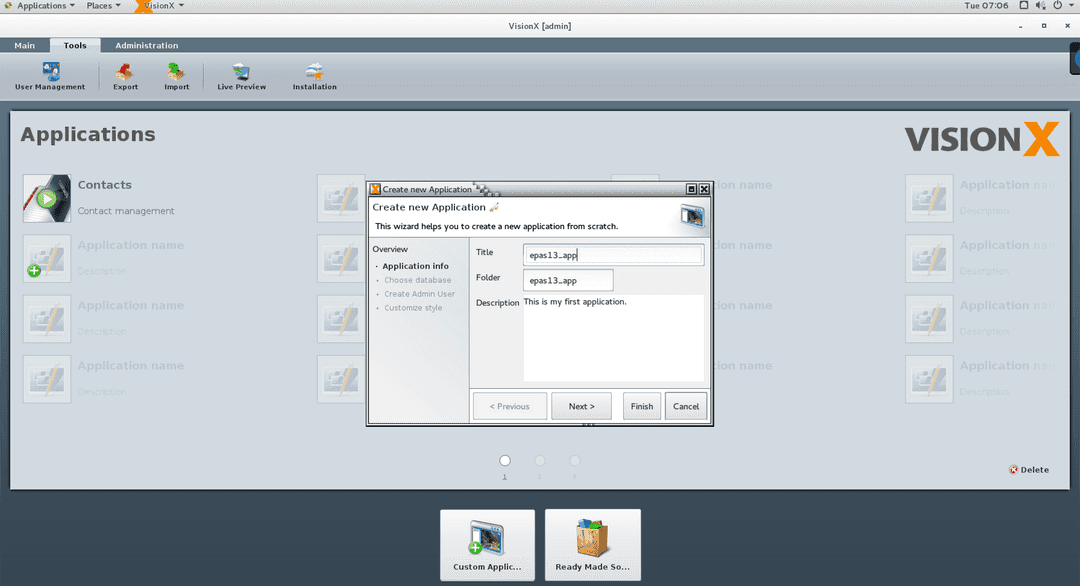
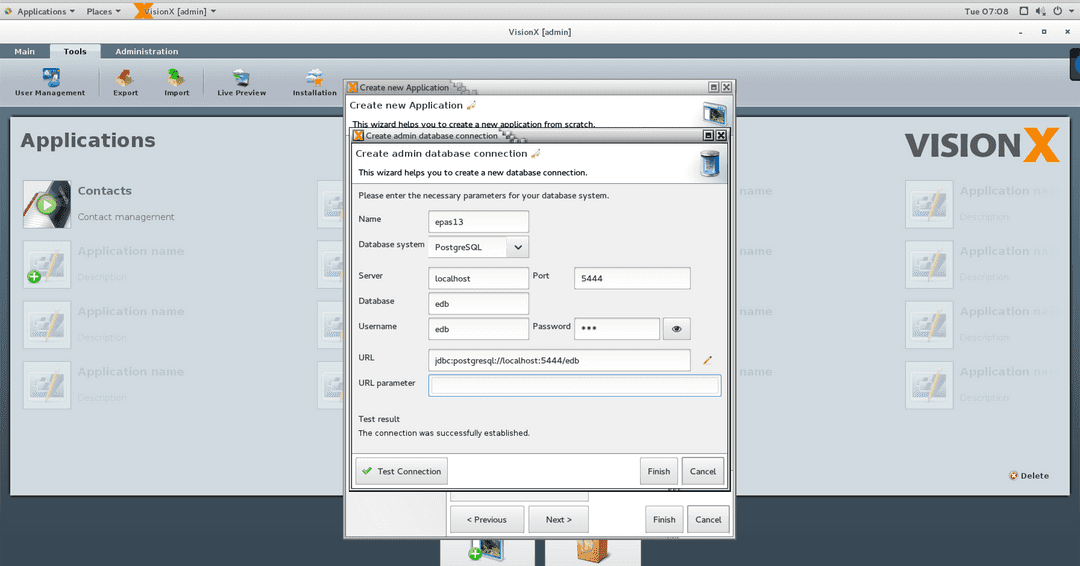
At the Choose Database step, enter the connection information for the EDB Postgres Advanced Server instance.
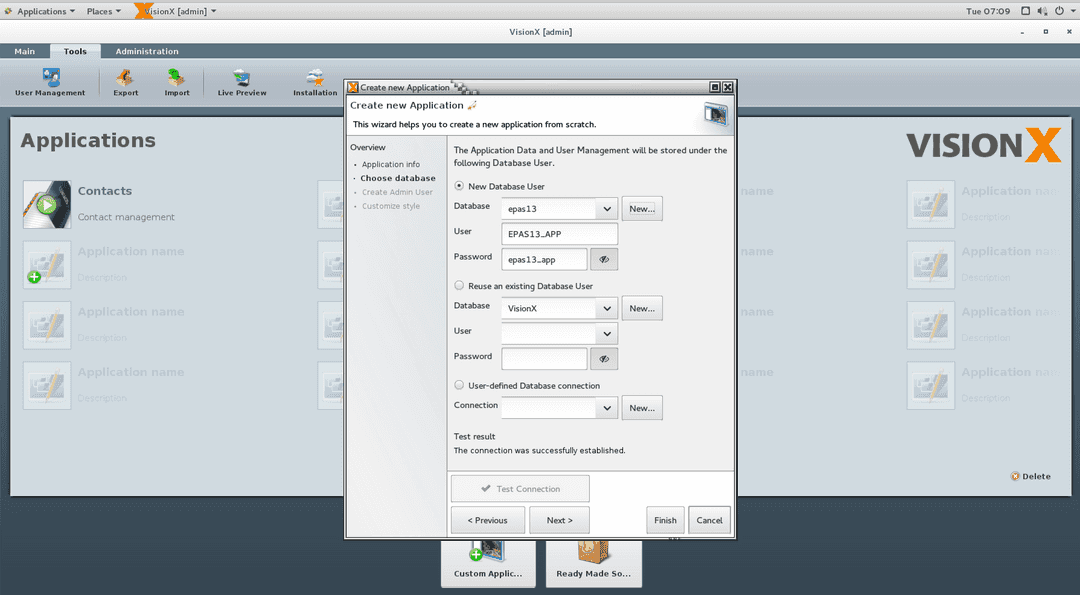
At the Create Admin User step, provide the user name and password.
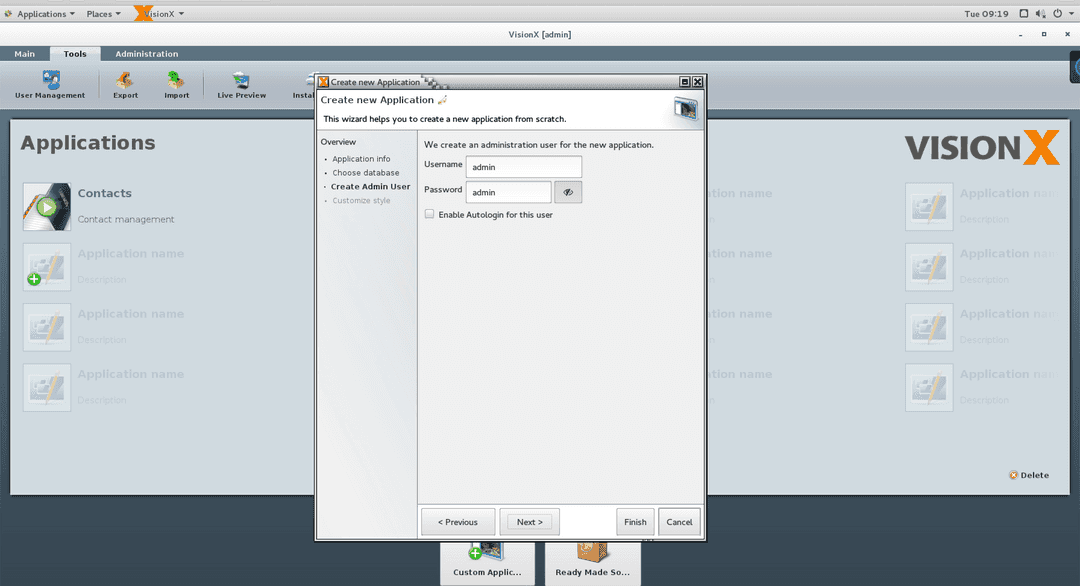
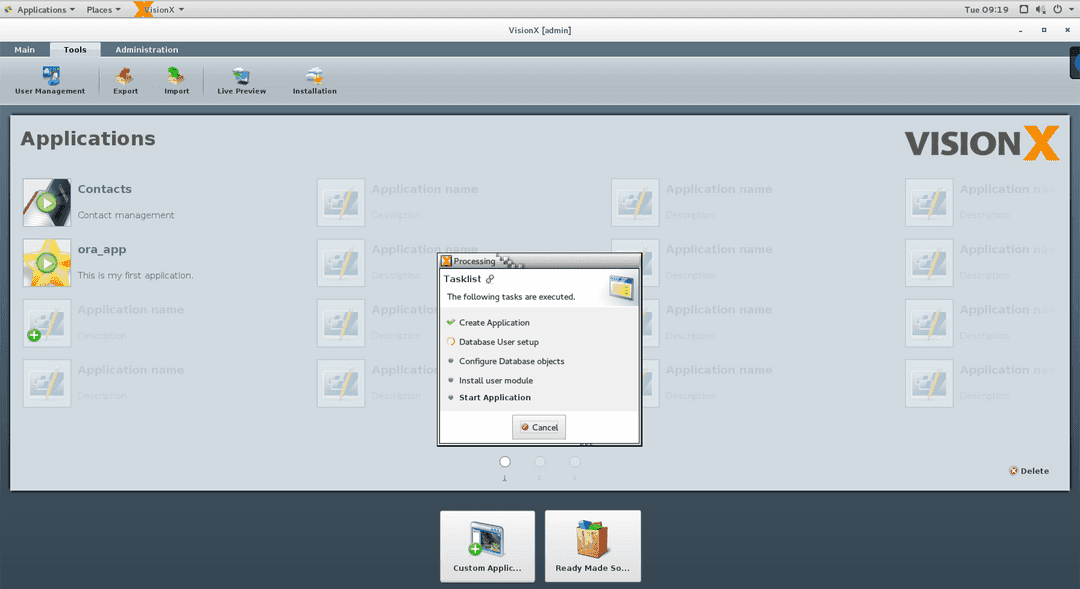
A Task List screen shows the application creation progress.
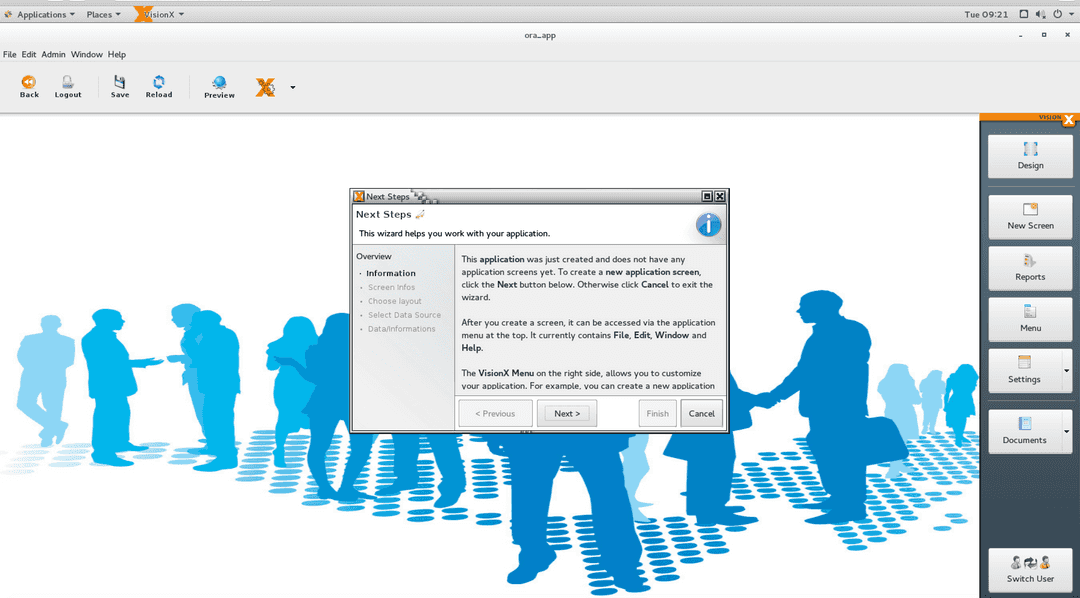
Once the application is created, the New Application Screen opens, which allows you to create a screen that's connected to the EDB Postgres Advanced Server 13.
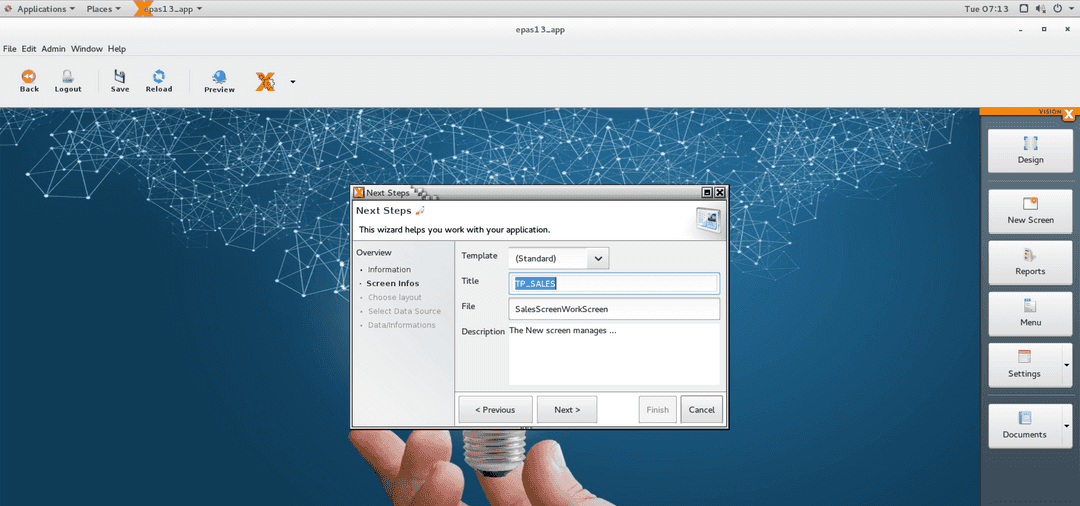
At the Screen Infos step, provide the required information for the screen.
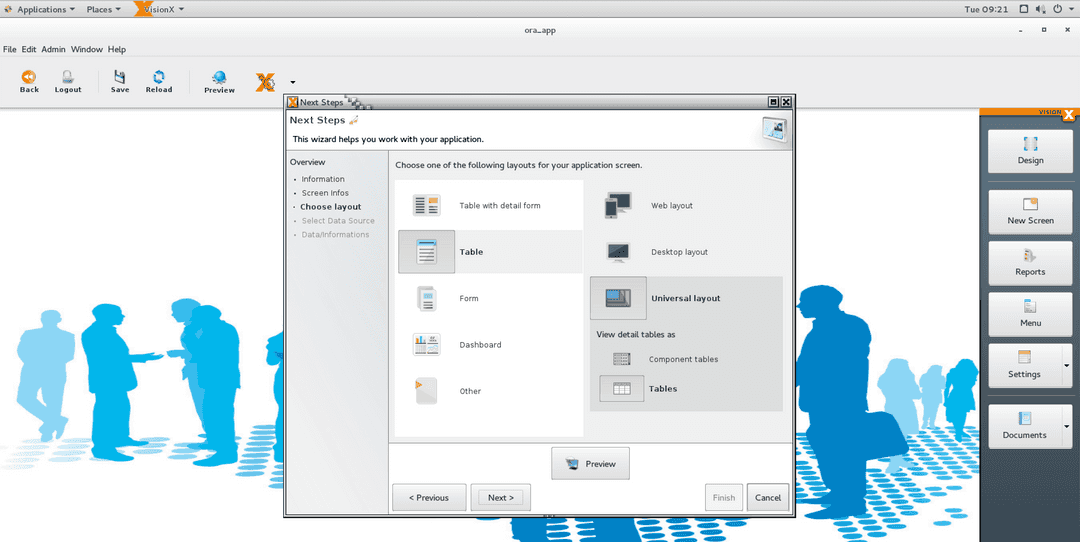
At the next step, select the required layout for the screen.
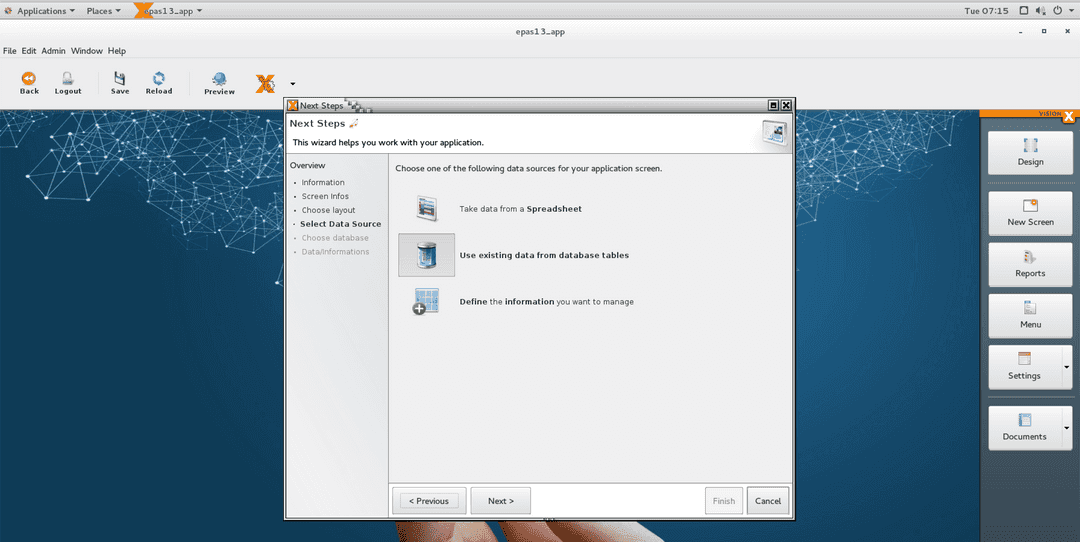
At the Select Data Source step, select the Use existing data from database tables option, which allows you to select the required table from the EDB Postgres Advanced Server 13 instance.
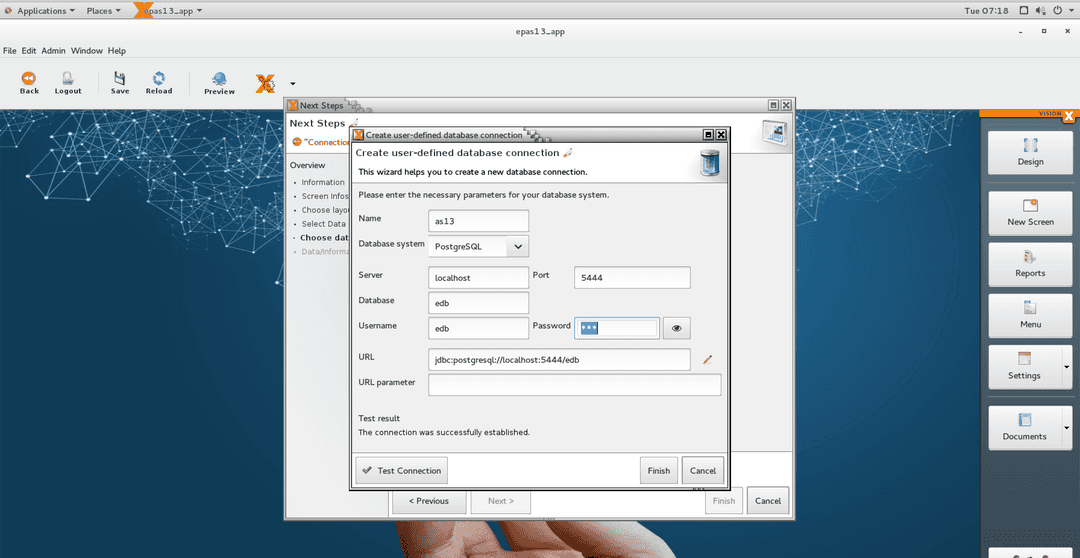
At the Choose Database step, provide the connection information for the EDB Postgres Advanced Server 13 instance.
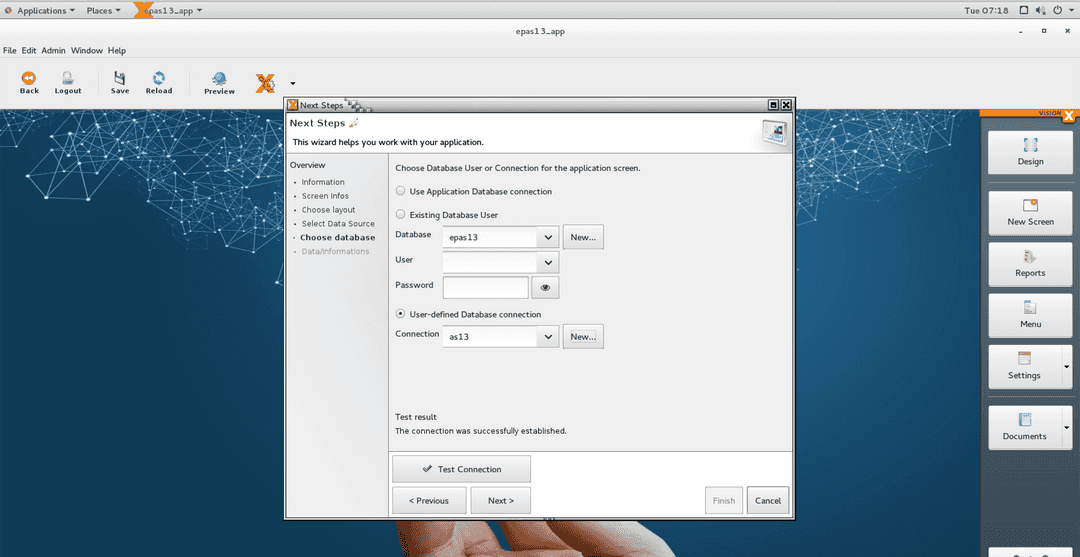
At the next step, from the list, select the table to use in the screen.
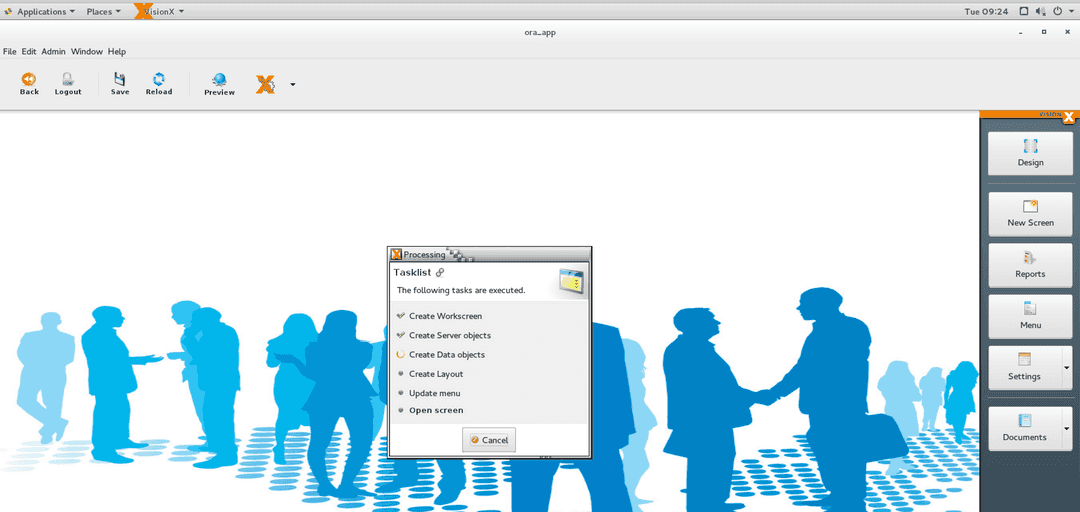
A Task List screen shows the screen creation progress.
Once the screen is created, it appears in design mode, where you can adjust it according to your requirements.

Open the screen in the Live Preview and enter a few records. The data is updated on the EDB Postgres Advanced Server 13 instance table.

edb=# select * from public.tp_sales;
Outputsalesman_id | salesman_name | sales_region | sales_amount -------------+---------------+--------------+-------------- 100 | TOM | USA | 15000 1 | UPDATED.... | test | 0 110 | ROBERT | UK | 100 (3 rows)
Create a screen that creates a table in the connected EDB Postgres Advanced Server/EDB Postgres Extended instance
In the application created in the previous example, select New Screen.

Provide the required information for the screen.
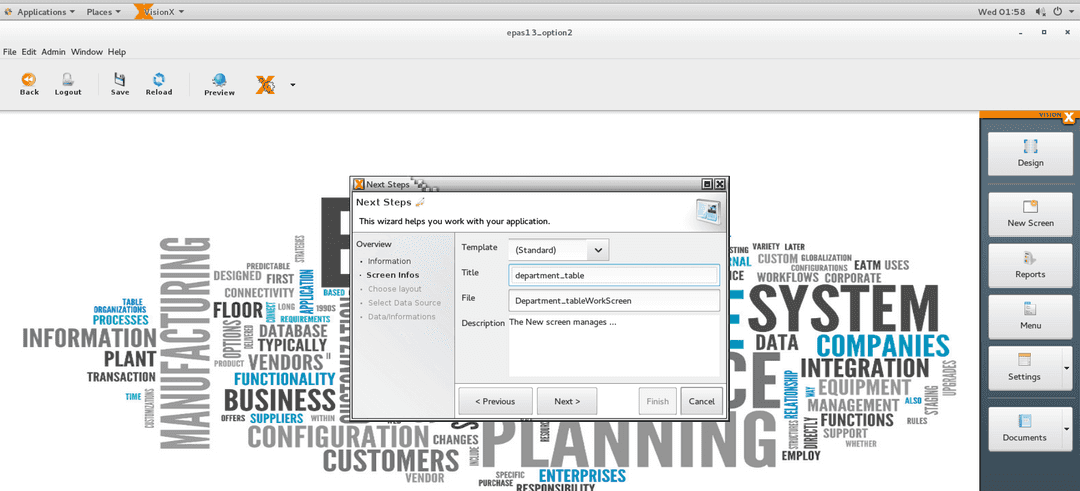
At the Choose Layout step, select the required layout for the screen.

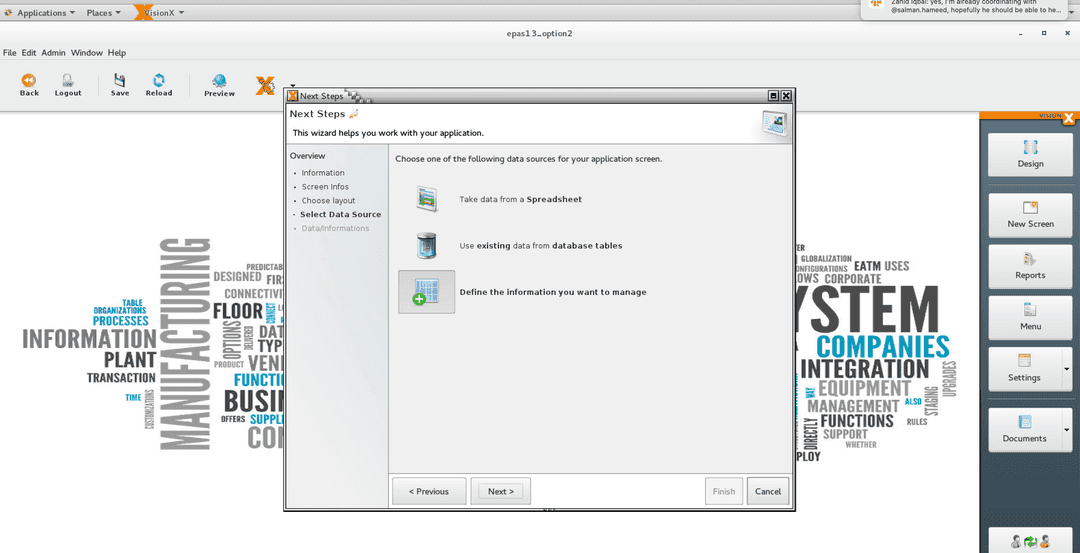
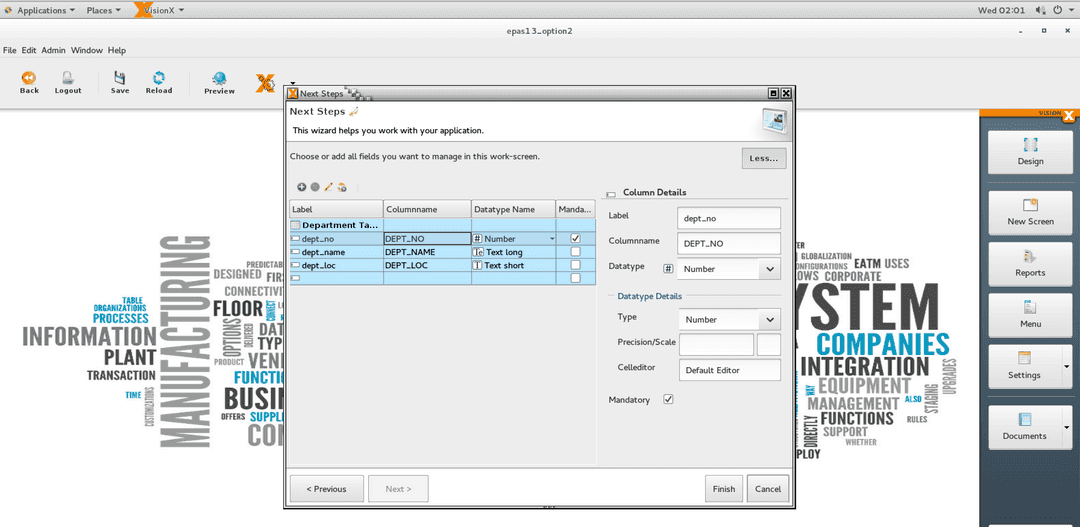
At the Select Data Source step, select the Define the information you want to manage option, which allows you to define the structure of the table that's created on Oracle.
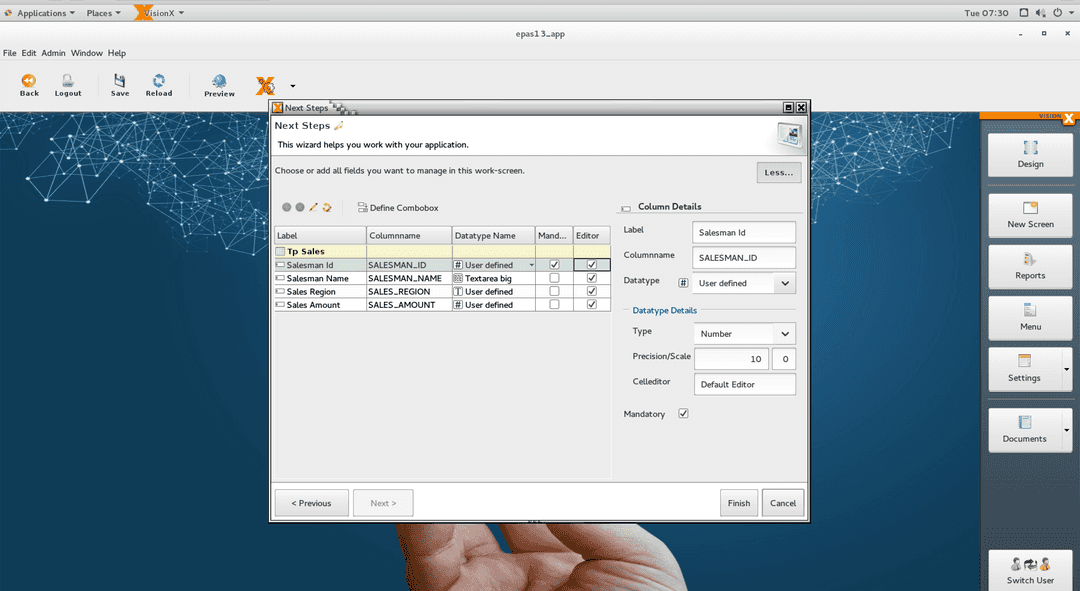
Create the structure of the table.
A Task List screen shows the screen creation progress.

Once the screen is created, it appears in design mode, where you can adjust it according to your requirements.
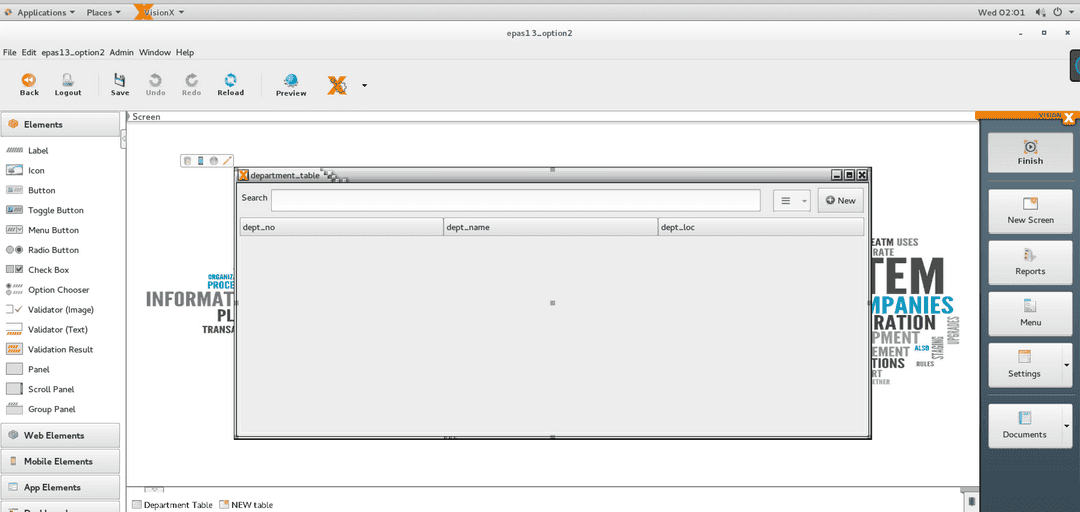
Open the screen in the Live Preview and enter a few records. The data is updated on the EDB Postgres Advanced Server 13 instance table.


- On this page
- FMB-based migration of an Oracle Forms application to an EDB Postgres Advanced Server/SIB Visions VisionX low-code application
- Data-model-based migration of an Oracle Forms/APEX application to an EDB Postgres Advanced Server/SIB Visions VisionX low-code application
- Create a SIB Visions VisionX application that uses an EDB Postgres Advanced Server/EDB Postgres Extended instance as a data source
Could this page be better? Report a problem or suggest an addition!