Performing a graphical installation on Windows v16
A graphical installation is a quick and easy way to install EDB Postgres Advanced Server on a Windows system. Use the wizard's screens to specify information about your system and system usage. After you complete the screens, the installer performs an installation based on the selections made during the setup process.
Assume administrator privileges, and double-click the
edb-as<xx>-server-xx.x.x-x-windows-x64executable file, where<xx>is the EDB Postgres Advanced Server version number.Note
To install EDB Postgres Advanced Server on some versions of Windows, you might need to right-click the file and select Run as Administrator from the context menu to invoke the installer with administrator privileges.
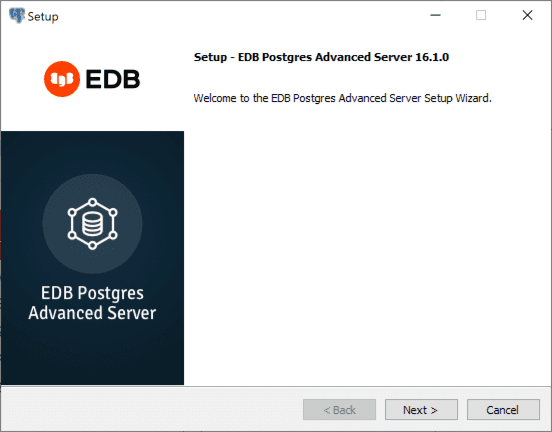
Select Next. The EnterpriseDB license agreement opens.
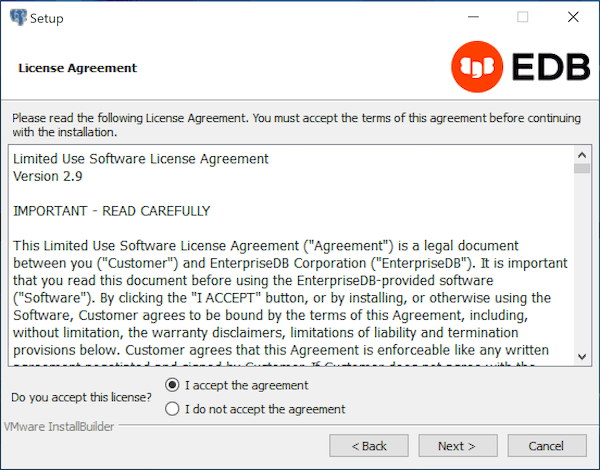
Carefully review the license agreement before selecting the appropriate option. Select Next.
The Installation Directory window opens.
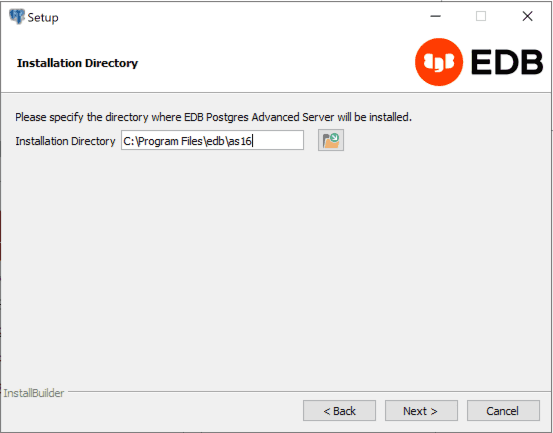
By default, the EDB Postgres Advanced Server installation directory is:
C:\Program Files\edb\as<xx>
Where
<xx>is the EDB Postgres Advanced Server version number.Accept the default installation location and select Next. Alternatively, select the file browser icon to open the Browse For Folder dialog box to choose a different installation directory.
Note
Don't store the
datadirectory of a production database on an NFS file system.The Select Components window opens, which contains a list of optional components that you can install with the EDB Postgres Advanced Server setup wizard. You can omit a component from the EDB Postgres Advanced Server installation by clearing the check box next to its name.
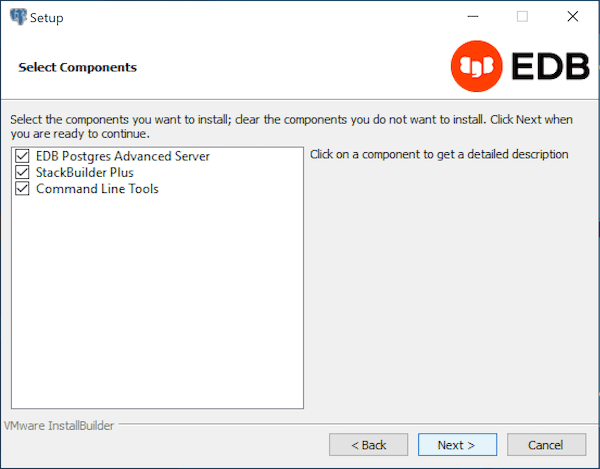
The setup wizard can install the following components while installing EDB Postgres Advanced Server:
Select EDB Postgres Advanced Server to install EDB Postgres Advanced Server.
Select StackBuilder Plus to install that utility. The StackBuilder Plus utility is a graphical tool that can update installed products or download and add supporting modules (and the resulting dependencies) after your EDB Postgres Advanced Server setup and installation completes. See Using StackBuilder Plus for more information.
The Command Line Tools option installs command line tools and supporting client libraries including these and others:
- libpq
- psql
- EDB*Loader
- ecpgPlus
- pg_basebackup, pg_dump, and pg_restore
- pg_bench
Note
The command line tools are required if you're installing EDB Postgres Advanced Server or pgAdmin 4.
After selecting the components you want to install, select Next. The Additional Directories window opens.

By default, the EDB Postgres Advanced Server data files are saved to:
C:\Program Files\edb<xx>\data
Where
<xx>is the EDB Postgres Advanced Server version number.The default location of the EDB Postgres Advanced Server
Write-Ahead Log (WAL) Directoryis:C:\Program Files\edb\as<xx>\data\pg_wal
EDB Postgres Advanced Server uses write-ahead logs to promote transaction safety and speed transaction processing. When you make a change to a table, the change is stored in shared memory, and a record of the change is written to the write-ahead log. When you perform a COMMIT, EDB Postgres Advanced Server writes contents of the write-ahead log to disk.
Accept the default file locations, or use the file browser to select a different location. Select Next.
The EDB Postgres Advanced Server Dialect window opens. The server dialect specifies the compatibility features supported by EDB Postgres Advanced Server.
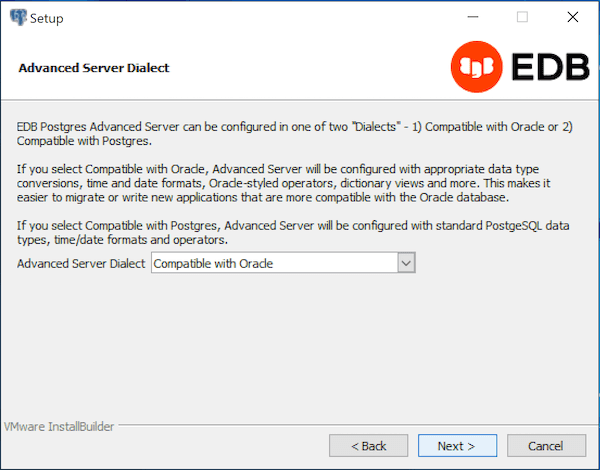
From the list, select a server dialect.
By default, EDB Postgres Advanced Server installs in Compatible with Oracle mode. You can choose between Compatible with Oracle and Compatible with PostgreSQL installation modes.
If you select Compatible with Oracle, the installation includes the following features:
Data dictionary views that are compatible with Oracle databases.
Oracle data type conversions.
Date values displayed in a format compatible with Oracle syntax.
Support for Oracle-styled concatenation rules. (If you concatenate a string value with a
NULLvalue, the returned value is the value of the string.)Schemas (
dboandsys) compatible with Oracle databases added to theSEARCH_PATH.Support for the following Oracle built-in packages.
Package Functionality compatible with Oracle databases dbms_alertProvides the capability to register for, send, and receive alerts. dbms_jobProvides the capability for creating, scheduling, and managing jobs. dbms_lobProvides the capability to manage on large objects. dbms_outputProvides the capability to send messages to a message buffer or get messages from the message buffer. dbms_pipeProvides the capability to send messages through a pipe within or between sessions connected to the same database cluster. dbms_rlsEnables the implementation of Virtual Private Database on certain EDB Postgres Advanced Server database objects. dbms_sqlProvides an application interface to the EDB dynamic SQL functionality. dbms_utilityProvides various utility programs. dbms_aqadmProvides supporting procedures for Advanced Queueing functionality. dbms_aqProvides message queueing and processing for EDB Postgres Advanced Server. dbms_profilerCollects and stores performance information about the PL/pgSQL and SPL statements that are executed during a performance profiling session. dbms_randomProvides a number of methods to generate random values. dbms_redactEnables redacting or masking of data that's returned by a query. dbms_lockProvides support for the DBMS_LOCK.SLEEPprocedure.dbms_schedulerProvides a way to create and manage jobs, programs, and job schedules. dbms_cryptoProvides functions and procedures to encrypt or decrypt RAW, BLOB, or CLOB data. You can also use DBMS_CRYPTOfunctions to generate cryptographically strong random values.dbms_mviewProvides a way to manage and refresh materialized views and their dependencies. dbms_sessionProvides support for the DBMS_SESSION.SET_ROLEprocedure.utl_encodeProvides a way to encode and decode data. utl_httpProvides a way to use the HTTP or HTTPS protocol to retrieve information found at a URL. utl_fileProvides the capability to read from and write to files on the operating system’s file system. utl_smtpProvides the capability to send emails over the simple mail transfer protocol (SMTP). utl_mailProvides the capability to manage email. utl_urlProvides a way to escape illegal and reserved characters in a URL. utl_rawProvides a way to manipulate or retrieve the length of raw data types. This isn't a comprehensive list of the compatibility features for Oracle included when EDB Postgres Advanced Server is installed in Compatible with Oracle mode. For more information, see the Database compatibility for Oracle developers built-in package.
If you choose to install in Compatible with Oracle mode, the EDB Postgres Advanced Server superuser name is enterprisedb.
If you select Compatible with PostgreSQL, EDB Postgres Advanced Server exhibits compatibility with PostgreSQL version 15. If you choose to install in Compatible with PostgreSQL mode, the default EDB Postgres Advanced Server superuser name is postgres. For detailed information about PostgreSQL functionality, see the PostgreSQL website.
After specifying a configuration mode, select Next. The Password window opens.
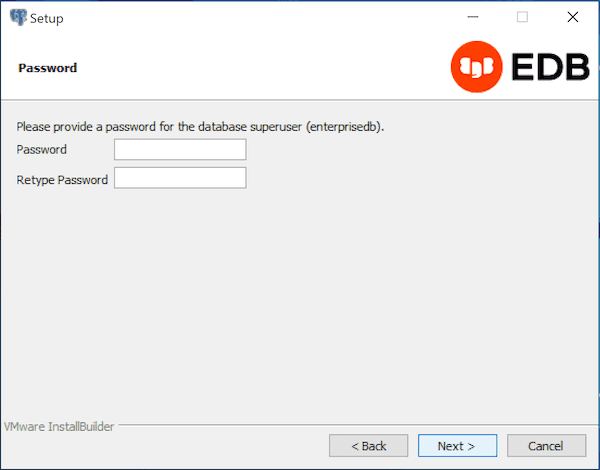
EDB Postgres Advanced Server uses the password specified on the Password window for the database superuser. The specified password must confirm to any security policies on the EDB Postgres Advanced Server host.
After you enter a password in the Password field and confirm the password in the Retype Password field, select Next. The Additional Configuration window opens.
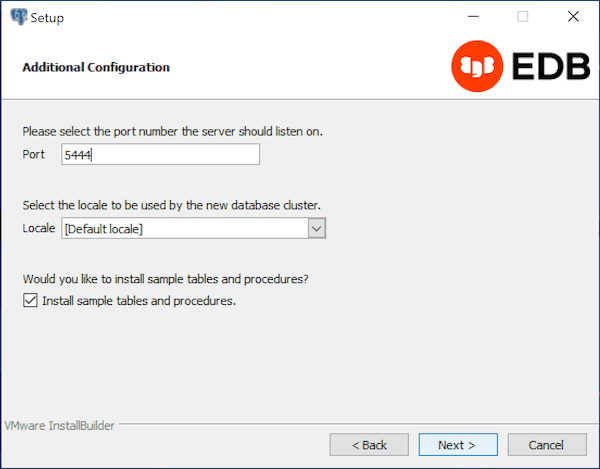
Use the fields on the Additional Configuration window to specify installation details:
- Use the Port field to specify the port number for EDB Postgres Advanced Server to listen to for connection requests from client applications. The default is
5444. - If the Locale field is set to [Default locale], EDB Postgres Advanced Server uses the system locale as the working locale. From the list, select an alternative locale for EDB Postgres Advanced Server.
- By default, the setup wizard installs corresponding sample data for the server dialect specified by the compatibility mode (Oracle or PostgreSQL). If you don't want to install sample data, clear the check box next to Install sample tables and procedures.
- Use the Port field to specify the port number for EDB Postgres Advanced Server to listen to for connection requests from client applications. The default is
After verifying the information on the Additional Configuration window, select Next. The Dynatune Dynamic Tuning: Server Utilization window opens.
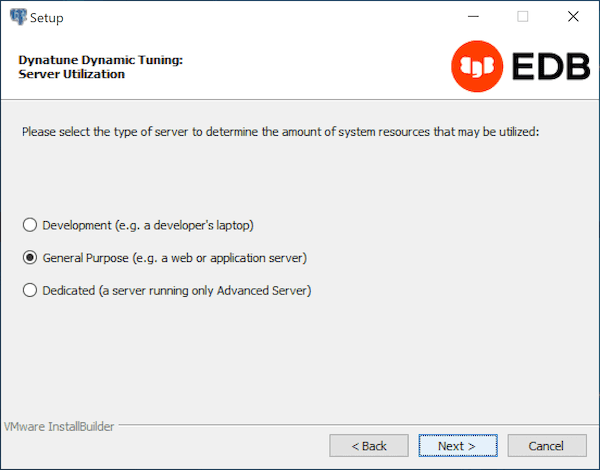
The setup wizard helps with performance tuning by way of the Dynatune Dynamic Tuning feature. Dynatune functionality allows EDB Postgres Advanced Server to make optimal use of the system resources available on the host machine on which it's installed.
Use the options on the Server Utilization window to set the initial value of the
edb_dynatuneconfiguration parameter. Theedb_dynatuneconfiguration parameter determines how EDB Postgres Advanced Server allocates system resources.- Select Development to set the value of
edb_dynatuneto33. A low value dedicates the least amount of the host machine’s resources to the database server. This seletion is a good choice for a development machine. - Select General Purpose to set the value of
edb_dynatuneto66. A mid-range value dedicates a moderate amount of system resources to the database server. This setting is good for an application server with a fixed number of applications running on the same host as EDB Postgres Advanced Server. - Select Dedicated to set the value of
edb_dynatuneto100. A high value dedicates most of the system resources to the database server. This setting is a good choice for a dedicated server host.
(After the installation is complete, you can adjust the value of
edb_dynatuneby editing thepostgresql.conffile, located in thedatadirectory of your EDB Postgres Advanced Server installation. After editing thepostgresql.conffile, you must restart the server for your changes to take effect.)Select the appropriate setting for your system, and select Next. The Dynatune Dynamic Tuning: Workload Profile window opens.
- Select Development to set the value of
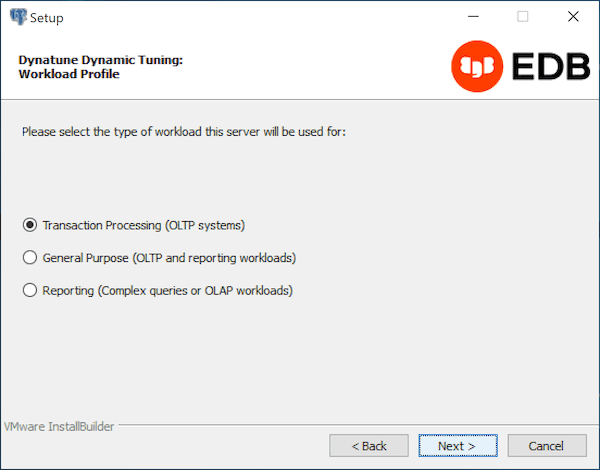
Use the options on the Workload Profile window to specify the initial value of the
edb_dynatune_profileconfiguration parameter. Theedb_dynatune_profileparameter controls performance-tuning aspects based on the type of work that the server performs.- Select Transaction Processing (OLTP systems) to specify an
edb_dynatune_profilevalue ofoltp. Recommended when EDB Postgres Advanced Server is supporting heavy online transaction processing. - Select General Purpose (OLTP and reporting workloads) to specify an
edb_dynatune_profilevalue ofmixed. Recommended for servers that provide a mix of transaction processing and data reporting. - Select Reporting (Complex queries or OLAP workloads) to specify an
edb_dynatune_profilevalue ofreporting. Recommended for database servers used for heavy data reporting.
After the installation is complete, you can adjust the value of
edb_dynatune_profileby editing thepostgresql.conffile, located in thedatadirectory of your EDB Postgres Advanced Server installation. After editing thepostgresql.conffile, you must restart the server for your changes to take effect.For more information about edb_dynatune and other performance-related topics, see the Dynatune.
- Select Transaction Processing (OLTP systems) to specify an
Select Next.
By default, EDB Postgres Advanced Server is configured to start the service when the system boots. The Pre Installation Summary opens.
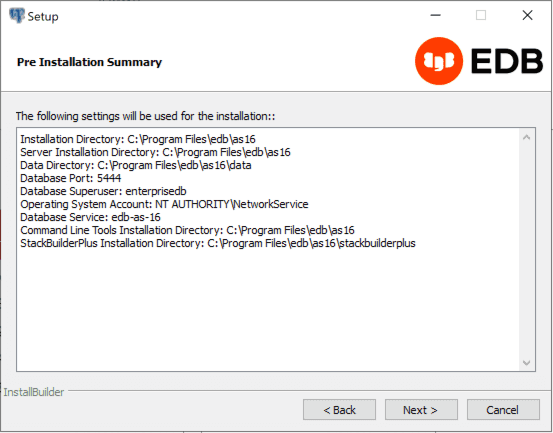
The Pre Installation Summary provides an overview of the options specified during the setup process.
Review the options before selecting Next. (Use Back to navigate back through the screens and update any options.)
The Ready to Install window confirms that the installer has the information it needs about your configuration preferences to install EDB Postgres Advanced Server.
Select Next. As each supporting module is unpacked and installed, the module’s installation is confirmed with a progress bar.
Before the setup wizard completes the EDB Postgres Advanced Server installation, it prompts:
Launch StackBuilder Plus at exit?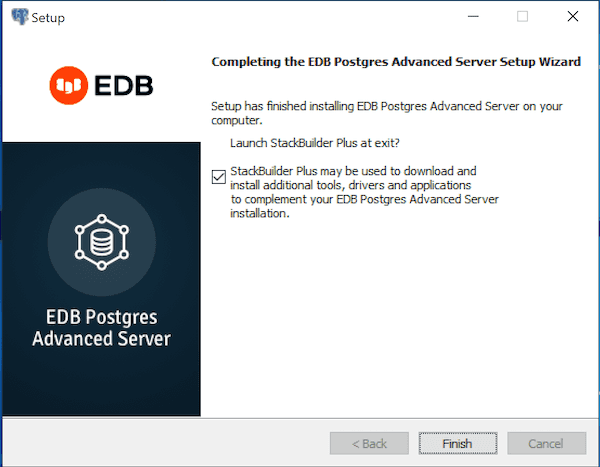
EDB Postgres StackBuilder Plus is included with the installation of EDB Postgres Advanced Server and its core supporting components. StackBuilder Plus is a graphical tool that can update installed products or download and add supporting modules and the resulting dependencies after your EDB Postgres Advanced Server setup and installation completes. See Using StackBuilder Plus for more information.
To complete the EDB Postgres Advanced Server installation, clear the StackBuilder Plus check box and select Finish. Alternatively, accept the default and proceed to StackBuilder Plus.