How to deploy WordPress with highly available PostgreSQL

WordPress uses MySQL as its default database management system. For users who prefer PostgreSQL, this raises a commonly asked question, “Is there any way to use WordPress with PostgreSQL rather than MySQL?”
You can use this guide to get an overview on how to do just that.
Introduction
WordPress is open source software that is commonly used to create websites, blogs, or applications. It comes with many designs and features/plugins that can be added to your WordPress installation. WordPress also supports many commercial plugins that can be used depending on your requirements.
Its flexible content management system makes it easy for you to manage your content—you can create drafts, schedule publication, and look at your post revisions. WordPress also has the option to make your content public or private and secure posts and pages with a password. WordPress is free and available under license GPLv2 (or later) from the Free Software Foundation.
Prerequisites
To run WordPress you should have at least PHP version 5.2.4+, a database (in our case we will be using PostgreSQL), and an Apache or Nginx server. One should always try to install the latest versions available according to your environment, as some of these versions may have reached end-of-life and you may expose your site to security vulnerabilities.
What is PG4WP?
As mentioned above, by default WordPress uses the MySQL database engine. If we want to use WordPress with PostgreSQL instead, we will need some kind of plugin. PostgreSQL for WordPress (PG4WP) is one such plugin that allows you to install and use WordPress with a PostgreSQL database as a backend.
How to install WordPress with PostgreSQL on Centos7
For our example we'll be using Centos 7 as our operating system.
Prerequisites
As discussed above, we will need these following items to be installed on our Centos7 Linux server:
- Apache or Nginx as web server
- PHP version 5.6 or higher (in our case we will be using v7.4)
- Any version of PostgreSQL (in our case we will be using v12)
Step 1: Updating the system and making sure ports are not blocked
We need to make sure that our system firewall / iptables or SELinux is not blocking any port(s) that will be required; otherwise, we might face issues with proper user permissions.
To disable SELinux use following command:
sudo setenforce 0
Once SELinux is disabled, we should also update our system. This is a good practice and will make sure that our system is up to date. This can be done by issuing following commands:
		sudo yum clean all
		sudo yum -y update
This action may require some time depending on the age of your system software and your internet speed.
Step 2: Setting up an Apache web server
To install Apache we need to run following command:
sudo yum -y install httpd
This will install Apache, and you should see the installation complete message as shown below.

Next, we need to start the service by issuing following command:
sudo systemctl start httpd
If we want to start Apache at boot time, so it gets started automatically without requiring any manual commands, we need to run the following:
sudo systemctl enable httpd
To confirm that Apache is up and running, we can check the status with the following command:
sudo systemctl status httpd
This should display service status as running, as shown below:

We can also test it by opening any browser and typing “localhost” or system IP. This will show a “Testing 123” page as shown below:
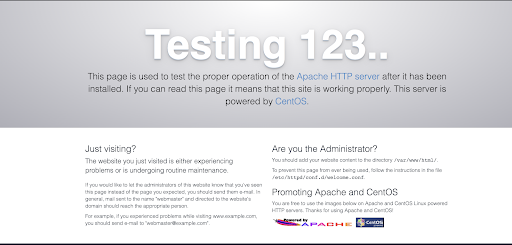
That's it! We are done with setting up Apache.
Step 3: Setting up PHP
The latest version of WordPress works with PHP versions 5.6 or above. Below we provide the steps to install the latest stable release of PHP, which is version 7.4.
First, we need to add the required repositories. Run the following commands:
sudo yum -y install https://dl.fedoraproject.org/pub/epel/epel-release-latest-7.noarch.rpm

sudo yum -y install https://rpms.remirepo.net/enterprise/remi-release-7.rpm
After installing the required repositories, we will now install PHP 7.4 by running the following commands:
sudo yum -y install yum-utils
sudo yum-config-manager --enable remi-php74
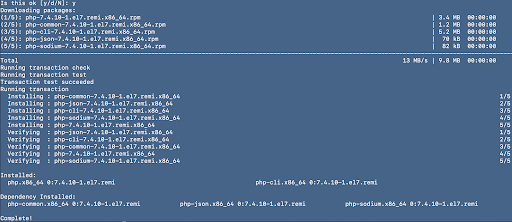
sudo yum -y install php php-cli
Once finished, you should see the following Installation Complete message:
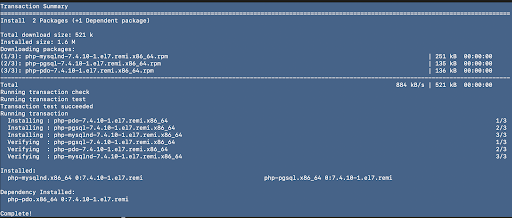
Now we have PHP installed, but we need to set up PHP with PostgreSQL. To do that, we will need to install a few other modules by running the following command:
sudo yum -y install php-mysqlnd php-pgsql
Once finished, you should see the Installation Complete message below:
After installing PHP v7.4, we need to restart the Apache service. That can be done by running following command:
sudo systemctl restart httpd.service
Step 4: Installing the PostgreSQL database
To install PostgreSQL, we first need to install the repo. This can be done by running the following command:
wget
https://download.postgresql.org/pub/repos/yum/10/redhat/rhel-7-x86_64/pgdg-redhat-repo-latest.noarch.rpm
Once the repo file is downloaded, we need to install it by running the following command:
sudo rpm -ivh pgdg-redhat-repo-latest.noarch.rpm
This will install the repo. Once done we can proceed to installing PostgreSQL. I will be installing version 12 by running the following command:
sudo yum install -y postgresql12-*
That’s it! Our PostgreSQL database is installed.
Step 5: Setting up the cluster
Once PostgreSQL is installed, we need to set up the cluster. We can do that by browsing to the bin directory located at “/usr/pgsql-12/bin/” and by running the following commands:
		sudo su - postgres
		cd /usr/pgsql-12/bin/
		./initdb -D /tmp/testdata  --no-locale -E UTF8
This will initialize the database as shown below:

Next we need to start the service. Run the following command:
./pg_ctl -D /tmp/testdata start "-o -p 5444"
Step 6: Creating a database and user in PostgreSQL
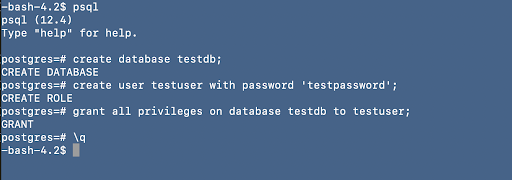
To create a database, open your terminal, move to your PostgreSQL bin directory, and run following commands in sequence:
		sudo su - postgres
		psql -p 5444
		create database testdb;
		create user testuser with password 'testpassword';
		grant all privileges on database testdb to testuser;
This will create your testdb and testuser with testpassword and will grant the required privileges, as shown below:
Step 7: Downloading and extracting the latest WordPress version
Now comes the part where we need to download the latest version of WordPress, which can be found on their website.
Go to your Apache server directory (i.e., “/var/www/html”) and download the file there by running following command:
wget https://wordpress.org/latest.zip
Once the download is complete, unzip the folder and copy the contents back to your required folder. In my case I have created a folder named “test-with-postgres” in “/var/www/html”. This can be done by the running following commands:
		unzip latest.zip
		mkdir test-with-postgres
		cp -rp wordpress/* test-with-postgres/
Step 8: Configuring PG4WP plugin
Installing the PG4WP plugin before performing WordPress configuration is recommended to avoid issues. As this helps startup the database to ensure that the plugin is loaded successfully
The original PG4WP plugin can be found on the WordPress site. Over time there have been many improvements, and people have released forked versions of the pg4wp plugin, many of which are listed here. In our example we'll be using the version developed by Kevin Locke, as we have found this to be compatible with any version of wordpress so far.
As we need to clone the forked version we will be needing git. To install git run the following command:
yum install git
Go to the wp-content directory—which in my case is located at "/var/www/html/test-with-postgres/wp-content“—and clone the PG4WP plugin by using the following command:
git clone https://github.com/kevinoid/postgresql-for-wordpress.git
Move the content to the wp-content directory:
mv postgresql-for-wordpress/pg4wp pg4wp
We also need to copy db.php file to the wp-content directory, which can be done by running the following command:
cp pg4wp/db.php db.php
Step 9: Updating wp-config.php with your database credentials
A sample file by the name of wp-config-sample.php is created for us under our webroot directory, which in our case is “/var/www/html/test-with-postgres”. We can move there, make a copy of it, and rename it wp-config.php by running the following commands:
        cd /var/www/html/test-with-postgres
		cp -rp wp-config-sample.php wp-config.php
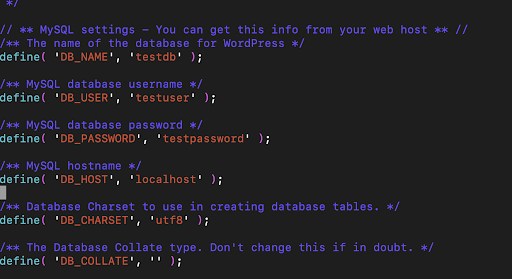
We can now update the wp-config.php file with the database name, username, and password that we created in Step 6, as shown below:
Step 10: Installing WordPress
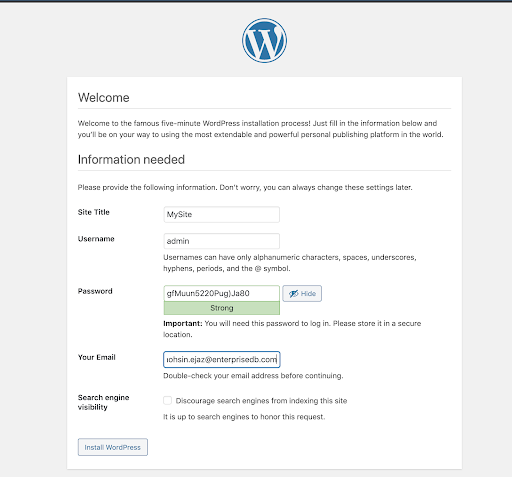
Now we are ready to install WordPress. We can do that by going to “http://localhost/test-with-postgres/wp-admin/install.php” and entering the sitename, username, password, and email address as shown below:
By pressing “Install WordPress” we should receive a confirmation message:
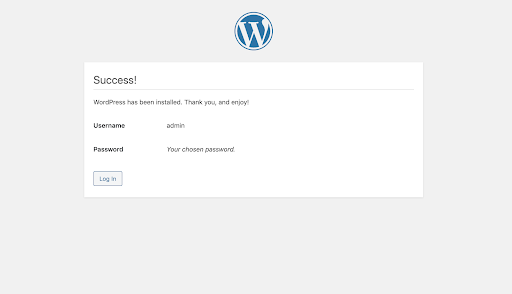
And we are done!
Step 11: Logging into WordPress and verification of PostgreSQL as backend
We can now log in to the admin panel of our newly created WordPress site by going to “http://localhost/test-with-postgres/wp-admin/” and providing the credentials that we have used in Step 10.
We can also visit the default WordPress page at http://localhost/test-with-postgres/.
To confirm that PostgreSQL is being used as backend, we can log in to the cluster and verify the records in our database by running the following commands:
		sudo su - postgres
		psql -U testuser -p 5444 testdb
		\dt
The \dt command will display all the relations in the current database so we should be able to view the tables that WordPress has created, and this will confirm that PostgreSQL has been used as backend for WordPress:

I hope that this article has proven helpful and given you some insight to the level of ease with which deployment of WordPress with PostgreSQL is possible.