pgAdmin, a comparable tool to PL/SQL Developer for PostgreSQL

pgAdmin is the leading open source management tool for PostgreSQL, the world’s most advanced open source database. pgAdmin 4 is designed to meet the needs of both novice and experienced Postgres users alike, providing a powerful graphical interface that simplifies the creation, maintenance, and use of database objects.
pgAdmin is a free software project released under the PostgreSQL/Artistic license. pgAdmin 4 is a software built using Python and JavaScript/jQuery. A desktop runtime written in C++ with Qt allows it to run standalone for individual users, or the web application code may be deployed directly on a web server for use by one or more users through their web browser.
How to download pgAdmin 4
pgAdmin 4 can be used on Linux, FreeBSD, Solaris, macOS, and Windows platforms to manage PostgreSQL running on any platform.
You can download the pgAdmin 4 installer for the Windows operating system here: https://www.pgadmin.org/download/
The latest version of pgAdmin 4 is version 4.16.
Execute the pgadmin4-4.16-x86.exe installer file and follow the on-screen steps for the pgAdmin 4 installation.
Official Website
How to get started with pgAdmin 4
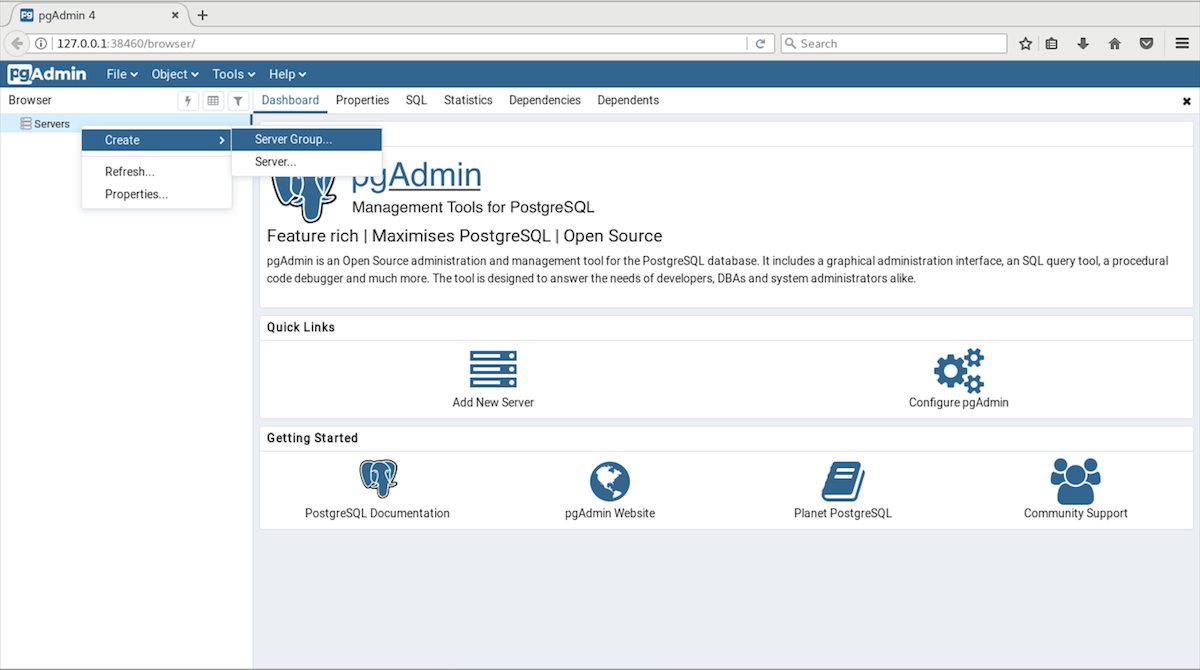
- Before you can use the pgAdmin client to manage the objects that reside on your PostgreSQL server, you must define a connection to the server. You can (optionally) use the Server Group dialog to create server groups to organize the server connections within the tree control for easier management. To open the Server Group dialog, right-click on the Servers node of the tree control, and select Server Group from the Create menu.
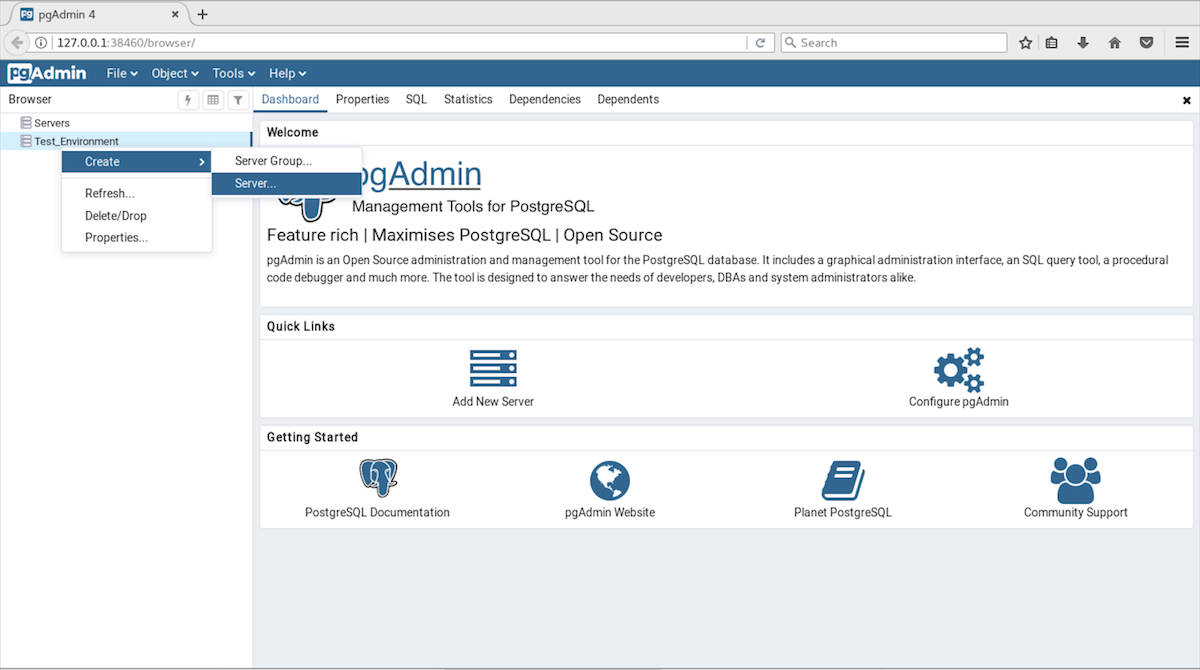
- Use the fields on the Server dialog to define the connection properties for each new server that you wish to manage with pgAdmin. To open the Server dialog, right-click on the Servers node of the tree control, and select Server from the Create menu and add the database server. Refer to snapshots 1 to 5.
- After defining a server connection, right-click on the server name, and select Connect to server to authenticate with the server, and start using pgAdmin to manage objects that reside on the server.
Snapshot 1: Right click on the Servers==>Click on Create ==>Click on Server Group.
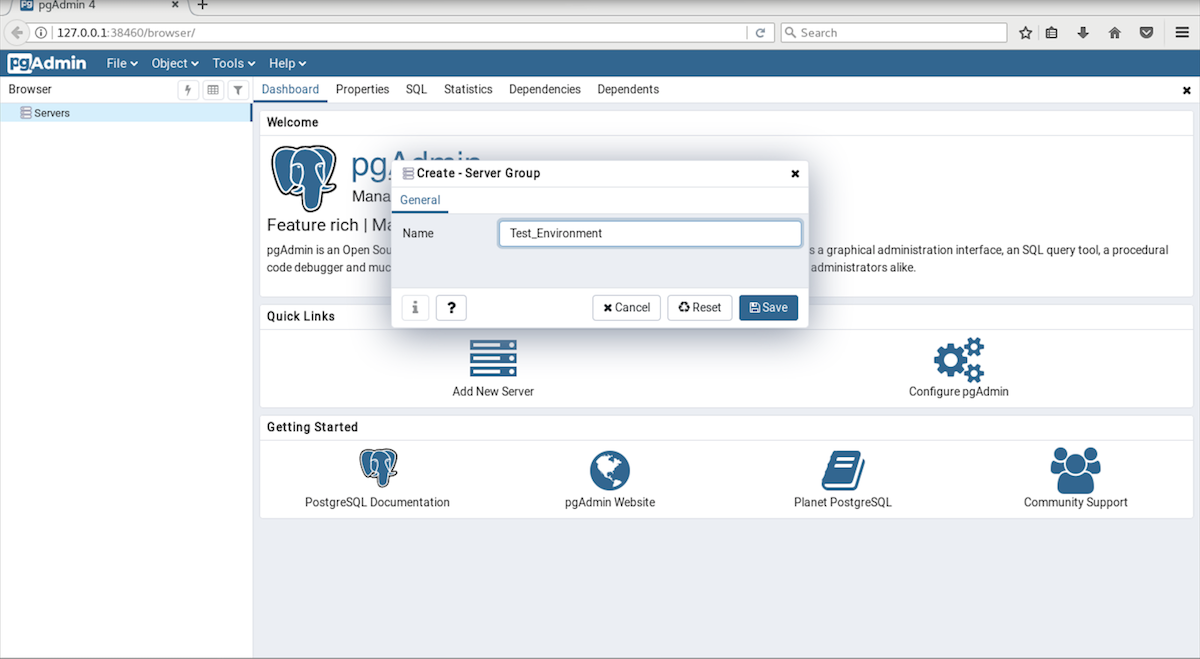
Snapshot 2: Enter the name of Server Group and click on Save.
Snapshot 3: Add the server into the new Server Group. In our case, it’s Test_Environment.
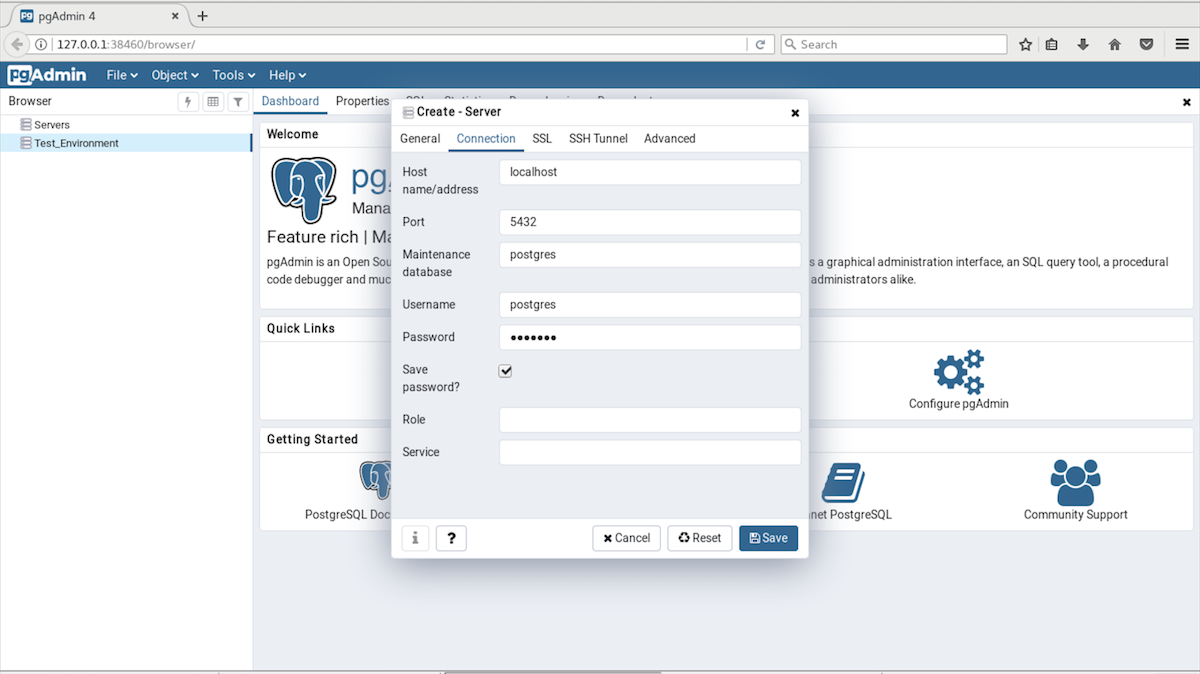
Snapshot 4: Enter the Name and click on the connection. You can give any name which is relevant to your environment.

Snapshot 5: In the connection tab, Enter the Postgres database cluster details on which you want to connect. In my below example, My Postgres database cluster is running locally on port 5432.
You can add the remote server by giving the remote database cluster IP. Next, Enter the database username and password and click on the save.
You can get more information about these fields on the below URL.
https://www.pgadmin.org/docs/pgadmin4/4.16/server_dialog.html
Query Tool
The Query Tool is a powerful, feature-rich environment that allows you to execute SQL commands and review the results. You can access the Query Tool via the Query Tool menu option on the Tools menu, or through the context menu of select nodes of the Browser tree control. The Query Tool allows you to:
- Issue ad-hoc SQL queries.
- Execute arbitrary SQL commands.
- Edit the result set of a SELECT query if it is updatable.
- Displays current connection and transaction status as configured by the user.
- Save the data displayed in the output panel to a CSV file.
- Review the execution plan of a SQL statement in either a text, a graphical format or a table format (similar to https://explain.depesz.com).
- View analytical information about a SQL statement.
How to execute a query in pgAdmin 4
Open the Query Tool
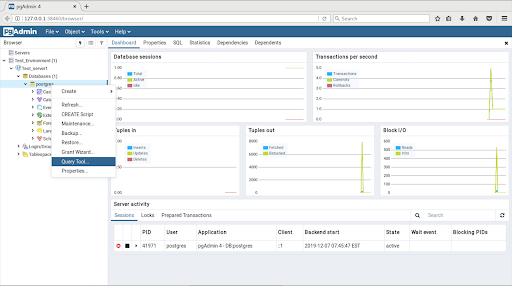
Right-click on the database and click on Query Tool. In the snapshot below we are executing the SQL queries in the PostgreSQL database.
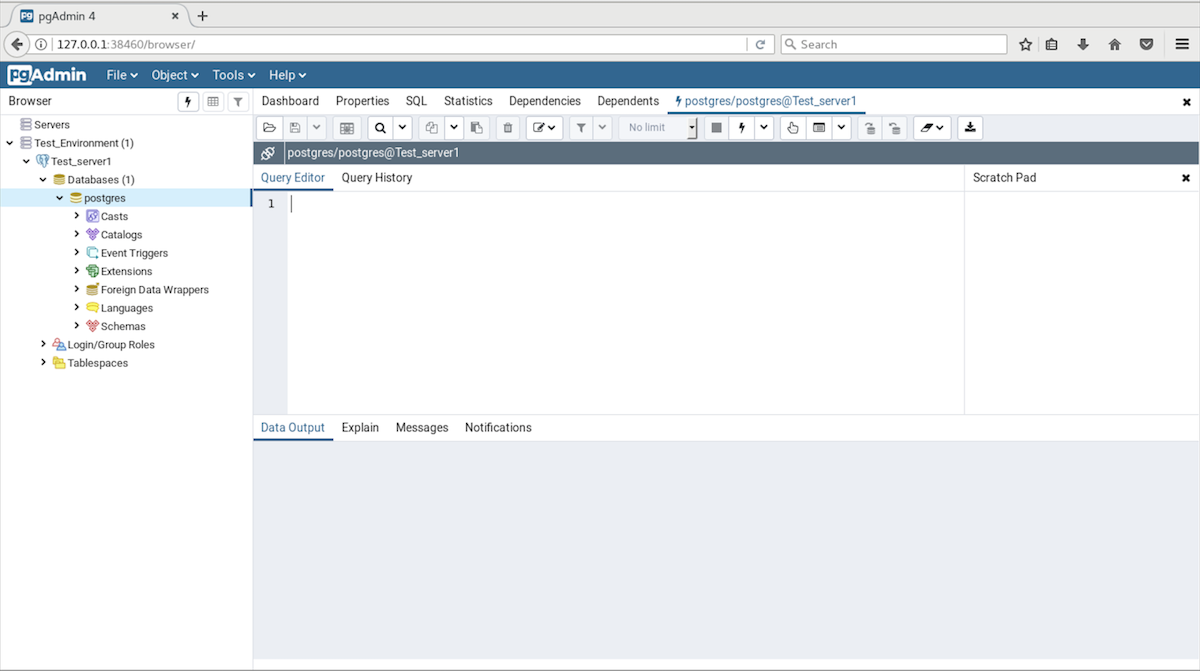
After clicking on the Query Tool you will see the window below.
Using the Query Tool environment
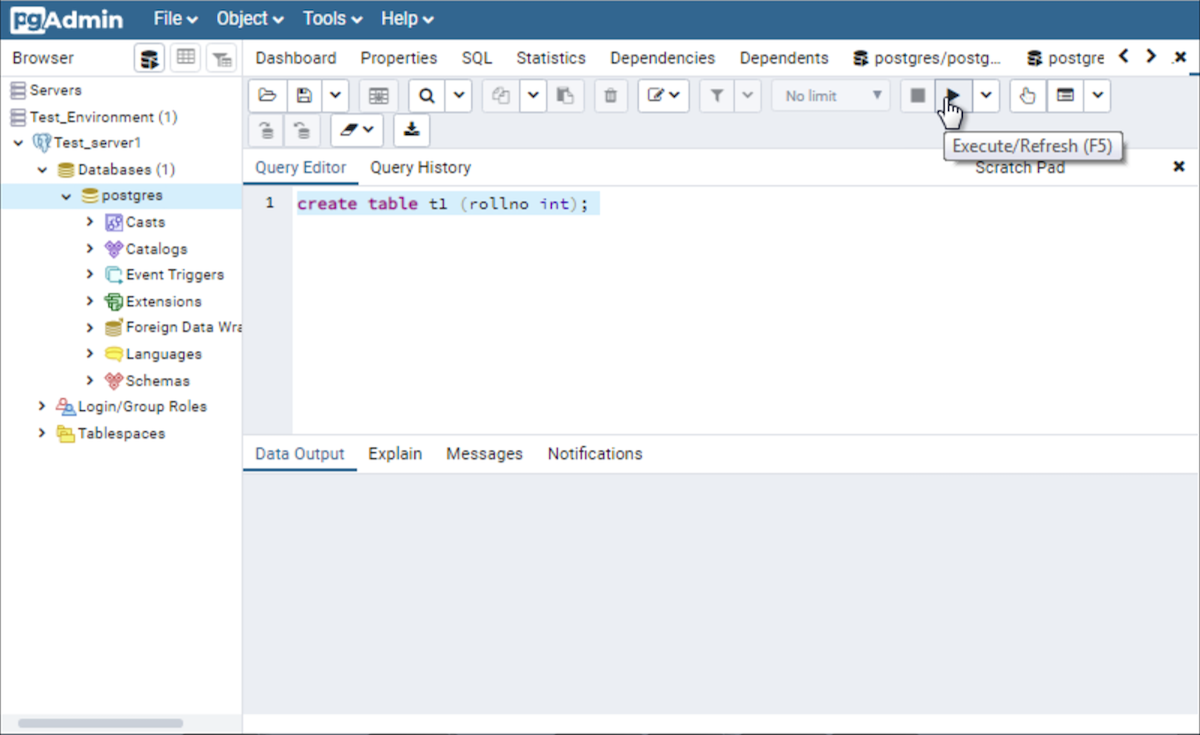
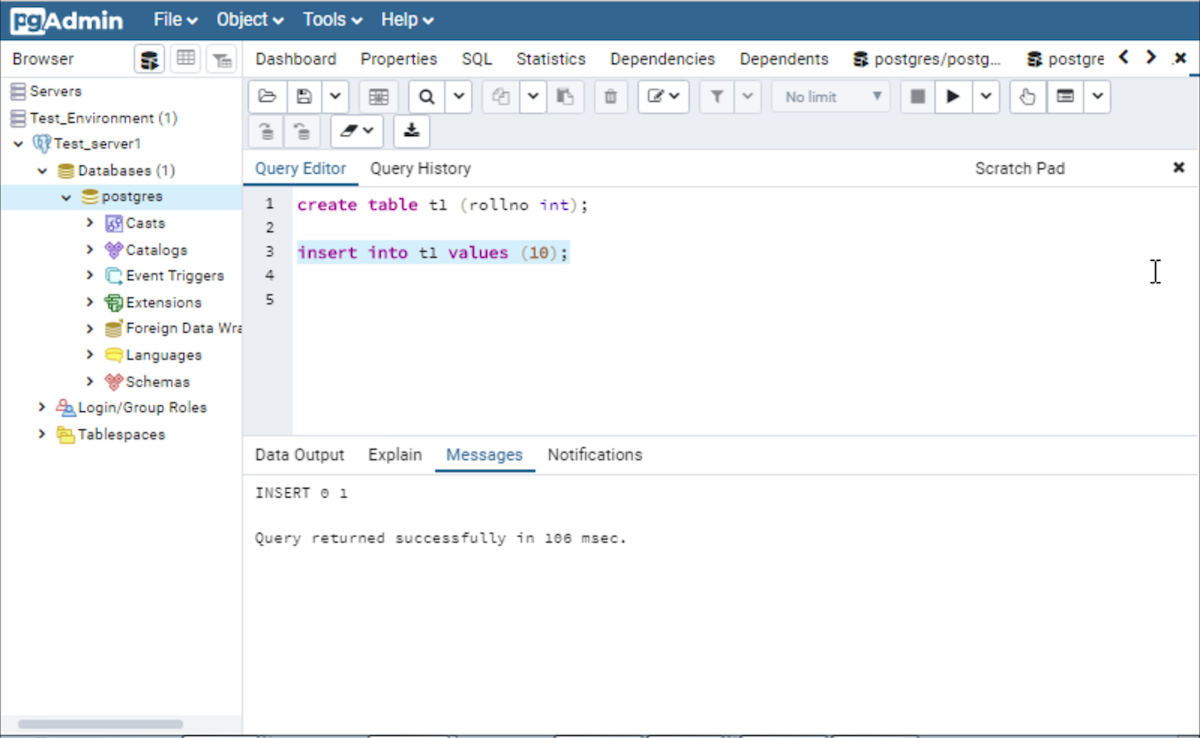
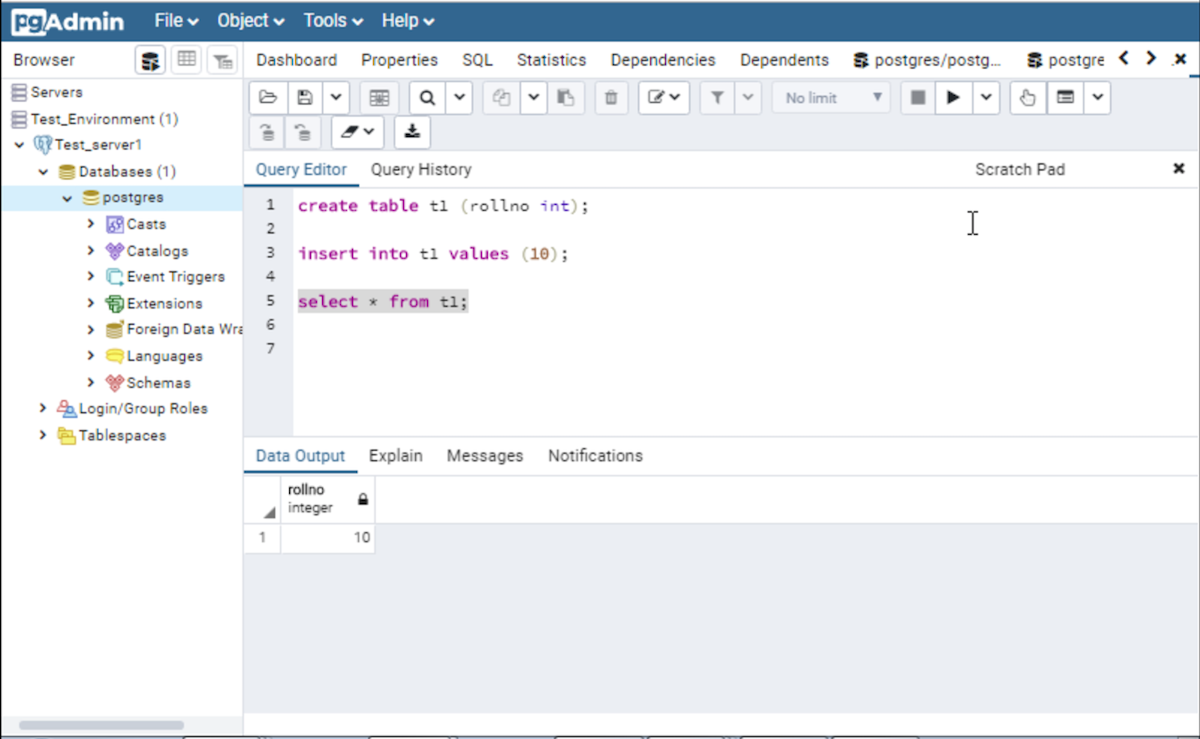
For executing the query into the database, just write the query into the Query Editor and click on the Execute/Refresh (F5) button. It will execute the query into the database.
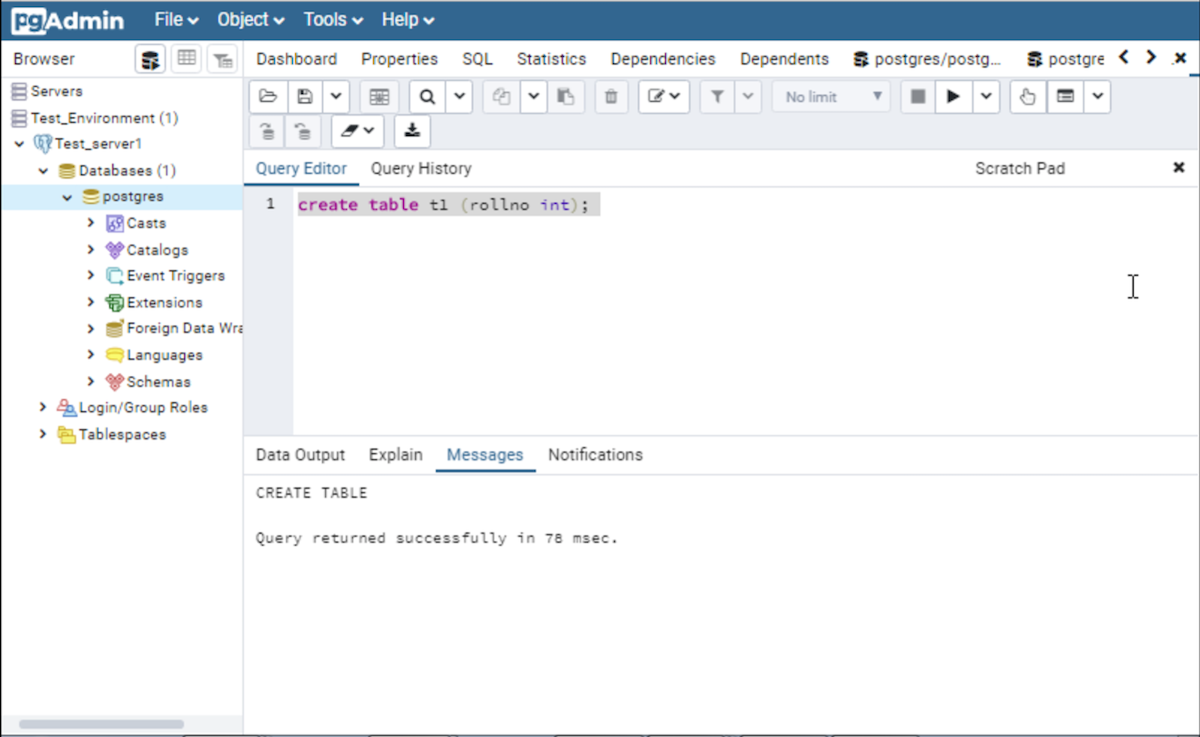
For executing the query into the database you only need to write the query into the Query Editor and select it and after that execute it by using the Execute button. In the two snapshots below we are inserting and selecting the data from the table t1, which we created earlier.
Creating functions, procedures, and triggers using Query Tool
In the below some examples we are creating the function, the procedure by using the query tool. The process is the same, we only need to write the code and execute it by using the Execute button.
Create Function
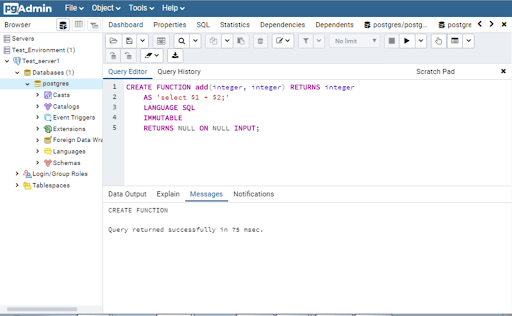
In the example below we are creating the function add. Just place the code into the Query Editor and execute it.
Example
CREATE FUNCTION add(integer, integer) RETURNS integer

    AS 'select $1 + $2;'

    LANGUAGE SQL

    IMMUTABLE

    RETURNS NULL ON NULL INPUT;
Create Procedure
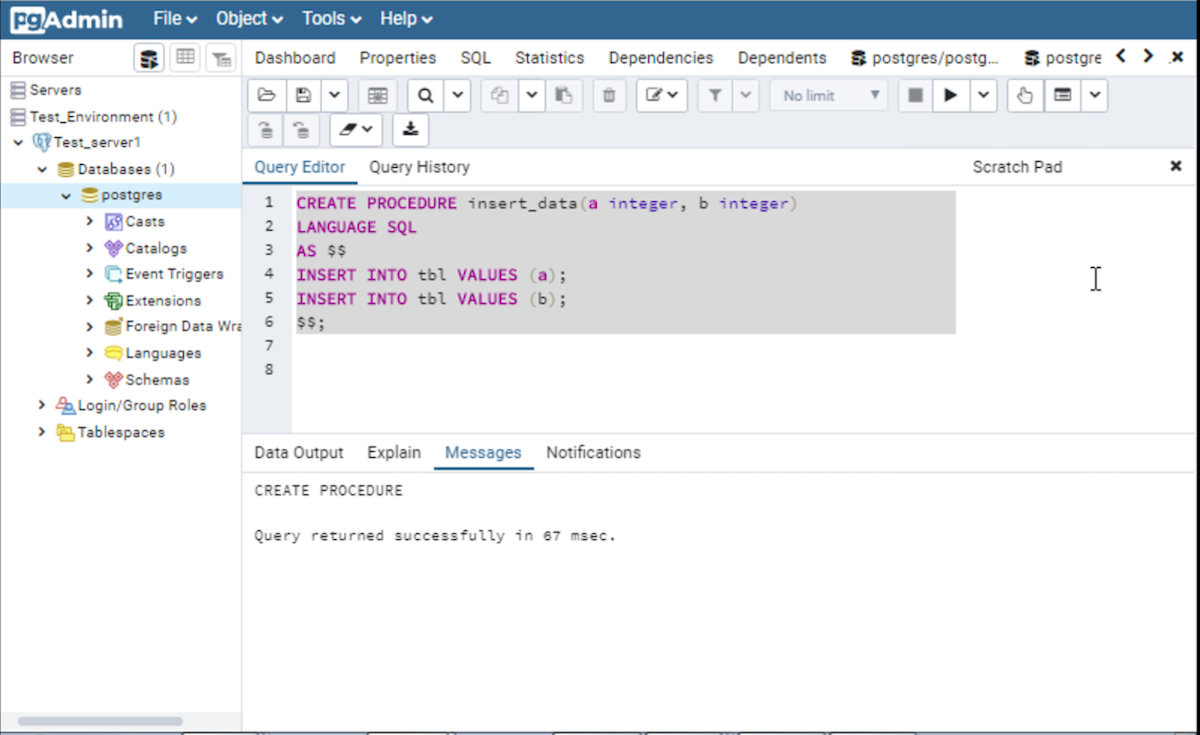
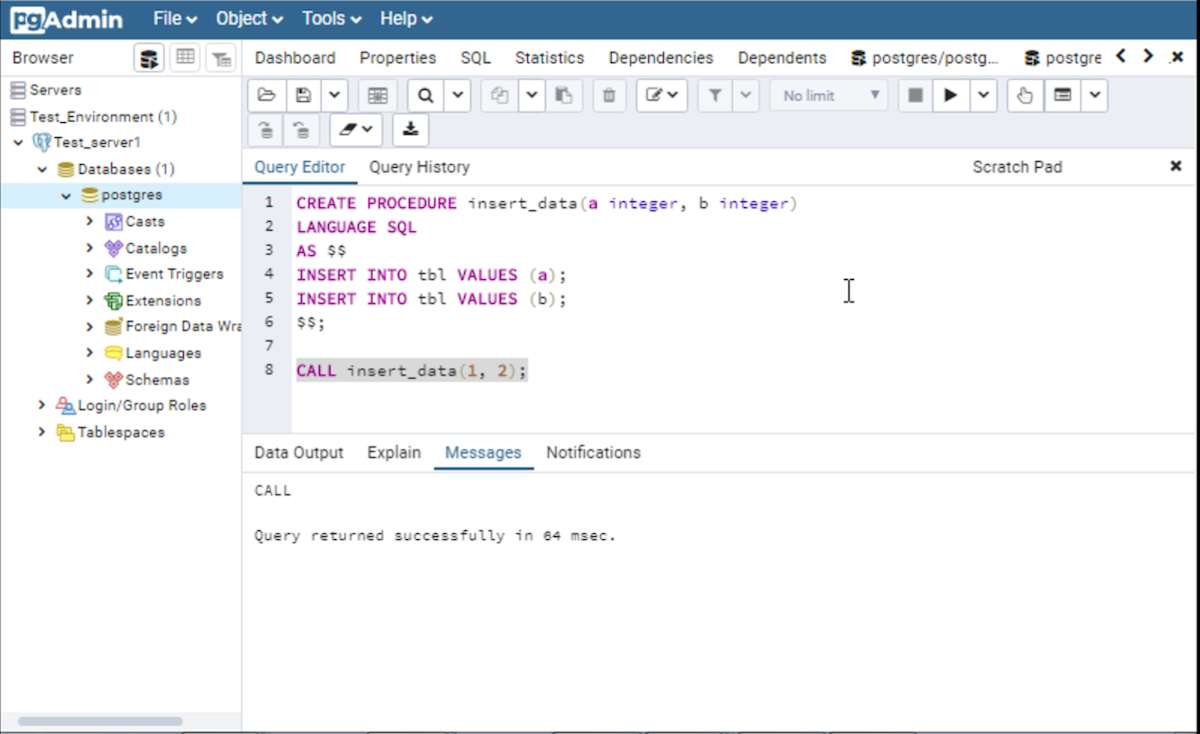
In the example below we are creating the procedure insert_data. Just place the code into the Query Editor and execute it. It will create the procedure insert_data.
Example
Create table tbl (rollno int);

CREATE PROCEDURE insert_data(a integer, b integer)

LANGUAGE SQL

AS $$

INSERT INTO tbl VALUES (a);

INSERT INTO tbl VALUES (b);

$$;

CALL insert_data(1, 2);
Notes
- Create the tbl table before creating the procedure insert_data. This procedure inserts the data/values into the tbl table which we pass at the time of executing the procedure.
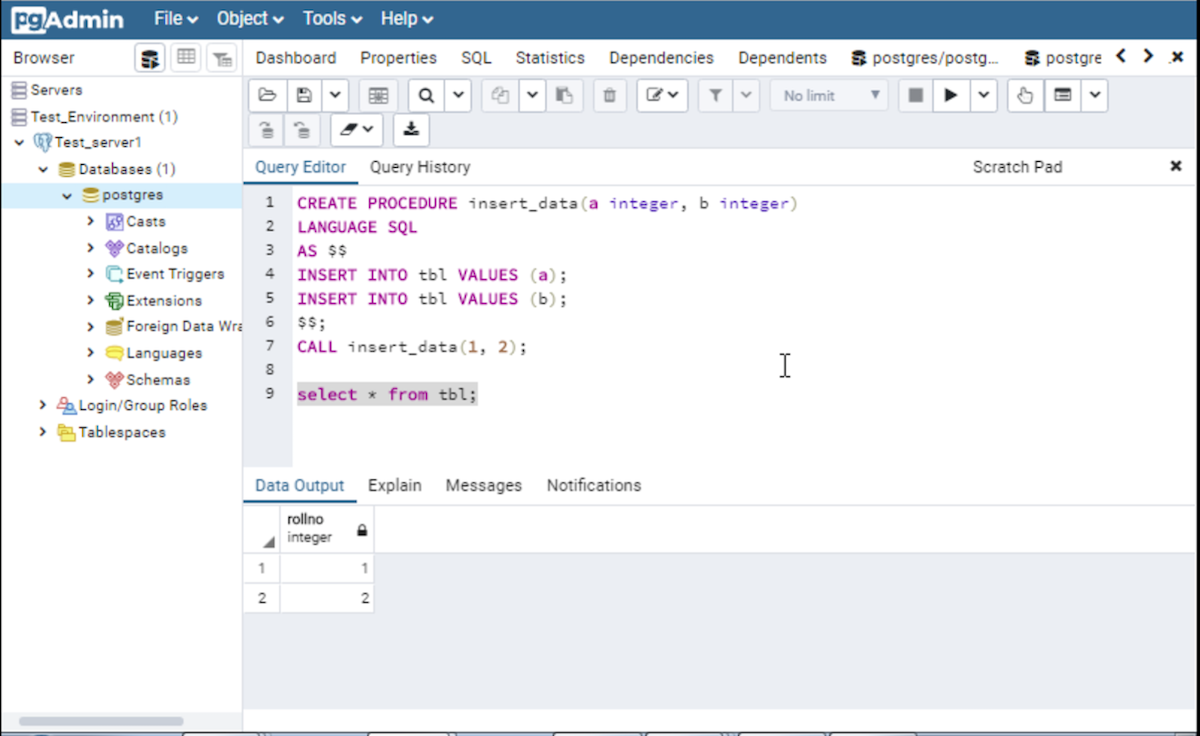
- In Snapshot P1 below, we are creating the procedure, and we call the procedure in Snapshot P2.
- In Snapshot P3, we can see that after calling the procedure, the data has been inserted into the tbl table.
Snapshot P1
Snapshot P2
Snapshot P3
Create Trigger
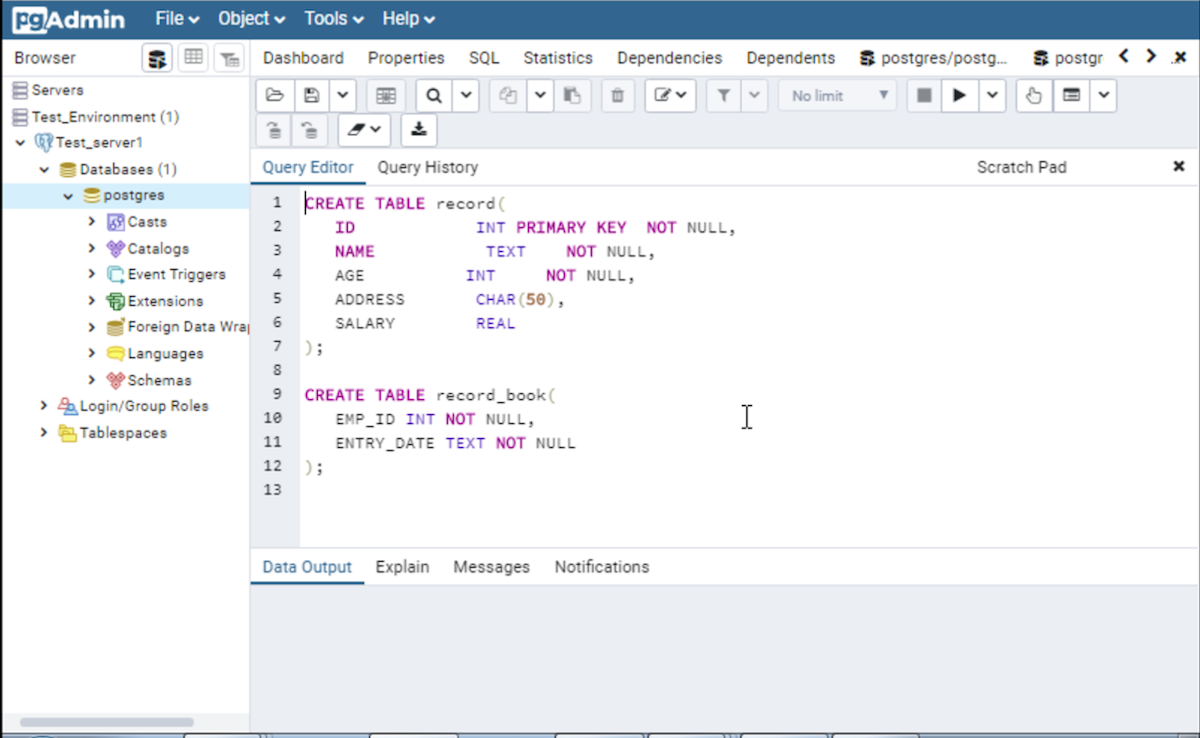
In the example below we are creating the trigger postgres_trigger. Just place the code into the Query Editor and execute it. It will create the trigger postgres_trigger.
Example
CREATE TABLE record(
ID INT PRIMARY KEY NOT NULL,
NAME TEXT NOT NULL,
AGE INT NOT NULL,
ADDRESS CHAR(50),
SALARY REAL
);
CREATE TABLE record_book(
EMP_ID INT NOT NULL,
ENTRY_DATE TEXT NOT NULL
);
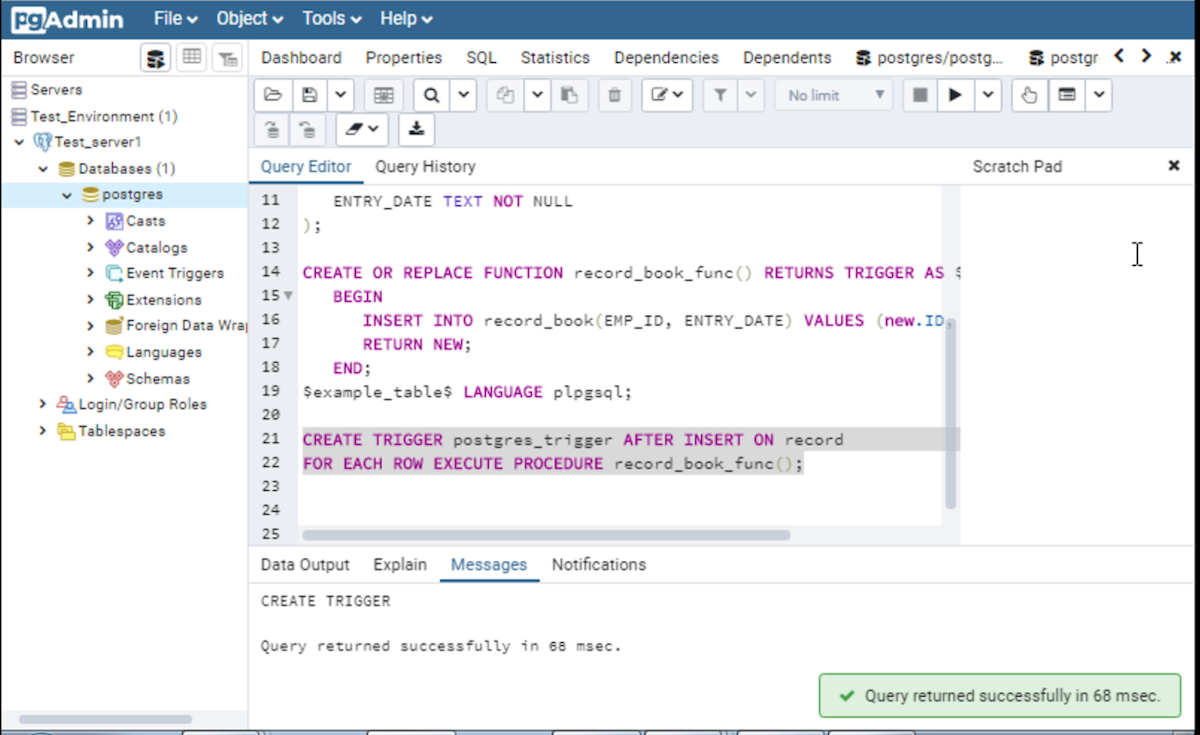
CREATE OR REPLACE FUNCTION record_book_func() RETURNS TRIGGER AS $example_table$
BEGIN
INSERT INTO record_book(EMP_ID, ENTRY_DATE) VALUES (new.ID, current_timestamp);
RETURN NEW;
END;
$example_table$ LANGUAGE plpgsql;
CREATE TRIGGER postgres_trigger AFTER INSERT ON record FOR EACH ROW EXECUTE PROCEDURE record_book_func();
Notes
- In the example below, we are creating the AFTER INSERT trigger named postgres_trigger, which will execute the record_book_func function when we insert the data into the record table.
- The record_book_func function inserts the data into the record_book table.

Visit the pgAdmin 4 Official Website (https://www.pgadmin.org/) for more information on the pgAdmin 4.